ZTE MF90
Let’s go
Getting started with your device.
ZTE CORPORATION
NO. 55, Hi-tech Road South, ShenZhen, P.R.China
Postcode: 518057
LEGAL INFORMATION
Copyright © 2013 ZTE CORPORATION.
All rights reserved.
No part of this publication may be excerpted, reproduced, translated or
utilized in any form or by any means, electronic or mechanical, includ-
ing photocopying and microlm, without the prior written permission of
ZTE Corporation.
The manual is published by ZTE Corporation. We reserve the right to
make modications on print errors or update specications without prior
notice.
Version No. : R1.0
Edition Time : 7.30.2013
NOTE:
Do not use the device in an enclosed environment or where heat dis-
sipation is poor. Prolonged work in such space may cause excessive
heat and raise ambient temperature, which may lead to automatic shut-
down of the device for your safety. In the case of such event, cool the
device in a well-ventilated place before turning on for normal use.
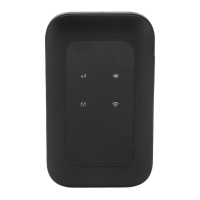
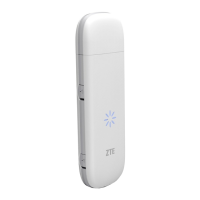
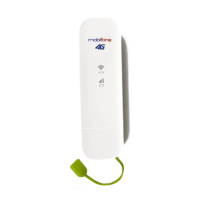
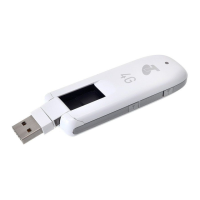
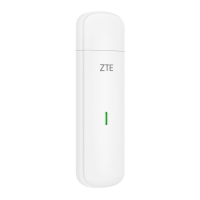
Getting to Know Your Device
Appearance
The following gure is only for your reference. The actual product may
be different.
1. LED Indicators
2. Power Button
3. WPS Button
4. External Antenna Connector
5. Micro USB Port
6. (U)SIM Card Slot
7. RESET Button
8. microSD Card Slot
NOTE:
microSD logo
is a trademark of SD-3C, LLC.
Indicators
Indicator Status Description
Network
Red solid
Error status. Not registered to the mobile
network, no (U)SIM card inserted or no
network service available.
Green solid Registered to the 2G/3G network.
Green blinking
Connected to the 2G/3G network and
data is being transferred.
Blue solid Registered to the 4G network.
Blue blinking
Connected to the 4G network and data is
being transferred.
Wi-Fi
Blue solid WPS is active.
Blue blinking Wi-Fi is active.
LED light off
Wi-Fi is off or your device is in sleep
mode.
Battery
Red blinking
The battery is empty. Please charge the
battery.
Red solid
• The battery is low. Please charge the
battery.
• The battery is in the over-voltage
charging status.
Green blinking The battery is being charged.
Green solid The battery level is middle or high.
LED light off
Your device is in sleep mode and not be-
ing charged, or the battery is not inserted.
Connection Scenario
Your device supports two methods to connect to the Internet and sup-
ports multi-clients for surng on the Internet at the same time. The fol-
lowing gure is only for your reference.
• 4G Mode: Use your (U)SIM card to access the Internet.
• Internet Wi-Fi Mode: Your device will connect to other WLAN de-
vice (hotspot device, wireless router, etc.) via Wi-Fi to access the
Internet. The WLAN device has already connected to the Internet.
NOTE:
The subnets of your device and other WLAN device must be different.
Installing Your Device
1. Slide the back cover and remove it
2. Insert the (U)SIM card.
IMPORTANT: Your device does not support Micro/Nano or any other
nonstandard SIM cards. To avoid device damage, please do not use
them.
3. Insert the microSD card if necessary.
4. Insert the battery.
5. Close the back cover.
Connecting to Your Device
Via Wi-Fi
1. Power on your device directly.
2. Use your normal Wi-Fi application on the client to search for the
available wireless networks.
NOTE: Please set the client to obtain an IP address automatically refer-
ring to the chapter “Conguring your PC”, and then the client will get an
IP address like “192.168.0.101”.
3. Select the SSID of your device, and then click Connect.
NOTE: Please check the label on your device to get the default SSID.
4. Input the password, and then click Connect.
NOTE:You may need to input the password for Wi-Fi connection.
Please check the label on your device to get the default.
5. Wait a moment, and then the client will connect to your device suc-
cessfully.
Via USB Cable
1. Connect to the device.
2. Power on your device.
3. The OS detects and recognizes new hardware and finishes the
installation automatically.
NOTE: If the system does not launch installation automatically, you can
run the installation program in path of My Computer > ZTEMODEM.
4. Wait a moment, and then the client will connect to your device suc-
cessfully.
Using the WPS(Optional)
If your client device supports WPS, you don’t have to input the pass-
word manually after WPS has been available. Please do the following:
1. Power on your device, and enable the Wi-Fi function on your de-
vice.
2. Press and hold the WPS button on your device about three sec-
onds to start Wi-Fi Protected Setup authentication process.
3. Enable the WPS function on your client to respond this authentica-
tion process.
4. Follow the system prompts on your client to nish the connection.
NOTE: For the detailed operations about the client, please refer to the
client’s instruction.
Accessing the Internet
4G Mode
After the client connected to your device successfully, you can access
the Internet in the Automatic or Manual mode. The default mode is
Automatic.
1 2 3 4 5 6 7 8 9