33
1159A 1GHz Active Differential Probe
Adjustment of 10:1 and 20:1 Attenuators
The attenuator’s plastic covers may be removed. You must take care not to
damage the probe attenuator pins.
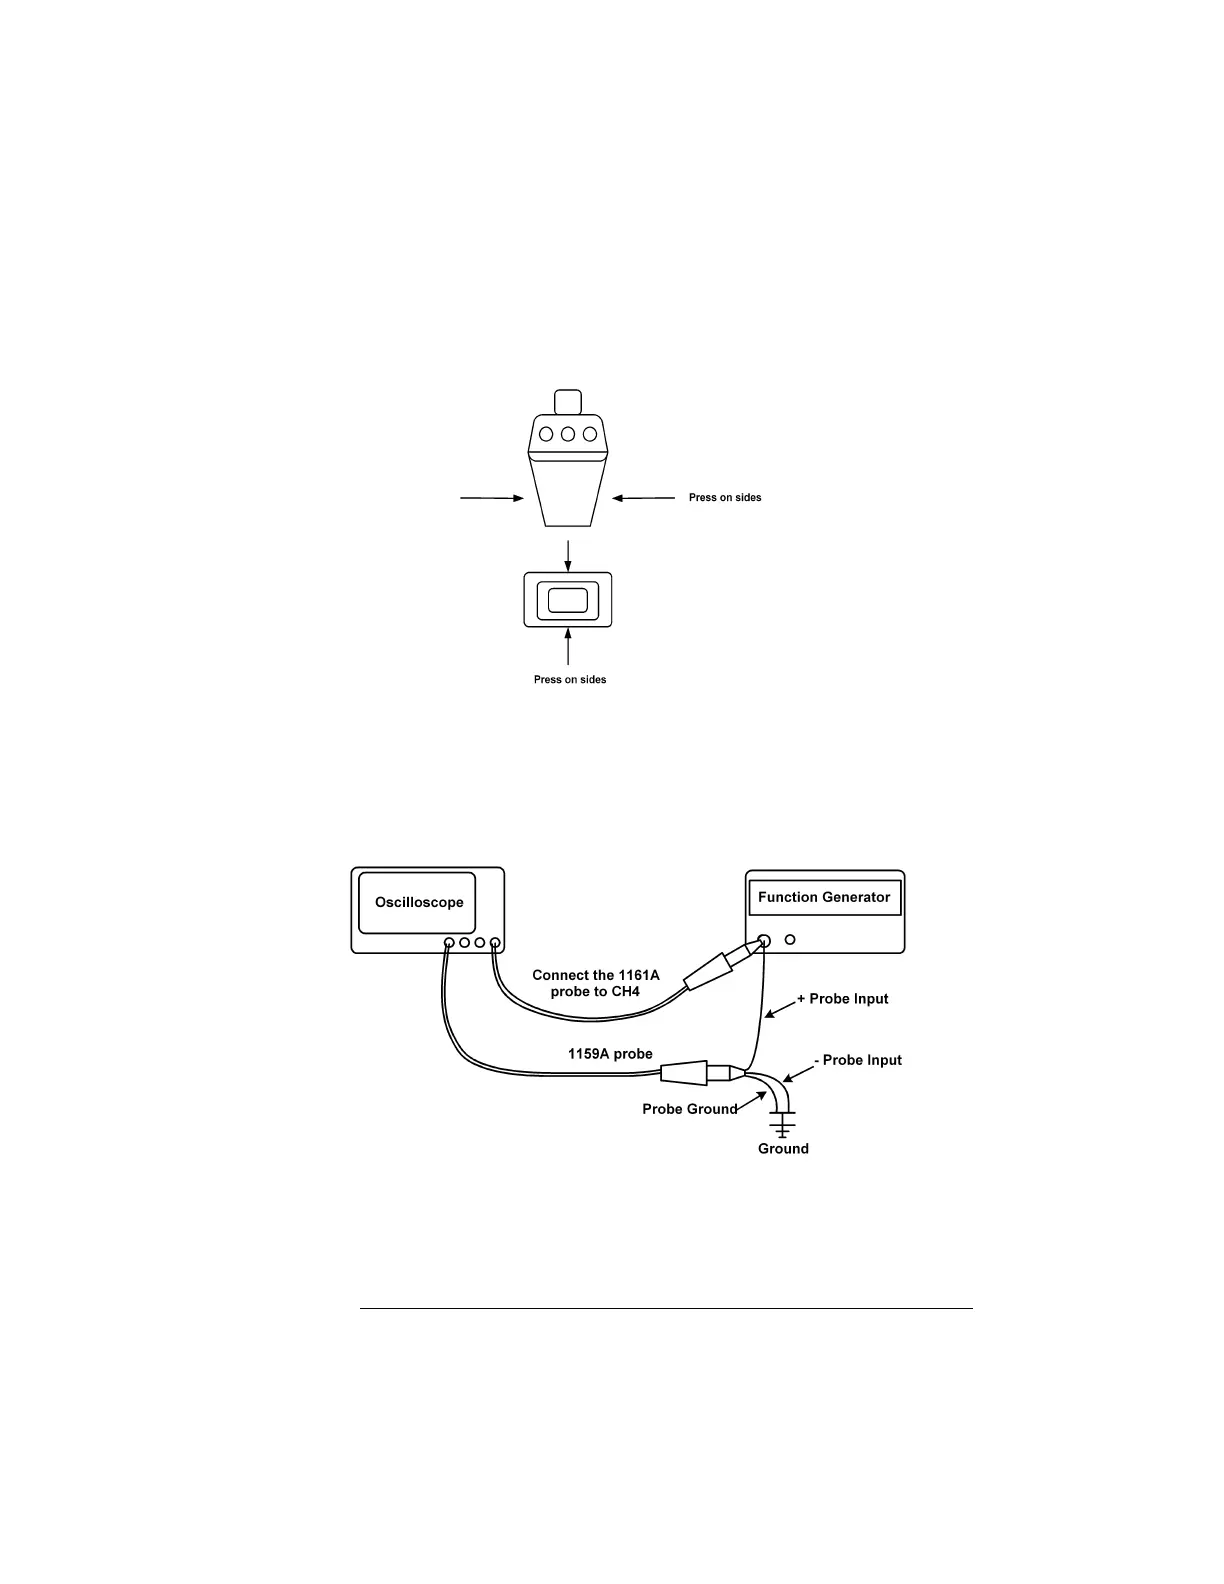
10:1 and 20:1 Attenuator Adjustment Procedure
Use the following steps to adjust the 10:1 or 20:1 attenuators.
1
Connect the function generator, probe and oscilloscope as shown.
Connect the + active probe input to the function generator output for these tests.
Connect the active input to ground with the probe ground socket.
2
Connect the 1159A Probe to CH1 of the oscilloscope.
3 Turn on the test equipment.
Allow 30 minutes for the probe to warm up.
Ð
Artisan Technology Group - Quality Instrumentation ... Guaranteed | (888) 88-SOURCE | www.artisantg.com
 Loading...