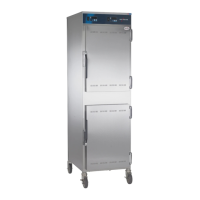
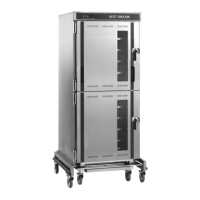
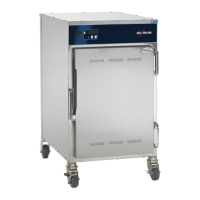
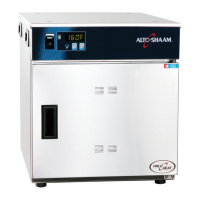
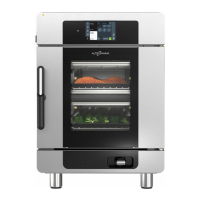
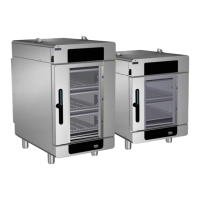
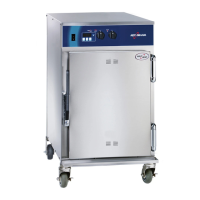
This document describes the Alto-Shaam Halo Heat Cook/Hold/Serve Systems, specifically focusing on Food Holding Cabinets, available in Pass-Through and Reach-In configurations, with either Manual or Electronic Control. The models covered are 1000-UP/HD, 1000-UP/P, 1000-UP/STD, 1000-UPS/HD, and 1000-UPS/STD.
Function Description:
The Alto-Shaam Food Holding Cabinet is designed to maintain hot food at proper serving temperatures for prolonged periods, up to several hours, using the Halo Heat concept. This system utilizes a special, low-heat-density heating cable mounted against the walls of the warming compartment, providing an evenly applied, thermostatically controlled heat source. This design eliminates the need for a moisture pan or a heat circulating fan, preserving the quality of food products. The cabinet's primary purpose is to hold preheated hot food, not to heat cold food. It can also be used for dough proofing.
Important Technical Specifications:
- Heating System: Halo Heat concept with low-heat-density heating cable.
- Temperature Control: Thermostatically controlled. Manual control units feature a thermostat dial and a temperature gauge. Electronic control units feature a four-digit LED display for temperature and diagnostic information, along with UP/DOWN arrow keys for setting temperature.
- Power Requirements:
- 120V, 60Hz, 2000W, 16.0A (Manual Control)
- 208V, 50/60Hz, 1500W, 7.2A; 240V, 50/60Hz, 2000W, 8.3A (Manual Control)
- 220V, 50/60Hz, 1690W, 7.6A; 230V, 50Hz, 1800W, 7.8A (Manual Control)
- 120V, 60Hz, 2000W, 16.0A (Electronic Control)
- 208V-240V, 60Hz, 1500-2000W, 7.2-8.3A (Electronic Control)
- 220V-240V, 50/60Hz, 1680-1800W, 7.6-7.8A (Electronic Control)
- Electrical Installation: Requires plugging into a properly grounded receptacle. An identification tag with model, serial number, volts, and watts is permanently mounted on the cabinet.
- Construction: Stainless steel wire shelves (SR-2120, SH-2325, SH-2346), various door assemblies (15147), handles (HD-24171), hinges (HG-2535), and gaskets (GS-23794). Optional full perimeter bumper (44119), 3" (14227) or 5" (4007) casters, 6" (5205) legs, and window door (15148).
- HACCP Integration: Electronic control units can be equipped with an optional HACCP with Kitchen Management feature for PC connection, providing temperature recording data and diagnostic information.
- Safety Features: Circuit breaker (SW-33788) for electronic units.
Usage Features:
- Preheating:
- Manual Control: Preheat at 200°F (93°C) for 30 minutes. The heat indicator light illuminates during heating and turns off when the set temperature is reached.
- Electronic Control: Press ON key, set to 200°F (93°C) using UP/DOWN arrows. Preheat for a minimum of 30 minutes. The LED heat indicator light goes out when the set temperature is reached.
- Loading: Only hot food (internal temperature 140° to 160°F / 60° to 71°C) should be placed in the cabinet.
- Temperature Setting:
- Manual Control: Reset thermostat to 160°F (71°C) after loading. The final setting depends on food type and quantity. Periodically check internal food temperature.
- Electronic Control: Reset control to 160°F (71°C) using UP/DOWN key. Final setting depends on food type and quantity. Periodically check internal food temperature.
- Dough Proofing: Set thermostat to 95°F (35°C), add 2 quarts (c. 2 liters) of hot water (140-180°F / 60-82°C) to a pan on the bottom, preheat for 45-60 minutes, then place dough in the cabinet until it doubles in size.
- Vents: Close vents for moist holding, open for crisp holding.
- Electronic Control Specific Features:
- Beeper: Enable/disable beeper for error codes by holding the DOWN arrow key when the control is off.
- Fahrenheit/Celsius: Switch between °F and °C by holding the UP arrow key when the control is off.
- Control Lock: Lock the display by pressing and holding ON/OFF and Up Arrow keys simultaneously. Unlock by pressing and holding ON/OFF and Down Arrow keys.
- Heat Recovery (SureTemp™): Automatically compensates for heat loss when the door is opened, applying heat to maintain consistent cavity temperature. If the door remains open for more than three minutes, the control sounds three rapid beeps every ten seconds.
- Multiple Shelf Timer Key Option: Available for electronic control units, this feature uses a timer-based "First-In, First-Out" system for product management.
- Programming Timers: Turn OFF power, press and hold a Shelf Timer Key to set desired holding time using UP/DOWN arrows. Repeat for other timers. Turn ON power, then press selected Shelf Timer Keys to activate.
- Alarm: A beeping alarm sounds when a timer expires; press the flashing shelf timer key to turn it off.
- Power Failure: The Power Indicator Light blinks to indicate a power failure. Press ON/OFF Key to stop blinking; memory is not impaired.
Maintenance Features:
- Daily Cleaning:
- Disconnect from power source and allow to cool.
- Remove and clean detachable items (wire shelves, side racks, drip pan) separately.
- Clean interior metal surfaces with a clean, damp cloth and an alkaline or alkaline chlorinated commercial detergent. Use a plastic scouring pad or oven cleaner for difficult areas. Avoid abrasive cleaning compounds, chloride-based cleaners, or cleaners containing quaternary salts. Rinse and wipe dry.
- Clean exterior with a cleaner recommended for stainless steel surfaces, wiping with the grain.
- Safety Precautions for Cleaning/Servicing: Always disconnect the unit from the power source before cleaning or servicing. Never flood the inside or outside with water or liquid solution. Never steam clean or use a water jet to clean, as this can cause severe damage or electrical hazard and void the warranty.
- Thermostat Calibration (Manual Control): The thermostat is factory calibrated. If recalibration is necessary, place a quality thermal indicator at the center of an empty holding cavity. Set thermostat to 140°F (60°C) and allow to stabilize for at least one hour. Adjust the calibration screw (located in the thermostat dial shaft) with great care: clockwise lowers the setting, counter-clockwise raises it. Seal the screw with enamel sealant (red nail polish is acceptable).
- Troubleshooting Checklist: Provides remedies for common issues such as unit not operating (insufficient power supply, defective cord/plug), no display (faulty power supply board, faulty electronic control), inability to control temperature (faulty relay, heating element grounded), and incorrect temperature readout (dirty/faulty sensor, faulty control). Repairs should be made by authorized service agents only.
- Warranty: One (1) year labor and parts warranty from installation or fifteen (15) months from shipping date, whichever comes first. Exceptions include a five (5) year parts warranty on heating elements for cook/hold ovens and refrigeration compressors for Quickchillers. Warranty does not cover calibration, light bulb/display glass replacement, damage from accident/improper installation/alteration, abuse/misuse, abnormal conditions, losses from malfunction, or unauthorized modifications/parts.