FOR MODELS: JGI, JGM, JGN, JGP AND JGQ SECTION 5 - MAINTENANCE
PAGE 5-6 9/08
8. Check the part number on each connecting rod when ordering and installing
bearings to be sure that the bearing part numbers being installed are compatible
with the connecting rod.
NOTE: DO MIX BEARING SHELL PART NUMBERS ON AN INDIVIDUAL CONNECTING
ROD. BOTH HALF SHELLS MUST HAVE THE SAME PART NUMBER.
9. Connecting rods need not be removed from the compressor to replace the crank
pin bearings.
10. Refer to “Connecting Rod - Installation” on page 5-8 for bearing shell installation.
If clearance readings are not within tolerance after installing new bearings, con-
tact your packager or Ariel before proceeding.
Connecting Rod - Removal
1. Remove the top cover from the crankcase (connecting rod and chain access
covers on the JGI) and the side covers from the crosshead guides.
2. Remove the piston and piston rod as described in “Piston and Rod” on page
5-27.
3. Move the throw to near the outer dead center position.
4. Remove the crosshead as described in “Crosshead - Removal” on page 5-11,
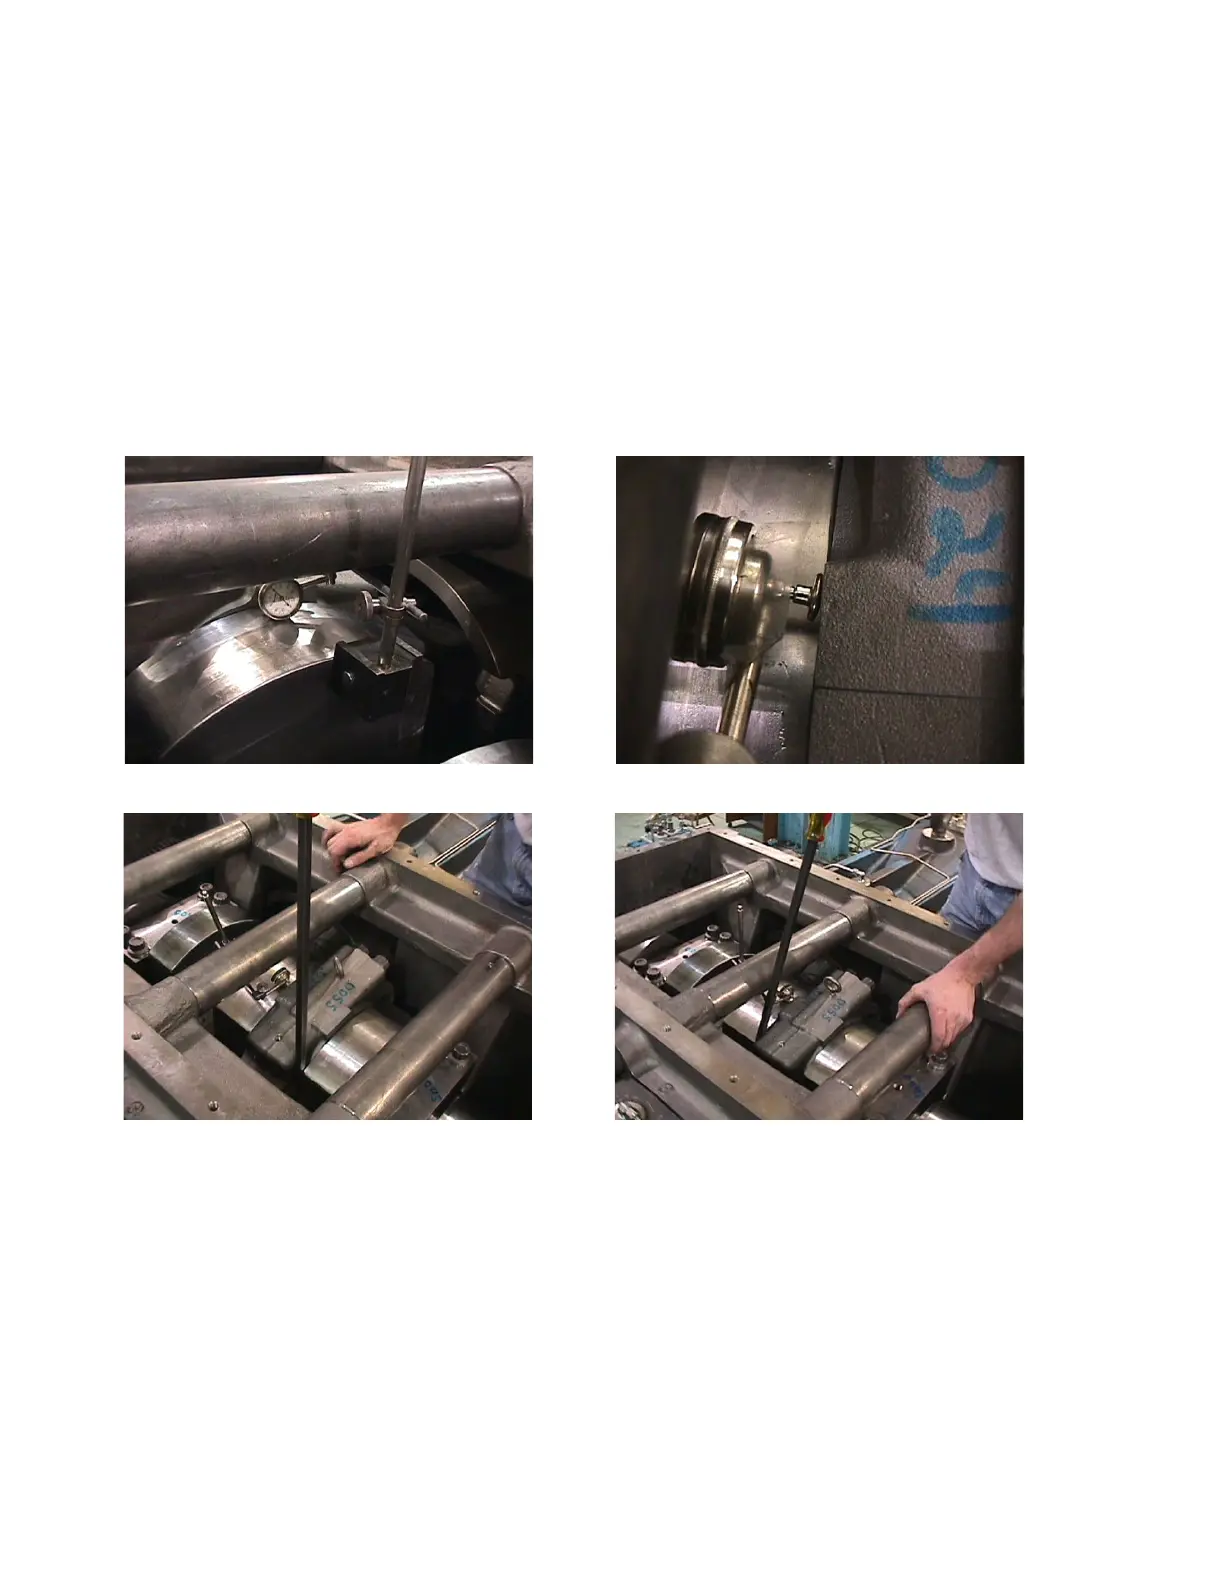
FIGURE 5-4 MEASURING CONNECTING ROD THRUST (SIDE) CLEARANCE - TYPICAL
Dial Indicator Magnetic Stand Placement Button Dial Indicator Placement
Rod Thrust Tight Away from Dial IndicatorRod Thrust Tight Toward Dial Indicator
 Loading...