Step Action
6 The tension is correct when a force of 50 N (11.25 lbf) applied at the midpoint of the belt
causes a deflection of 6 mm (0.23 in).
7 Retighten bolts (2).
8 Refit the bodywork panels.
Belt replacement procedure
Step Action
1 Stop the compressor, close the air outlet valve and switch off the voltage.
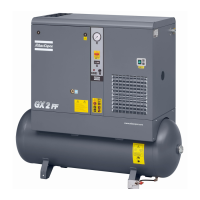
For Full-Feature versions: also stop the dryer.
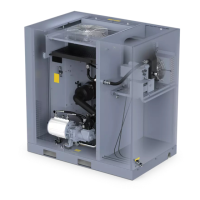
2 Remove the front panel of the compressor housing.
3 Remove the side, back and top panels of the compressor housing.
4 Loosen the 4 bolts (2) by one turn.
5 Release the belt tension by loosening tensioning nut (1).
6 Remove the fan cowl.
7 Remove the belt via the fan cowl opening. Install the new belt via the same opening.
8 Tension belt (3) as described above.
9 Re-assemble the fan cowl.
10 Refit the bodywork panels.
11 Check the belt tension after 50 running hours.
Instruction book
56 2920 7105 31
 Loading...