5
5. If the wafes are not dark enough, close the Wafe Maker, rotate to lock, and then wait another
30 seconds. Repeat as needed.
6. When you are satised with your wafes, use a non-metallic utensil to remove them from the
heating plates.
7. To make more wafes, close the Wafe Maker until the Green Ready Light comes on, then repeat
from step 4.
8. When nished baking wafes remove plug from wall outlet.
9. After it has sufciently cooled, the heating plates may be wiped clean.
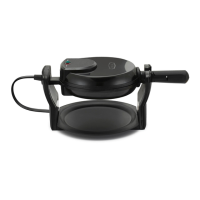
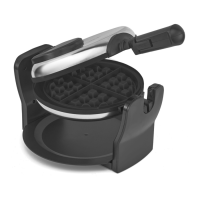
Locking And Unlocking Your Wafe Maker
Your Wafe Maker is unlocked only when the side with 2 indicator lights are facing up and is locked when
the 2 indicators lights are facing down. You can only open the Wafe Maker in the unlocked position.
Tips For Perfectly Baked Wafes
1. Stir your wafe batter only until large chunks of dry ingredients are dissolved. Over mixing the wafe
batter can cause the wafes to be hard.
2. The exact amount of batter needed to make perfect full-sized wafes depends on the type and
consistency of the batter. Use the same ladle or measuring cup each time to determine how much
batter you need to ll the lower plate fully so as to cover the peaks in the plate.
3. When making softer variety of wafes, once they are baked, make sure to cut the wafes into halves
orin 4 quarters and support them with a spatula at the bottom so it is easier to take them out from
the plates, since softer wafes can break easily.
4. When making large batches to serve at once, you can keep the wafes fresh & crisp by placing them
ina preheated oven at 200°F. Take them out using oven mitts when you are ready to serve.
5. To avoid wafes with a moist base, kept the wafes on a wire cooling rack. This will retain the
crispness
of the wafes.
6. You can reheat your wafes in the wafe maker. Pre-heat the wafe maker on low setting. Once
preheated, place the wafes on the lower plate so they t the grooves correctly, then close the wafe
maker and heat for 1 to 2 minutes, checking every 30 seconds to avoid burning.
7. You can also freeze your wafes to eat later. After the freshly baked wafes have cooled completely,
pack them in a covered container or plastic freezer bag. Make sure to separate the wafes with a
sheet of wax paper between each wafe. To reheat the frozen wafes, place in a pre-heated oven,
toaster oven or toaster until they are hot.
Cleaning and Maintenance
1. Always turn off the appliance, unplug it, and allow it to cool down before cleaning.
2. You can easily remove any excess oils or crumbs without disassembling the appliance.
NOTE: NEVER SUBMERGE THE APPLIANCE IN WATER OR PLACE IT IN THE DISHWASHER.
3. For best results and preserve the non-stick coating longer, use nylon, plastic, wooden or
rubberutensils.
4. Use a soft cloth on the heating plates and occasionally a metal polish intended for stainless steel on
theouter housing. Never use abrasive scouring pads or steel wool.
5. If there is hardened batter on the plates, pour a little oil and let it sit for about 5-7 minutes.
You can then wipe clean with a paper towel.
6. Do not use the Wafe Maker for anything other than making wafes.
This appliance requires little maintenance. It contains no user serviceable parts. Do not try to repair it
yourself. Any servicing requiring disassembly other than cleaning must be performed by a qualied
appliance repair technician.
17174_BELLA_Rotating Waffle Maker_IM R1.indd 517174_BELLA_Rotating Waffle Maker_IM R1.indd 5 2020-06-02 9:26 AM2020-06-02 9:26 AM
 Loading...