3
www.berner.com Berner International 800.245.4455
111 Progress Ave. / New Castle / PA / 16101 / USA
To use threaded
rod to hang from
the ceiling
instead of
the wall - use
the factory
installed
threaded inserts.
1
2
3
4
To wire – follow the wiring diagram (found inside
wiring compartment).
The controls ship in the same box as the air curtain.
5
6
For more information see page 4
For more information see page 4
For more information see page 5 For more information see page 5
For more information see page 6 For more information see page 7
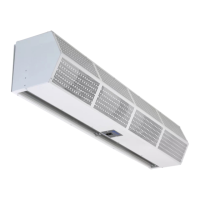
Before hanging,
check to see what
the clearance is
above the door.
A
I
R
A
I
R
Rule of thumb – If the unit must be mounted
higher than 1” above the opening, it must be
spaced out from the wall 3/8” for every inch the
unit is above the door opening.
Simple to Install
Easy to operate & maintain
6' minimum*
20˚
4" minimum*
AIR
Discharge
Nozzle
4" minimum
side clearance
from
combustible
material*
*Electrically Heated Units Only
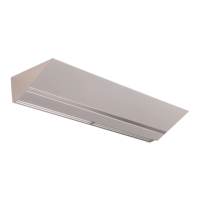
INTERIOR
EXTERIOR
Flush Mounting
1"
AIR
CURTAIN
Top of Doorway
2"
3"
AIR
CURTAIN
Spacer
Spacer
Seal
3/8"
3/4"
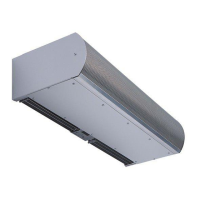
Mark the wall according to
the length of the air curtain.
If the keyhole slots are not
located where suitable
support is available,
drill new holes in
the back plate
where space
is available.
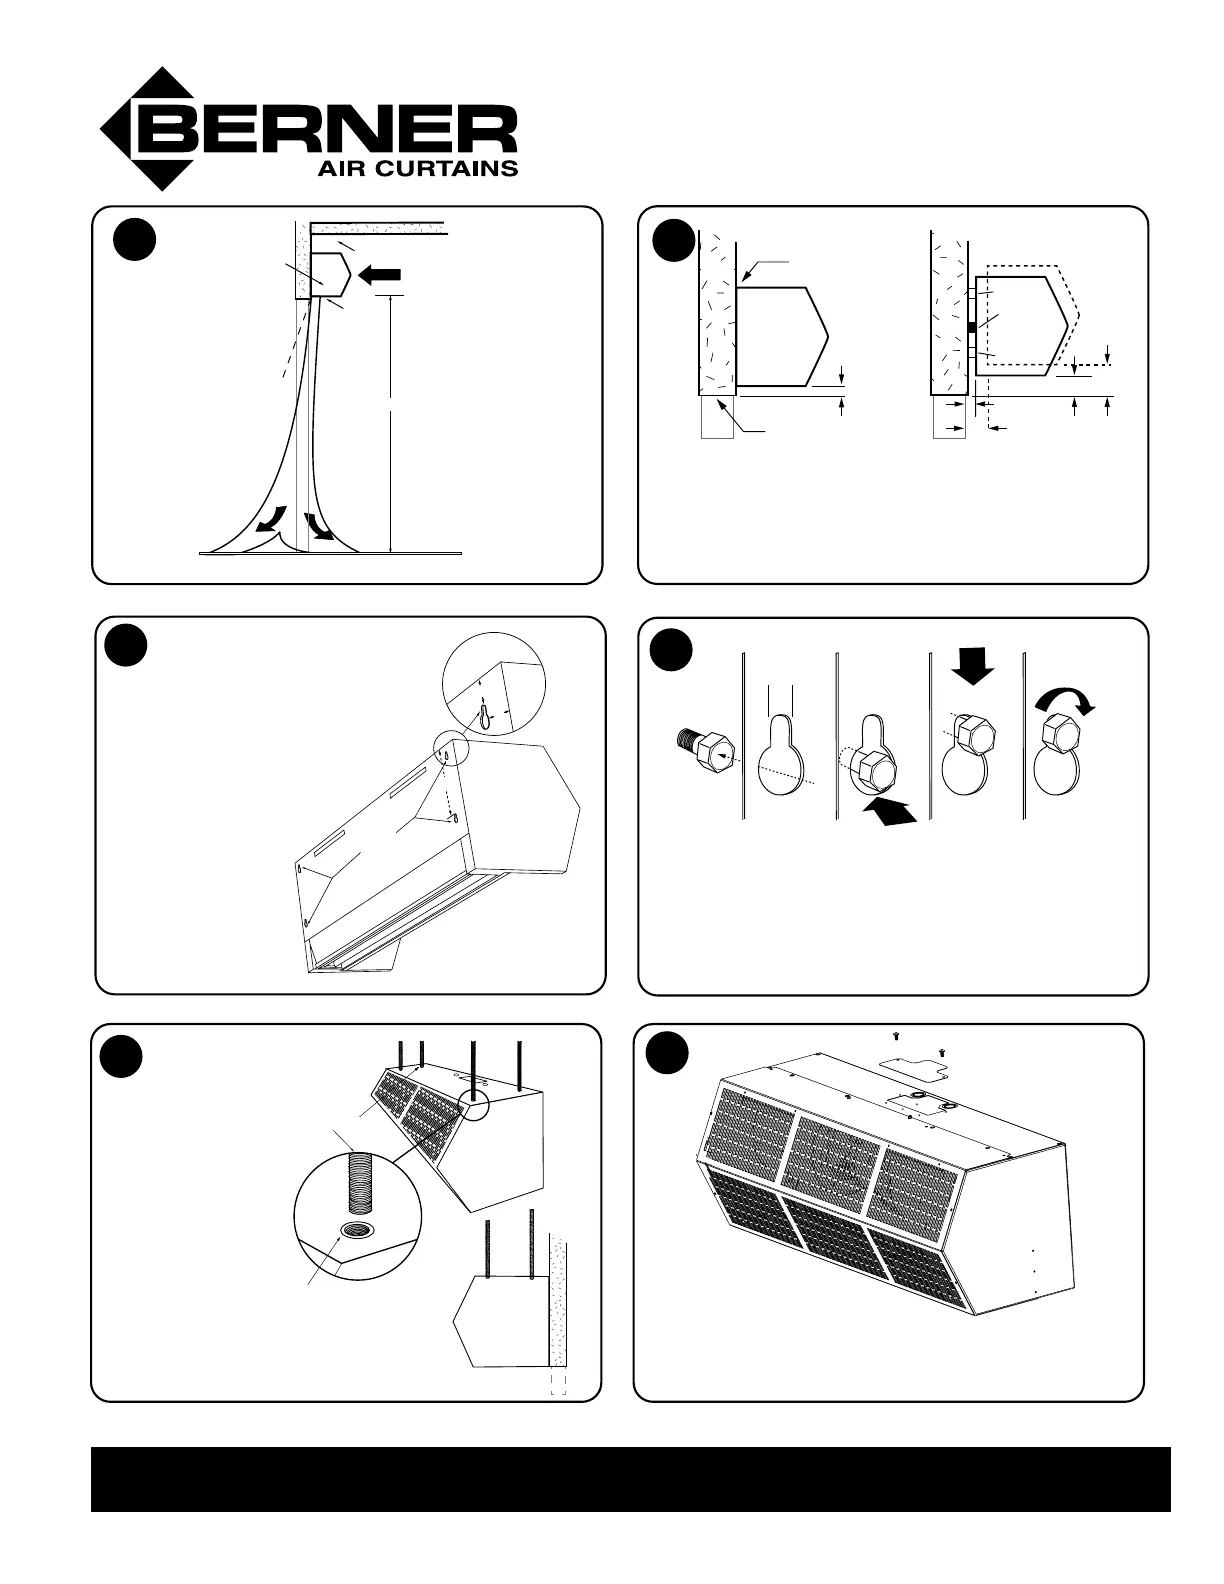
After installing the mounting hardware, lift and
slip the air curtain over the mounting hardware by
grasping the inlet rings. Tighten the mounting
hardware.
The keyhole slots are spaced 1” from
the ends, and 3/4” and 7” from the top.
Line-up
Keyholes on
All Screws
Push
Backplate
Toward Wall
Slide
Backplate
Down
Tighten All
Screws
1/4"
Suspension Rods
1/4” Threaded Insert
Side View
Keyhole
Mounting
Slots
7"
3/4"
1"
®
 Loading...