11
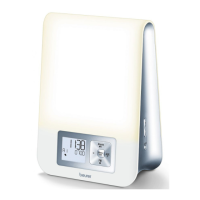
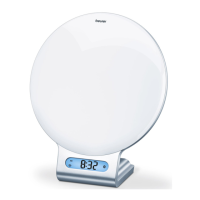
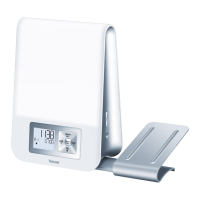
5. Device description
1
2
4
5
6
3
1 Display 5 +/- buttons
2 Light area 6 Light button
3 Snooze function
(taplight area)
4 Keypad
Alarm button /
►ǁ button
AUX button /
button
Menu/Set
button
Radio button /
■ button
button
6. Initial use
•
Remove the packaging material.
•
Check that all parts listed are present
.
•
Check the device, mains adapter and mains cable for
damage.
•
Place the device on a firm, even surface.
•
Insert the mains adapter connector into the mains
adapter socket on the rear of the device.
•
Insert the mains adapter into a suitable socket.
•
The time is shown on the device display.
•
Route the cable antenna of the device to the rear.
7. Basic settings
In the basic settings, you can set the time (
TIME
), the alarm
properties for the set alarm times (
ALARM 1, ALARM 2,
ALARM 3
), the display brightness (
DISPLAY
), the
snooze duration (
SNOOZE
) and the button tone (
BEEP
)
in the order stated here.
7.1 Setting the time
•
When the device is switched on, press the
Menu/Set button. "
TIME
" flashes in the display. Press
the Menu/Set button again.
•
The hour mode "
24 Hr
" flashes in the display. Set hour
mode using the / buttons (24-hour mode or 12-hour
mode). Confirm using the Menu/Set button.
•
The hour display flashes in the display. Set the hours
using the / buttons. Confirm using the Menu/Set
button.
•
The minute display flashes in the display. Set the
minutes using the / buttons. Confirm using the
Menu/Set button.
•
The weekday display flashes in the display. Set the day
of the week using the / buttons. Confirm using the
Menu/Set button.
Note
MON
= Monday,
TUE
= Tuesday,
WED
= Wednesday,
THU
= Thursday,
FRI
= Friday,
SAT
= Saturday,
SUN
= Sunday.
7.2 Setting the alarm properties
You can choose to wake up with one of the 4 wake-up
melodies, an alarm tone or the radio.
For the alarm times that have been set (see section 8.1),
you can configure the following alarm properties: alarm
tone, volume, sunrise, duration of sunrise, brightness of
sunrise.
To configure the alarm properties, proceed as follows:
•
When the device is switched on, press the Menu/Set
button. "
TIME
" flashes in the display.
•
Use the / buttons to select the desired alarm
storage location (
ALARM 1, ALARM 2
or
ALARM 3
)
for which you wish to configure the functions
.
Confirm
using the Menu/Set button.
•
The currently set alarm tone (e.g.
BUZZ
) flashes. Use
the / buttons to select the desired alarm tone.
Confirm using the Menu/Set button.
 Loading...