Do you have a question about the BK Radio KNG-P150S and is the answer not in the manual?
Radio supports 512 channels, organized into 32 groups of 16 channels each.
The radio offers two power output levels: 5 Watts (High) and 2 Watts (Low).
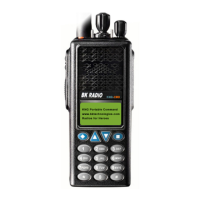
Features a display capable of showing multiple lines of alphanumeric information.
The product comes with a standard warranty period of three years.
Commands accessible from the main screen for power, menu, priority, and guard list selection.
Functions for navigating menus: Escape, Up/Down arrows, and Enter.
Button for selecting the desired zone or group.
Control for adjusting the radio's squelch sensitivity.
The primary button used for transmitting audio.
Port for connecting external accessories like microphones or programming cables.
How to select a zone, including using buttons, arrows, or keypad entry.
Procedure for adjusting squelch using preset or user select options.
Steps to select transmit code guard tones using the TCG button and menu.
How to switch between high (5W) and low (2W) power modes indicated by 'LPW'.
Using the collar switch to lock/unlock the keypad for operation.
How to select priority channels, including 'Use Per Zone' and 'Main' options.
The menu is accessed by pressing the ▲ button, providing access to various functions.
List of available menu options: Scan List Editing, Cloning, Keypad Programming, Version, Contrast Adjust, Radio Status.
Functionality to edit scan lists.
Access to radio cloning features.
Options for programming the radio via the keypad.
Displays current software, firmware, versions, and codes.
Adjusts the screen contrast for better readability.
Shows which features are currently enabled on the radio.
Instructions for adding or removing channels from the scan list using menu options.
Details on the three cloning methods: Active Zone, Zone-to-Zone, and Entire Radio.
Clones the current active source zone to the target zone. Valid for Legacy radio cloning.
Allows selection of specific source and target zones for cloning.
Clones all non-radio specific data and radio-specific data like serial numbers.
Enables or disables cloning on a per-zone basis to protect custom groups.
Steps to change the radio to desired zone, enter programming, select zone params, and set Clone 'On' or 'Off'.
Cloning to a Legacy radio disables 'User Code Guard' and prevents tone selection.
The issue affects only the cloned group, not the entire radio, and is a firmware issue.
Steps to re-enable 'User Code Guard' on a legacy radio using programming mode and password.
Use a DPH radio as master cloner; set KNG Tone Pick List to 'Default' for zone-specific tones.
Steps to access keypad programming via Menu, selecting 'Keypad Prog', and entering password.
Sections available for editing: Channels, Zone Parameters, and Global Parameters.
How to select zone and channel, press CLR before new data, and save settings with ENT.
Entering a channel name using the keypad, similar to cell phone input.
Setting Rx Freq, Rx Mode (Analog, Digital, Mixed), RX Guard, and RX NAC.
Configuring Tx Freq, Tx Mode, Bandwidth (12.5/25 khz), Tx Guard, and Tx NAC.
Explanation of TGID, Secure Mode, Key, Key Lock for digital operation and encryption (not used).
Selecting a zone and editing its parameters, including Zone Label, Pri 1 Chan, Tx on Pri 1, Pri 2 Chan.
Configuration of ANI Mode/ID (not used), Disable Clone, and Disable Plist for selected zones.
Warning not to change global settings as they are set via software universally.
Parameters include Priority channels, Scan Hold Time, Busy Channel Mode, Timers, Battery Saver, Password, P25 Unit ID, Power, etc.
Displays current software, firmware, versions, and codes.
Allows adjustment of the screen contrast.
Shows which features are currently enabled on the radio.
Information on charging Li-Ion batteries on or off the radio.
Using 8 AA batteries in a clamshell and changing them while the radio is off.
Details on plugging in cloning cable or hand mic, securing with thumb screw, and spring-loaded pins.
Never carry the radio by its antenna.
Steps for extended storage: removing batteries and attaching connector cover.
Recommended cleaning methods using a soft-bristled toothbrush and alcohol cloth.
Install cover when the accessory connector is not in use.
Radio supports 512 channels, organized into 32 groups of 16 channels each.
The radio offers two power output levels: 5 Watts (High) and 2 Watts (Low).
Features a display capable of showing multiple lines of alphanumeric information.
The product comes with a standard warranty period of three years.
Commands accessible from the main screen for power, menu, priority, and guard list selection.
Functions for navigating menus: Escape, Up/Down arrows, and Enter.
Button for selecting the desired zone or group.
Control for adjusting the radio's squelch sensitivity.
The primary button used for transmitting audio.
Port for connecting external accessories like microphones or programming cables.
How to select a zone, including using buttons, arrows, or keypad entry.
Procedure for adjusting squelch using preset or user select options.
Steps to select transmit code guard tones using the TCG button and menu.
How to switch between high (5W) and low (2W) power modes indicated by 'LPW'.
Using the collar switch to lock/unlock the keypad for operation.
How to select priority channels, including 'Use Per Zone' and 'Main' options.
The menu is accessed by pressing the ▲ button, providing access to various functions.
List of available menu options: Scan List Editing, Cloning, Keypad Programming, Version, Contrast Adjust, Radio Status.
Functionality to edit scan lists.
Access to radio cloning features.
Options for programming the radio via the keypad.
Displays current software, firmware, versions, and codes.
Adjusts the screen contrast for better readability.
Shows which features are currently enabled on the radio.
Instructions for adding or removing channels from the scan list using menu options.
Details on the three cloning methods: Active Zone, Zone-to-Zone, and Entire Radio.
Clones the current active source zone to the target zone. Valid for Legacy radio cloning.
Allows selection of specific source and target zones for cloning.
Clones all non-radio specific data and radio-specific data like serial numbers.
Enables or disables cloning on a per-zone basis to protect custom groups.
Steps to change the radio to desired zone, enter programming, select zone params, and set Clone 'On' or 'Off'.
Cloning to a Legacy radio disables 'User Code Guard' and prevents tone selection.
The issue affects only the cloned group, not the entire radio, and is a firmware issue.
Steps to re-enable 'User Code Guard' on a legacy radio using programming mode and password.
Use a DPH radio as master cloner; set KNG Tone Pick List to 'Default' for zone-specific tones.
Steps to access keypad programming via Menu, selecting 'Keypad Prog', and entering password.
Sections available for editing: Channels, Zone Parameters, and Global Parameters.
How to select zone and channel, press CLR before new data, and save settings with ENT.
Entering a channel name using the keypad, similar to cell phone input.
Setting Rx Freq, Rx Mode (Analog, Digital, Mixed), RX Guard, and RX NAC.
Configuring Tx Freq, Tx Mode, Bandwidth (12.5/25 khz), Tx Guard, and Tx NAC.
Explanation of TGID, Secure Mode, Key, Key Lock for digital operation and encryption (not used).
Selecting a zone and editing its parameters, including Zone Label, Pri 1 Chan, Tx on Pri 1, Pri 2 Chan.
Configuration of ANI Mode/ID (not used), Disable Clone, and Disable Plist for selected zones.
Warning not to change global settings as they are set via software universally.
Parameters include Priority channels, Scan Hold Time, Busy Channel Mode, Timers, Battery Saver, Password, P25 Unit ID, Power, etc.
Displays current software, firmware, versions, and codes.
Allows adjustment of the screen contrast.
Shows which features are currently enabled on the radio.
Information on charging Li-Ion batteries on or off the radio.
Using 8 AA batteries in a clamshell and changing them while the radio is off.
Details on plugging in cloning cable or hand mic, securing with thumb screw, and spring-loaded pins.
Never carry the radio by its antenna.
Steps for extended storage: removing batteries and attaching connector cover.
Recommended cleaning methods using a soft-bristled toothbrush and alcohol cloth.
Install cover when the accessory connector is not in use.
| Frequency Range | 136-174 MHz |
|---|---|
| Water Resistance | Yes |
| IP Rating | IP67 |
| Battery Type | Lithium-Ion |
| Operating Voltage | 7.4V |
| Operating Temperature | -30°C to +60°C |