18/36 Bosch Rexroth AG
Reparaturanleitung/Repair Manual A10VG 28–63
RDE 92750-21-R/02.08
4.2 Exchanging Seals
The assembly group "complete seal set" contains seals for the
following components:
• Positioning piston covers
• Valves
• Pressure cut-off
• Auxiliary pump (refer to "Exchanging the Auxiliary Pump")
• Control unit (refer to "Exchanging the Control Unit")
Required Special Tools:
• Sleeve to push o-ring and support ring,
Mat. no.: R909454005
Exchanging the seal of the positioning piston cover
This section explains how you can exchange the seal of the
positioning piston cover.
To exchange the seal of the positioning piston cover:
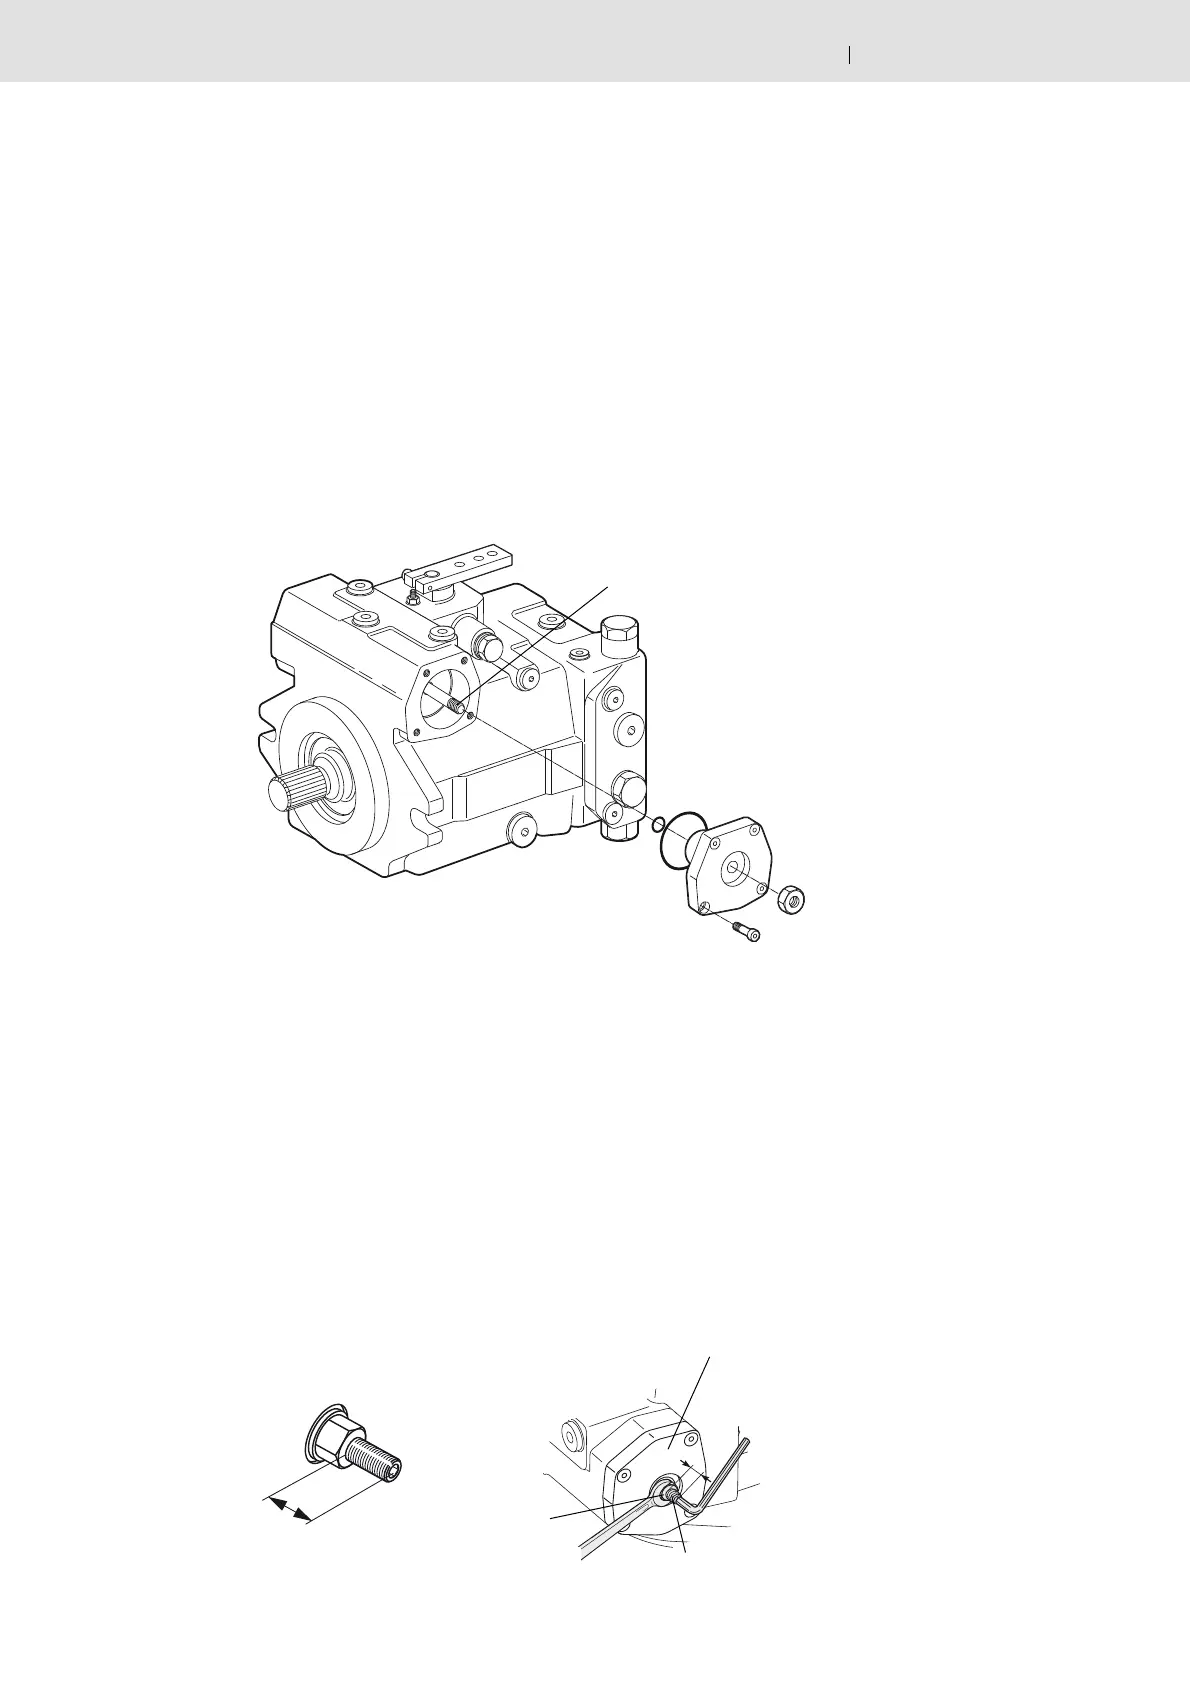
1 Mark the position of the right cover (a) so that you can set it
back to its original position after sealing.
Measure and write down the dimension X of the counter
nut (d). You need this for the subsequent assembly.
Remove the counter nut. To do so, grip the positioning
screw (c).
4.2 Dichtungen austauschen
Die Baugruppe „Dichtungssatz komplett“ enthält Dichtungen
für folgende Komponenten:
• Stellkolbendeckel
• Ventile
• Druckabschneidung
• Hilfspumpe (siehe „Hilfspumpe austauschen“)
• Steuerung (siehe „Steuergerät austauschen“)
Benötigtes Sonderwerkzeug:
• Hülse zum Aufziehen von O-Ring und Stützring,
Mat.-Nr.: R909454005
Dichtung an den Stellkolbendeckeln austauschen
Dieser Abschnitt erklärt, wie Sie die Dichtung am Stellkolben-
deckel austauschen.
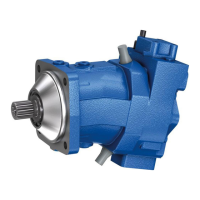
a
a: Deckel Cover
b: O-Ring O-ring
c: Stellschraube Adjustment screw
d: Kontermutter Counter nut
e: Befestigungsschrauben Fastening screw
b
b
c
d
e
Um die Dichtung an den Stellkolbendeckeln auszutauschen:
1 Markieren Sie die Lage des Deckels (a), damit Sie
ihn nach dem Abdichten wieder lagerichtig aufsetzen kön-
nen.
Messen und notieren Sie das Maß X der Kontermutter (d) für
die spätere Montage.
Entfernen Sie die Kontermutter. Halten Sie dazu die Stell-
schraube (c) fest.
X
a
c
d
X
 Loading...