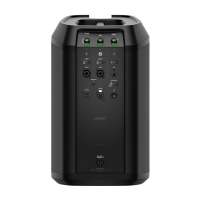
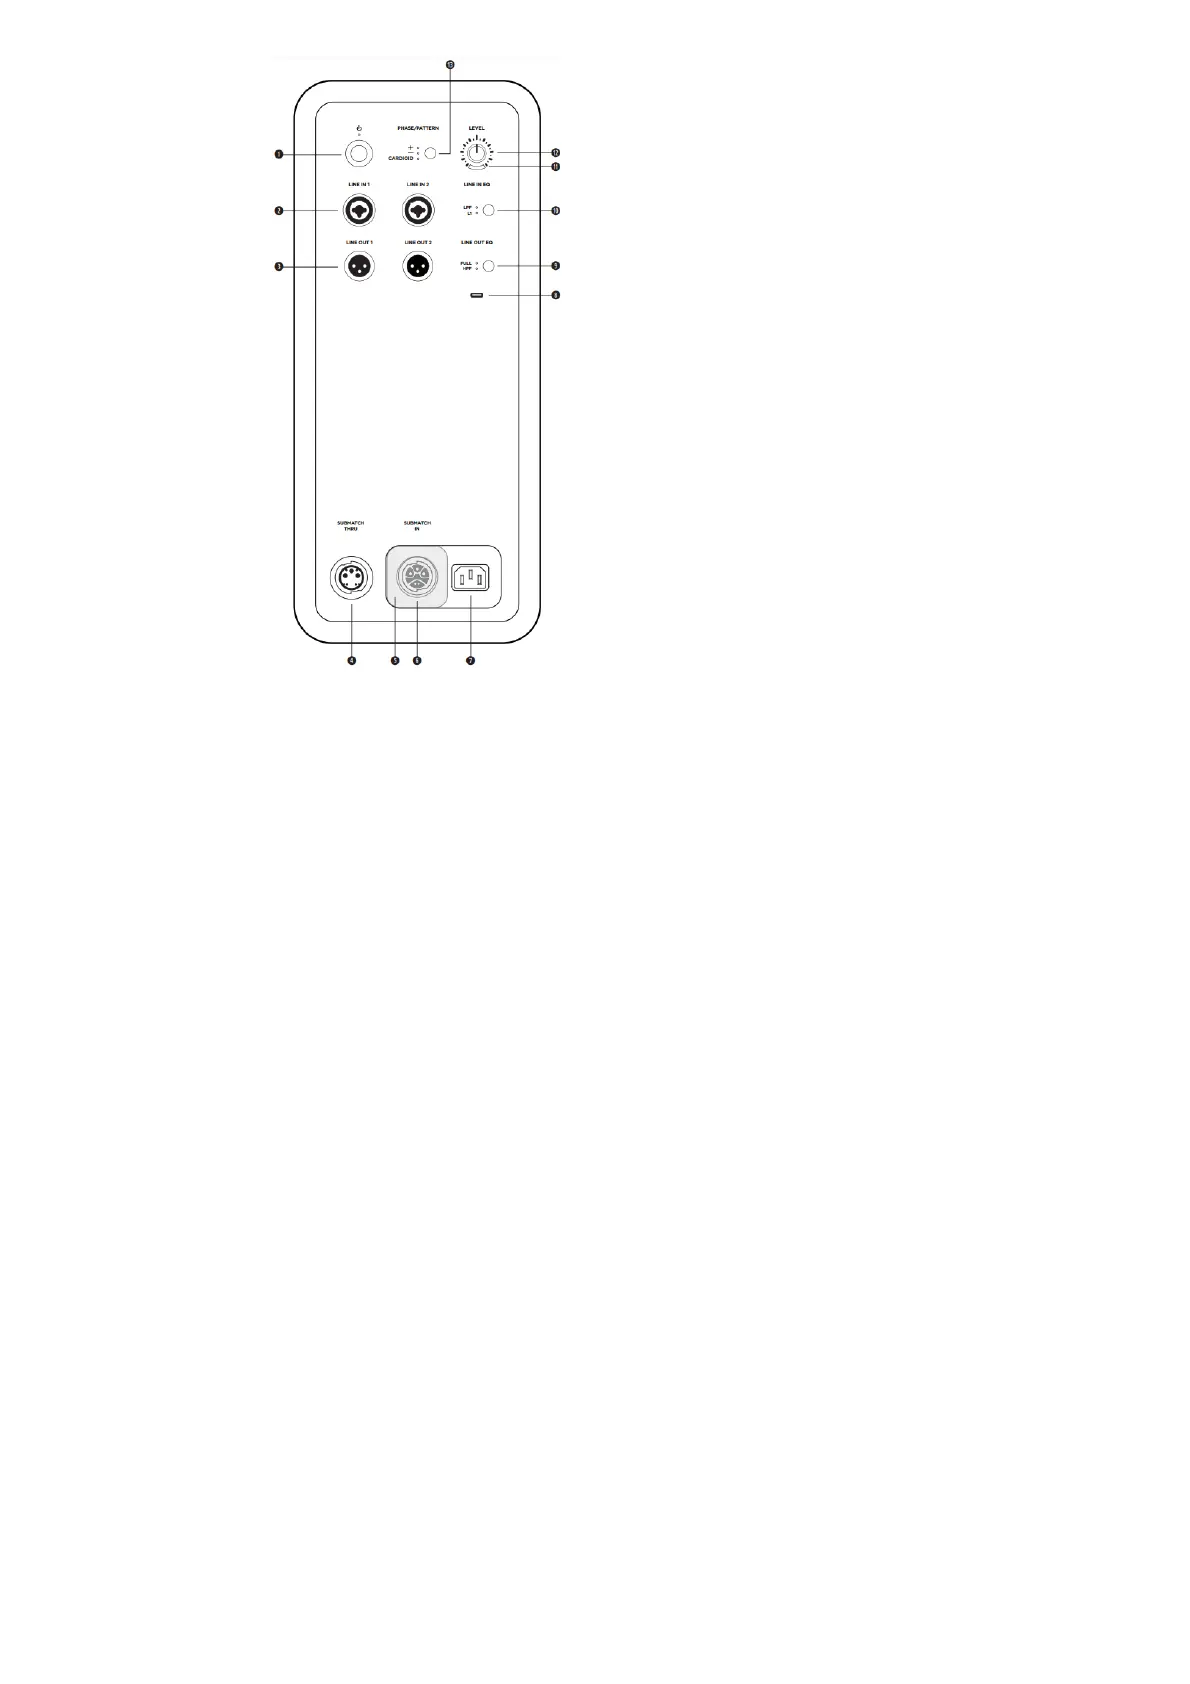
Connections and Controls
1. Standby Button: Press the button to power on the Sub. The LED will illuminate white while the Sub is on.
2. Line Inputs: Analog input for connecting an L1 Pro or another line-level audio source. Compatible with XLR, TRS balanced, and TS unbalanced cables.
3. Line Outputs: Use an XLR cable to connect the line-level output to a loudspeaker.
4. Sub Match Thruput: Connect an additional Sub-bass module with a SubMatch cable. Up to two Sub1 or Sub2 powered bass modules can be powered by a
single L1 Pro32 via a SubMatch connection.
5. Power Input Cover: Prevents simultaneous use of the SubMatch Input and Power Input. Slide the cover to reveal the power input that is needed for setup.
6. Sub Match Input: Connect the Sub to an L1 Pro32 with a SubMatch cable.
7. Power Input: IEC power cord connection.
8. USB Port: USB-C connector for Bose service use and firmware updates.
Note: This port is not compatible with Thunderbolt 3 cables.
9. Line Output EQ: Select between FULL bandwidth or a multi-purpose HPF when using Line Outputs. Press the button to switch EQ settings. The
corresponding LED will illuminate white while selected.
10. Line Input EQ: Select between an optimized EQ for an L1 Pro or a multipurpose LPF when using Line Inputs. Press the button to switch EQ settings. The
corresponding LED will illuminate white while selected.
11. Signal/Clip Indicator: The LED will illuminate green when a signal is present and will illuminate red when the signal is clipping or the Sub is entering limiting.
Reduce the level or signal volume to prevent signal clipping or limiting.
12. Level Control: Adjust the level of audio output. The Level Control does not affect the Line Outputs. The 12 o’clock position is recommended when in use
with an L1 Pro32.
13. Phase/Pattern Button: Adjust the polarity of the Sub. Press the button to switch polarity. The corresponding LED will illuminate white while selected. Also
allows access to Cardioid mode when using two identical Submodules.
 Loading...