ENGLISH 9
2. Getting Started
2.1 Plug one end of the included AC adapter into a
standard 110-240V AC electrical outlet and the
other end into the right side the frame.
2.2. Remove the protective film covering the LCD.
2.3. Power on the unit by pressing the Power but-
ton at the backside of the unit (Press ON/OFF but-
ton for a longer period).
3. Operating Instruction
After turning on the unit, it will show the startup
picture, press MENU to get to the card select inter-
face.
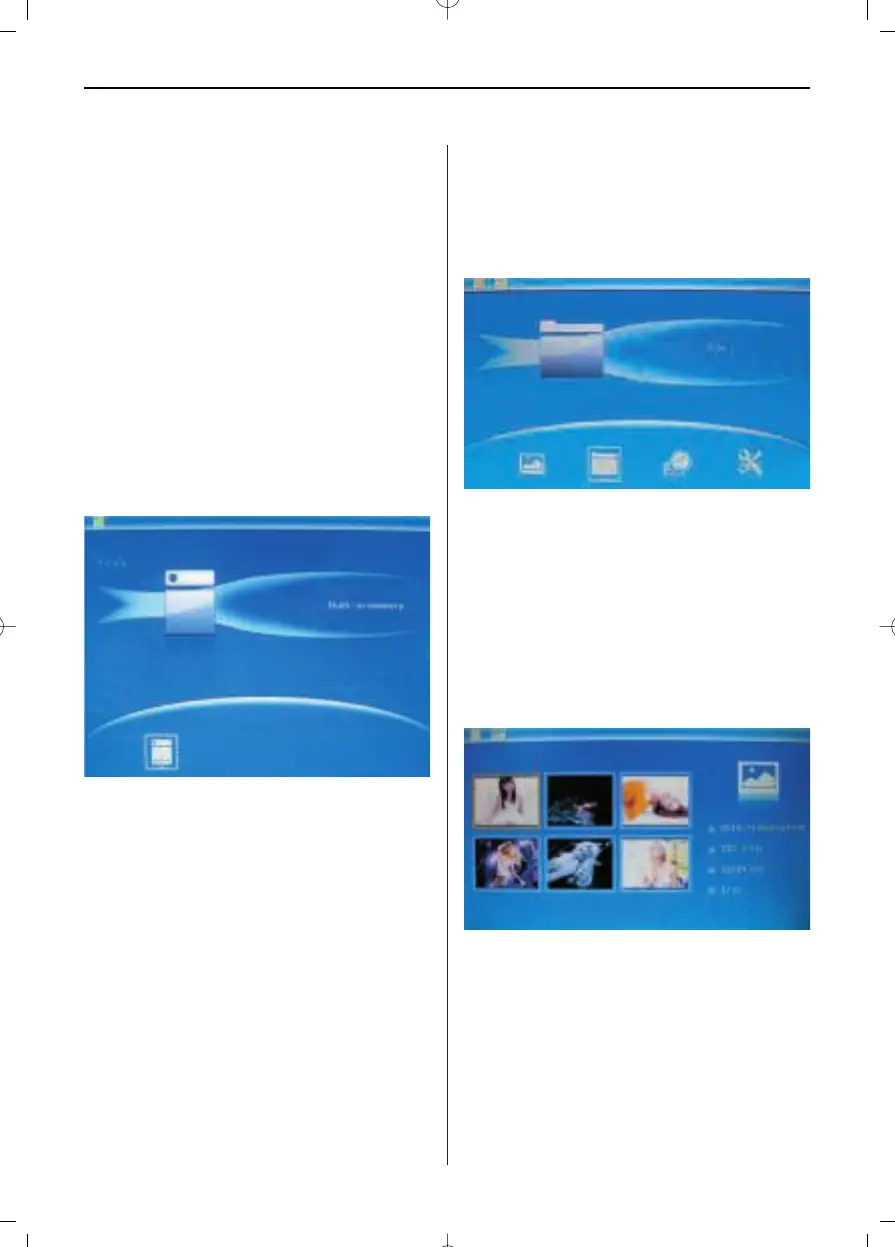
3.1 Card and USB
It supports SD/SDHC/MMC and USB 2.0. After ins-
erting a card or USB device, slideshow will play
automatically, then press MENU twice to access to
photo, file, calendar and setup. Press
왘II to con-
firm.
Note:
Make sure there are supported picture files in the
Card or USB device.
3.2 Picture Mode
Press MENU to choose "MEMORY CARD" in the main
menu. Highlight Photo, press 왘II to access to the
six-picture mode, use 왖왔왗 왘 to choose the pictu-
re, press 왘II to play the picture in single window.
Press 왘II to start slideshow pictures in the selec-
ted slide mode.
 Loading...