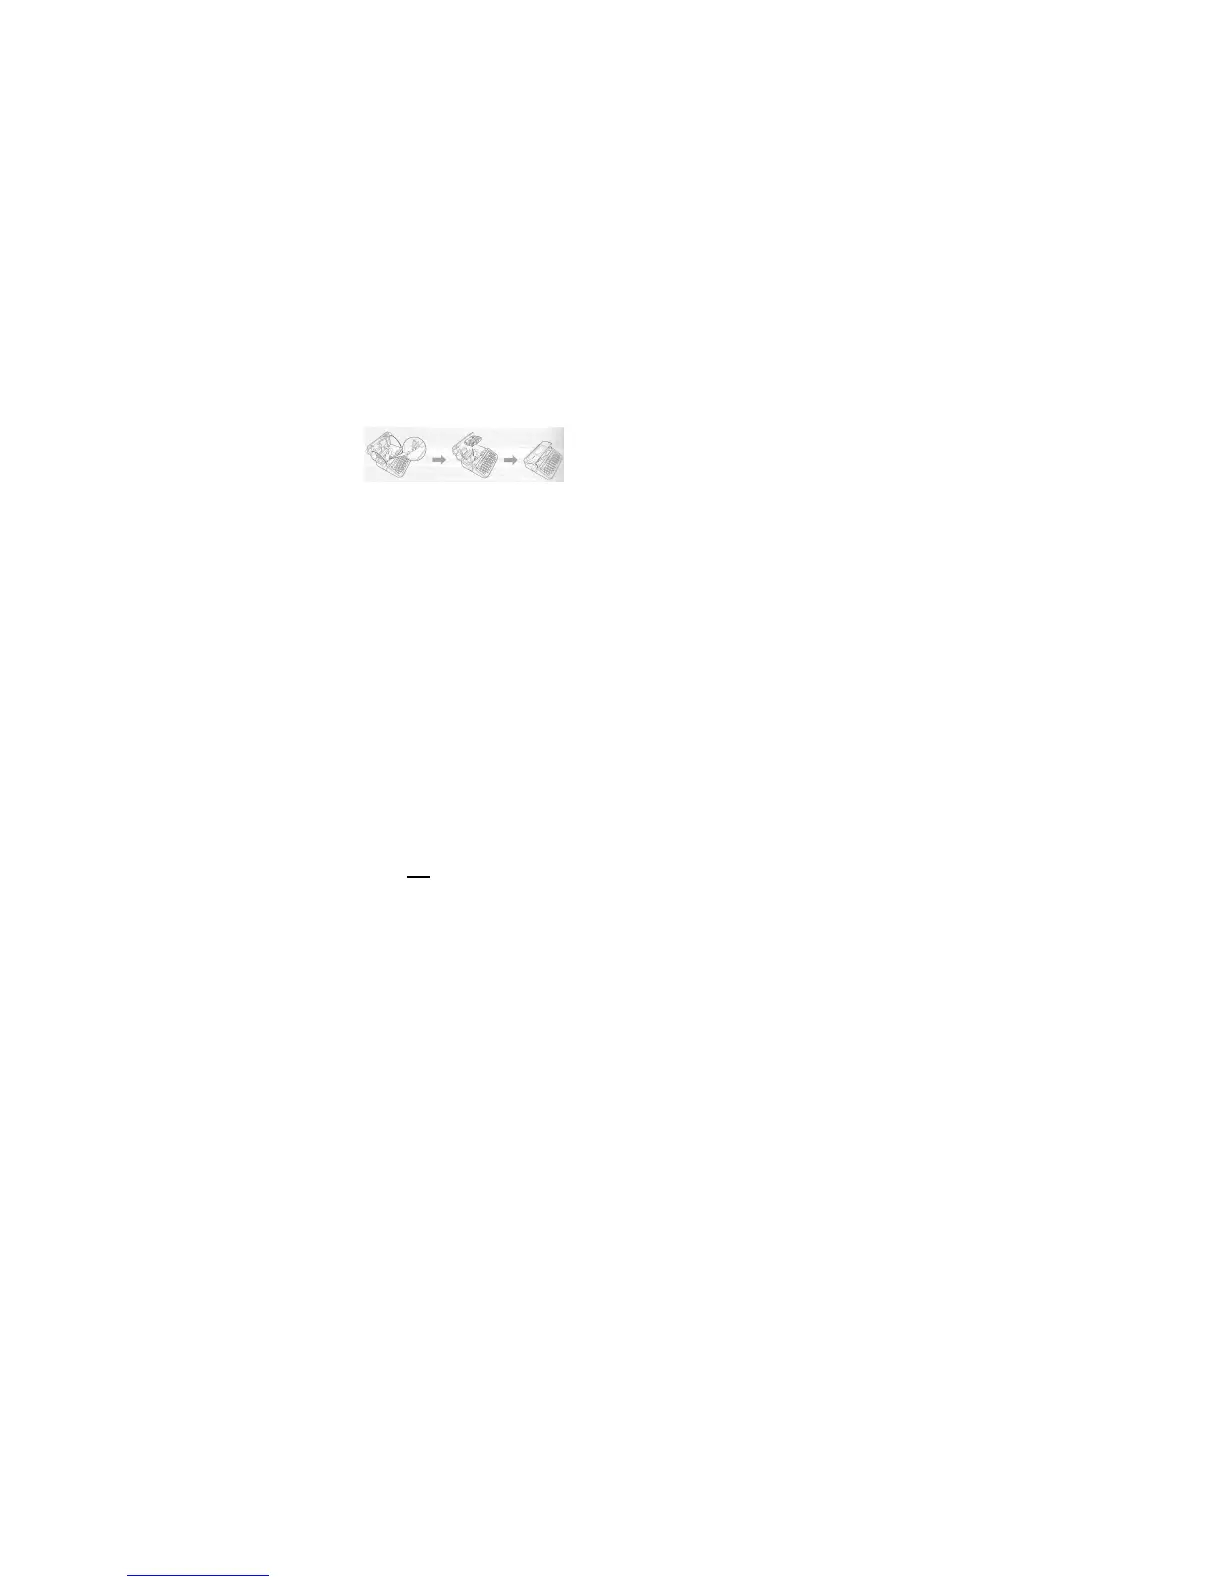
GETTING STARTED – Installing a Label Cartridge
1. Make sure that at least ½” of blank
label material is sticking out of the edge
of the cartridge.
2. Open the label cartridge compartment
lid. Insert the label cartridge into the compartment with the end of the tape
protruding out of the P-touch printer tape exit slot and press firmly until you
hear it click.
When inserting the label cartridge, make sure that the tape and ribbon
do not catch on the print head. If there is slack in the tape, pull the
tape through the tape guide.
3. Close the label compartment lid.
4. DO NOT PULL THE LABEL WHILE IT IS COMING OUT OF THE
PRINTER. DOING SO WILL CAUSE THE INK RIBBON TO PULL OUT OF
THE EXIT SLOT AND TO BE CUT WHEN THE LABEL IS CUT. THIS
WILL CAUSE THE LABEL CARTRIDGE TO NO LONGER FUNCTION.
GETTING STARTED - Feeding Tape
Feed & Cut
This function will feed approximately 1” of tape and cut it.
1. Press the following keys: Shift + Search ►▲/ ▼ (Feed & Cut) ►then
press OK or Enter.
2. To exit or cancel this function, press Esc.
Feed Only
This function will feed approximately 1” of tape resulting in a blank label
sticking out of the label cartridge. This should always be done prior to
removing a label cartridge.
Print both Clothing labels, which can be applied to most clothing with an
EzProducts Model-7 digital EzPress®, digital PopUpPress®, or digital
AirPress® and laminated self-stick labels.
Page - 1
Fixed Length Label
1. Press the Fn key.
2. Press
▲/ ▼
to select Length then press OK.
3. Press
▲/ ▼to select label Length in inches. Then press OK.
The text that you type will be scaled up or down to fit on the fixed label
length. (Long words will produce a smaller font size than short words.)
Variable Length Label
1. Press the Fn key.
2. Press
▲/ ▼
to select Length then press OK.
3. Press
▲/ ▼to select label length as Auto. Then press OK.
The label length will be expanded or contract to fit the fixed size text that you
type (Long words will create a long label and short words will create a short
label.)
CREATING A LABEL - One Line Label
1.At the [] Prompt, type one line of data.(
P
ress Enter for a 2 line label)
2.Press the Print Key.
3.Type your second line of data.
Label width Maximum lines
12mm (0.47”) 18mm (0.70”) 24mm (0.94”) 3 lines 5 lines 7 lines
LABEL PRINTING - Printing a Single Label
1. Press the Print key.
2. Press OK or Enter key.
LABEL PRINTING – Printing & Cutting Several Identical Labels
1. Press the Print key.
2. Using the ˄ ˅ key scroll to the quantity of labels you wish to print, then
press the Ok, Enter or Print key.
LABEL PRINTING – Automatic Print & Cut Multiple Labels
1. Press the Fn key, then press ▲/ ▼ to select Cut Option, then press OK
or Enter key.
Page 2

 Loading...