12
The printer connection settings and software installation are performed using a computer.
You can download the setup les from our website. If you are using a Windows PC, you can also start this from the CD-ROM.
However, if you selected No in step 3 for connecting to a wireless LAN on p.11, congure the wireless LAN settings only using the printer. Proceed to
"Congure Wireless LAN Settings on the Printer" on p.13.
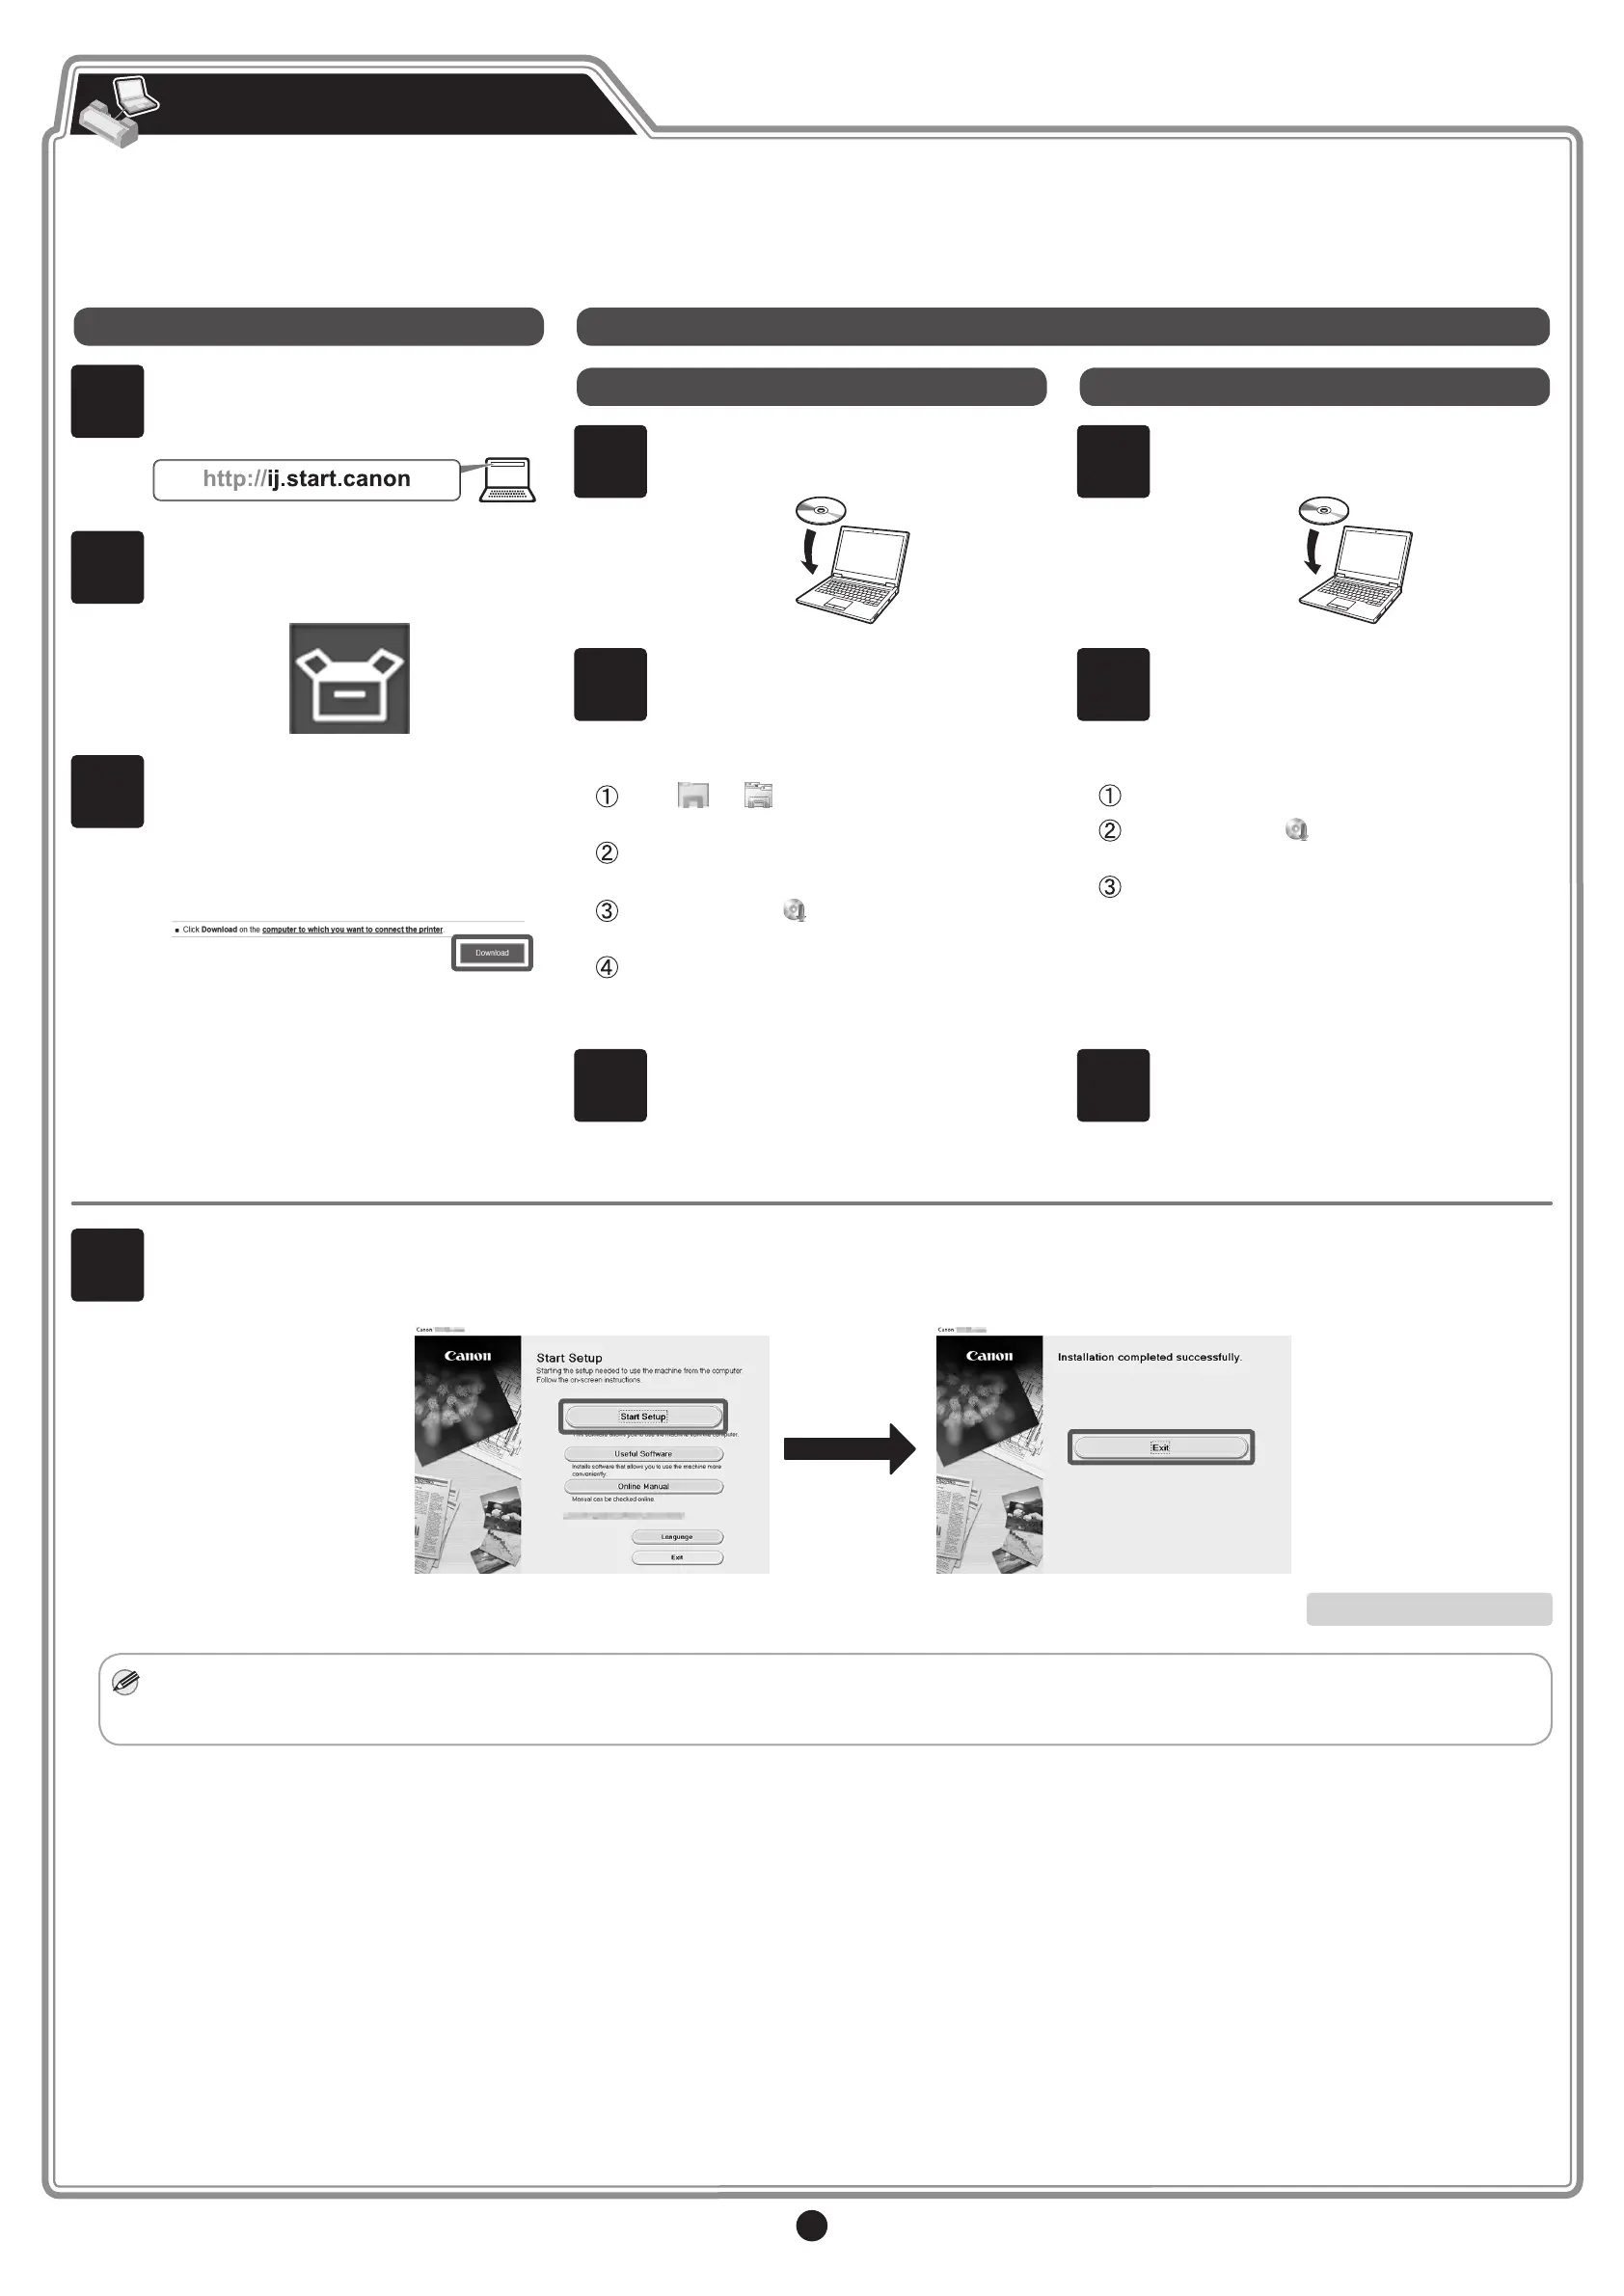
Connect to the Printer
4
Click Start Setup.
Congure the settings by following the instructions on the screen.
This completes the setup.
Note
• A screen for selecting the printer connection method may be displayed in the middle of conguring the settings.
If this happens, select the method you selected on p.11 and then click Next and continue with the rest of the settings.
Downloading and running from the website
1
Enter the following URL in the web
browser of your computer to access the
website.
2
Click Set Up.
Perform the remaining operations by
following the instructions on the screen.
3
Click Download to download the setup
le and then run the le.
If a warning screen about downloading
appears, select Do not block, Allow, etc.
and then proceed to the next step.
Running from the CD-ROM
If you are using Windows 10 or Windows 8.1
1
Insert the setup CD-ROM into the
computer.
2
Click the popup message for the disk
drive and click Run Msetup4.exe on the
screen that is displayed.
If the message did not appear (or has disappeared)
Click or File Explorer on the
taskbar.
Click This PC on the left side of the window
that opens.
Double-click the CD-ROM icon on the
right side of the window.
If the contents of the CD-ROM appear,
double-click Msetup4.exe.
3
If the User Account Control dialog box
appears, click Yes and proceed to the
next step.
If you are using Windows 7
1
Insert the setup CD-ROM into the
computer.
2
When the AutoPlay screen appears, click
Run Msetup4.exe.
If the AutoPlay screen does not appear
Click Computer from the start menu.
Double-click the CD-ROM icon in the right
side of the window that opens.
If the contents of the CD-ROM appear,
double-click Msetup4.exe.
3
If the User Account Control dialog box
appears, click Continue and proceed to
the next step.