PhotoMed Quick Start Guide
For the Canon 40D Digital Clinical Camera System - Canon MR-14EX
Congratulations on your purchase of the Canon 40D Digital Camera.Your camera has been completely assembled, tested and is
ready to start taking clinical photos. The rechargeable battery pack is partially charged and installed in your camera body. The
instructions listed below show you the camera settings that work best for macro photography. If you use the camera for recreational
photography, use these instructions to return the camera to the proper clinical settings. Consult the Canon instruction book for
details on all other camera and flash functions.
The memory card has been installed in the camera and formatted. As
shown above, the memory card slot is on the side of the camera body.
Your camera has been set to the Large/Fine mode (10.1 megapixel
resolution/Fine JPG mode). At this setting, you can fit approximately 300
images on a 1GB card. You can change this mode in the camera’s menu.
You can choose MED (5.3 megapixel), SMALL (2.5 megapixel) or RAW in
the camera menu.You can also choose RAW+JPG and you will get two
files - a processed JPG image and a RAW file of that image.
Canon has added a new feature to the 40D - CAMERA USER SETTINGS. There are three user settings
available on the MODE DIAL (C1, C2, & C3). The user settings allow you to combine a group of
camera settings and assign them to one of the three modes on the camera’s mode dial.
This allows us to simplify your use of the camera for clinical photos.We have pre-programmed all
of the settings needed for closeups in the C1 mode and the settings for portrait views in the
C2 mode. Simply turn the dial to C1 for closeups, focus and shoot.Turn the dial to C2 for portraits,
focus and shoot. Its that easy!
Please see page 3 of these instructions for more info about the camera user settings (C1,C2, C3).
Press the ISO button and set the ISO to 100.
Turn on the flash and the camera body. When the PILOT
(ready) LIGHT illuminates on the flash power pack, the
shutter speed will be automatically set to 1/250 second.
Set your f-stop by turning the MAIN DIAL on the top of
the camera body (see photo above).
For closeup shots, use C1 on the Mode Dial (f22)
For portrait shots, use C2 on the Mode Dial (f5.6)
page 1
Turn the camera on using the switch
on the back of the camera at the
bottom.There are 2 positions. ON
turns the camera on and locks the
QUICK CONTROL DIAL.The next
position ( ) turns the camera on
and allows the QUICK CONTROL
DIAL to be used.
MAIN DIAL:
turn dial
to change
the f-stop
setting
shutter speed
f-stop
ISO button
© 2008, PhotoMed International. All rights reserved
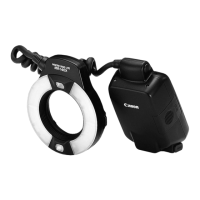
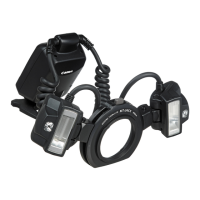
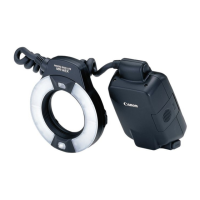
The Canon MR-14EX Ring Flash (or MT-24EX
dual point flash) should be set to the E-TTL
mode.This mode is chosen using the MODE
button. Press the MODE button until E-TTL
shows on the flash display (as shown).The
LAMP button turns on the focus lamp. After
turning on the flash, wait until the PILOT LIGHT
is illuminated - the flash is now ready to fire.
We recommend leaving the power switch in
the SE position. When you turn the camera
on, the flash will turn on. When you turn the
camera off, the flash will go to “sleep” in a
few minutes.
Set to
E-TTL
Power
switch
LAMP
button
PILOT
(ready)
light