12
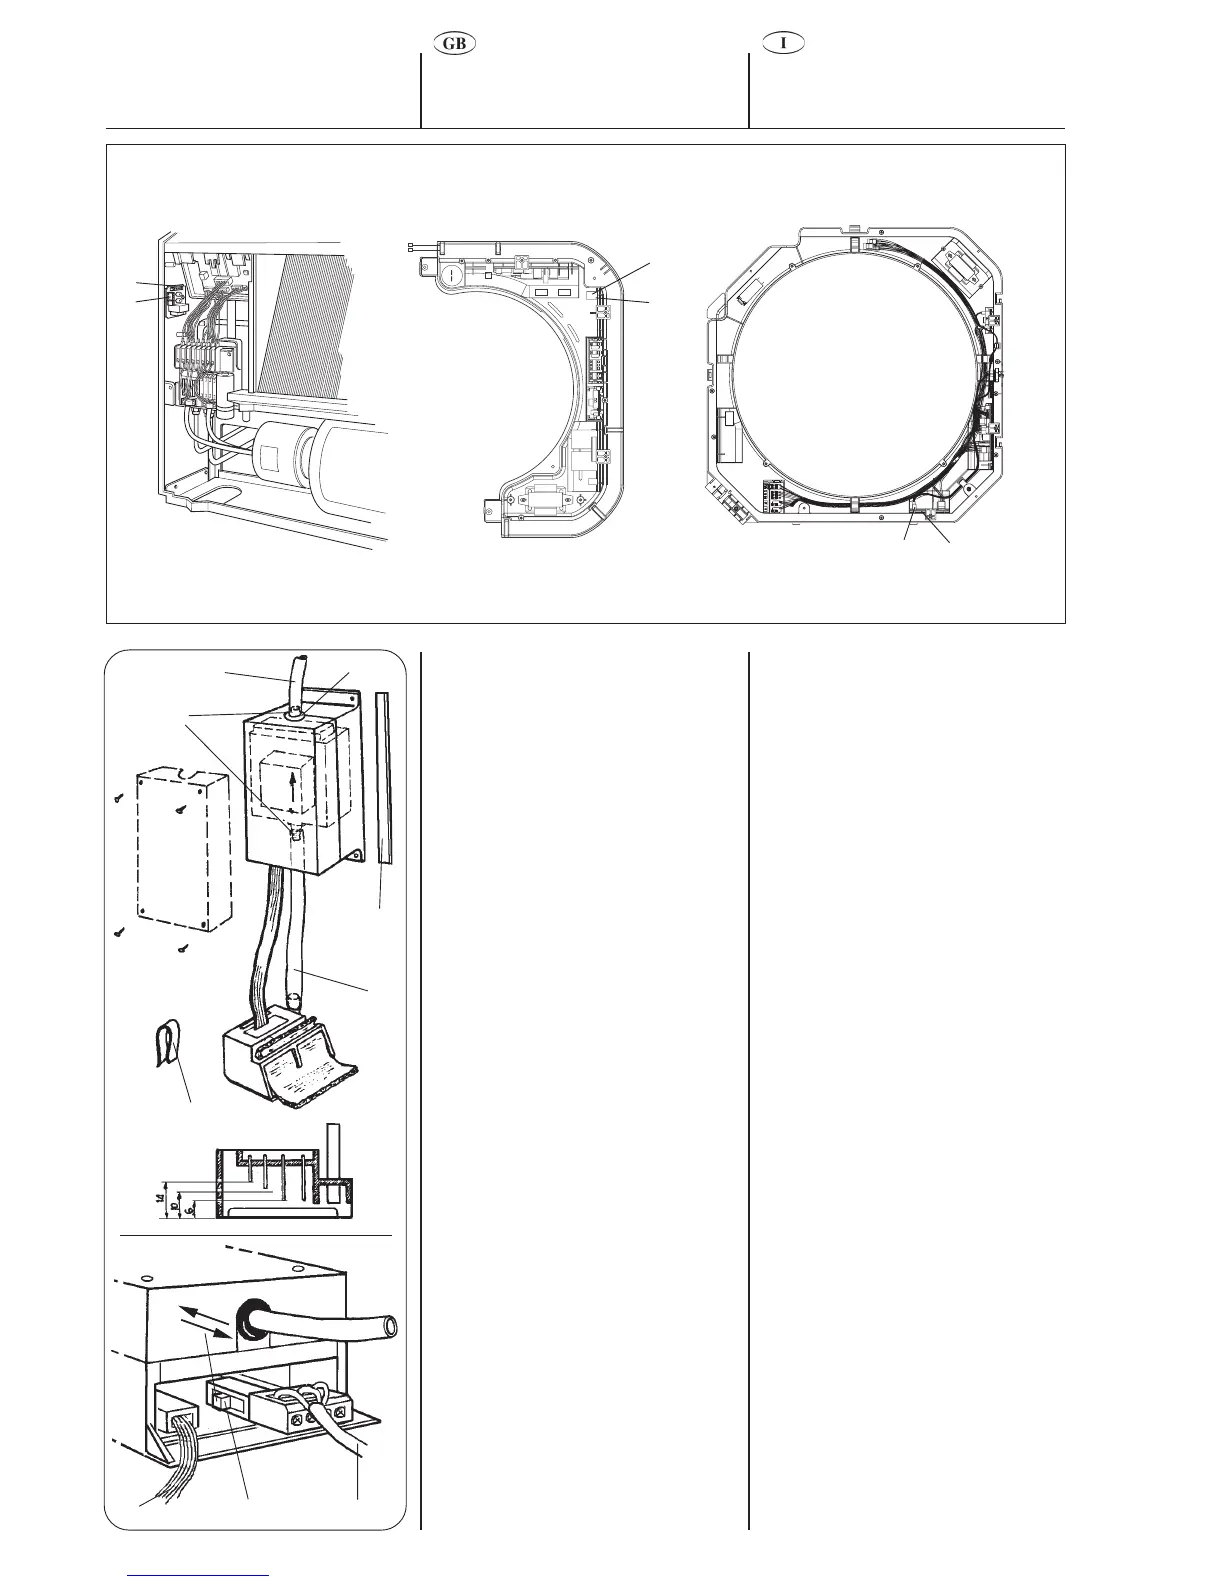
Electrical connection
Collegamenti elettrici
The CZM kit is installed /
É presente il kit CZM
/ En presence du kit CZM
Der CZM-Bausatz ist installiert
/ Con kit CZM
D
C
• Switch to super-quiet speed (whisper
mode), or to high speed if the
elevation and the horizontal tract
planned exceeds the limits allowed by
the whisper mode using the switch
indicated in figure.
• Remove the pump cover and connect
the transparent PVC tube to its
special attachments.
• Shorten the suction tube to the
desired length if necessary.
• Reassemble the cover after inserting
the cable conduits .
• Fix the connectors to the power
supply cable .
• Connect the power supply cable to
the pump terminal block.
• Insert the level controller cable .
The ways of connecting the pump to the
electronic control vary depending on
whether the CZM (Zone Manager) kit is
installed or not:
The CZM kit is installed
• Connect pump power supply terminal
block terminals “C” and “Nc” to
connector J3 of the auxiliaty board,
using the cable with a 2 pole
connector (see figure and wiring
diagram).
Clip
Double-sided adhesive strip
Field supplied
Fixing clamp
Flexible PVC tube
Tube conduit
Level controller section
Switch
Supply power connector
Level controller connector
Super-quiet speed (whisper)
High speed
• Commutare alla velocità silenziosa
(whisper mode) oppure alla alta
velocità (high speed) se l'elevazione ed
il tratto orizzontale previsti eccedendo i
limiti consentiti dalla prima agendo sul
commutatore
indicato in figura.
• Rimuovere il coperchio della pompa e
collegare il tubo in PVC trasparente
agli appositi attacchi.
• Se necessario, accorciare il tubo di
aspirazione
fino alla lunghezza
desiderata.
• Rimontare il coperchio dopo aver
inserito i relativi passatubi
.
• Fissare al cavo di alimentazione
ai
terminali
.
• Collegare il cavo di alimentazione
alla morsetteria della pompa.
• Inserire il cavo del regolatore di
livello
.
Le modalità di collegamento della
pompa al controllo elettronico dell'unità
variano in funzione della presenza del
kit CZM (Zone Manager):
É presente il kit CZM
• Collegare i morsetti “C” e “Nc” della
morsettiera di alimentazione della
pompa al connettore J3 della scheda
ausiliaria, utilizzando il cavetto con
connettore a 2 poli
(vedere figura e
schema elettrico).
Clip
Strisce biadesive
A cura dell'installatore
Fascetta fissaggio
Tubo flessibile PVC
Passatubo
Sezione regolatore di livello
Commutatore
Connettore alimentazione
Connettore regolatore il livello
Velocità silenziosa
Velocità superiore
C Auxiliary board
D Connector J3
C Scheda ausiliaria
D Connettore J3
C Fiche auxiliaire
D Connecteur J3
C Hilfsplatine
D Anschluss J3
C Tarjeta auxiliar
D Conector J3
C
D
DC
 Loading...