EasyManua.ls Logo

Carrier Aura User Manual

Carrier Aura
15 pages
To Next Page IconTo Next Page
To Previous Page IconTo Previous Page
Page #10 background imageLoading...
Page #10 background image
11. LOUVER
Not available in this model
12. ON TIMER
The air conditioner can be programmed to to turn on
in advance.
15. RUN HOUR TARGET SETTING
To change the target setting, press the
16. CHECKING BALANCE
Press button while the Run Hour feature is active
and the LED display will show the remaining hours
for 5 seconds. If the counter is below 100 hours, the 2-digit
LED will display the remaining hours for 5 seconds. If the
remaining value is above 100 hours, the dot after the first
digit will be lit and the value shown is to be multiplied
by 10. Please refer to example above.
Note:
If the setting is equal to vvor above 100 hours, the dot after
the 1st digit will be lit. The value shown has to be
multiplied by 10.
Examples:
If unit displays 2.4 (with decimal point lit), this means
24 x 10 = 24 hours.
If unit displays 10 (without decimal point lit), this means
10 hours.
button. As soon as it displays the last setting, press
the button. The target can be set in a
range of 10-990 hours (10 hours each per up /
down press). When the desired value is reached,
press button again to confirm the new target
setting. The Run Hour counter will reset and the
display will go back to normal. If the button is not
pressed to confirm within 10 seconds, the display
will go back to its regular setting automatically and
the target set value will be discarded.
or
Press ON TIMER, and start-time
display will blink.
ON TIMER
Press ON TIMER button again and start-time
display will stop blinking.
To cancel this function, press ON TIMER
butoon again. The dot after the 2nd on the
LED will show the status of the timer setting.
ON TIMER
Press to set hour.
to set minutes.
(v)
Press (v)
13. OFF TIMER
The air conditioner can be programmed to
to turn off in advance.
Press OFF TIMER, the symbol and
start-time display will blink.
OFF TIMER
BAL
Notes: if the button is pressed while Run Hour
operation is deactivated, “rd” will be shown at the 2-digit
LED for 5 seconds.
If the counter has reached zero balance, the dot after the
1st digit will blink continuously as the alarm and the unit
will be locked out. You would need to reset the run hour
target setting before you can use the aircon unit again.
BAL
OFF TIMER
Press OFF TIMER button again,
and stop-time display will stop blinking.
To cancel this function, press ON TIMER
butoon again. The dot after the 2nd on the
LED will show the status of the timer setting.
Press to set hour.
to set minutes.
(v)
Press and hold button from the remote
handset for 3 seconds, the LED screen will show
‘ rd ’ which stands for Run Hour deactivated.
The screen will also show the previous target setting.
RUN -H
RUN -H
RUN -H
RUN -H
To activate, wait for the display to go back to normal
The setting will be confirmed immediately.
Do the same thing to deactivate the Run Hour Function,
In case you do not want to use it.
then press button again for 3 seconds until
the ‘ rd ’ re-appears. Immediately press mode from
the unit display board, wait until the unit display ‘ rA ’
RUN -H
Press (v)
14. RUN HOUR OPERATION ACTIVATION / DEACTIVATION
The user can activate or deactivate the
Run Hour target operation. When it is activated and
the unit is on, the unit will run based on the balance
number of hours from the target that was set. When
the set hour target is reached, the dot after the 1st digit
will blink continuously which will serve as an alarm.

Other manuals for Carrier Aura

Question and Answer IconNeed help?

Do you have a question about the Carrier Aura and is the answer not in the manual?

Carrier Aura Specifications

General IconGeneral
Capacity1.5 Ton
CompressorRotary
RefrigerantR32
Condenser CoilCopper
Power Supply230 V, 50 Hz
Weight (Outdoor Unit)30 kg
TypeSplit
FeaturesAuto Restart, Sleep Mode, Turbo Mode
Dimensions (Outdoor Unit)780 x 540 x 240 mm

Summary

Safety Precautions

Precautions During Installation

Key safety measures and warnings to follow before and during the installation process.

General Safety Rules

Essential safety rules for operation, grounding, electrical safety, and supervision.

Checklist of Items

Air Conditioning Installation

Location Guidance

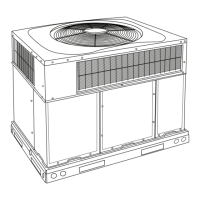
Guidance on choosing the optimal installation location to avoid direct sunlight and ensure stability.

Side Discharge Unit Installation Steps

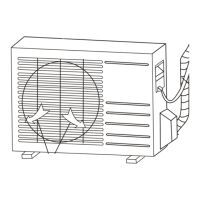
Detailed steps for installing the side discharge unit, including component removal and reassembly.

Troubleshooting Guide

Unit Does Not Start

Identifies common causes and solutions when the air conditioner fails to power on.

Unit Does Not Cool Properly

Addresses issues related to insufficient cooling, including filter, settings, and modes.

Fan Motor Does Not Run

Explains potential causes and fixes for a non-operational fan motor.

Ice or Frost Forms on Indoor Coil

Details reasons for ice formation and how to resolve it, such as temperature and filter checks.

Water Dripping into Room

Provides solutions for water leakage issues, focusing on outer wrapper tilt and drain hole.

Control Panel Codes

Lists error codes displayed on the control panel and the required actions.

Parts Identification and Operation

Parts List

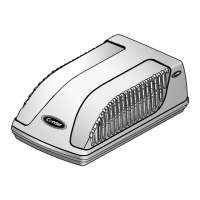
Identification of all components included with the Carrier Aura Inverter air conditioner.

Power ON / OFF

Instructions on how to turn the air conditioner on and off using the power button.

Fan Speed Control

Details on selecting and adjusting fan speeds (High, Mid, Low, Auto).

Temperature Setting

How to adjust the desired temperature using the UP (+) and DOWN (-) buttons.

Operating Modes

Explanation of different operating modes: Fan, Cool, and Dry.

Timer Function

How to set the timer for automatic unit shut-off after a specified period.

Swing Function

How to activate or deactivate the automatic louver movement for air distribution.

LED Screen Display

Information about what the 2-digit LED screen shows, including temperature and modes.

Fan Plug Operation

How to use the fan plug outlet for external electric fans.

Remote Control Operation

Power ON / OFF

Instructions for operating the unit's power using the remote control.

Fan Speed Adjustment

How to select fan speeds (low, med, high, auto) via the remote.

Temperature Setting

Adjusting temperature using the remote's up and down buttons.

Operating Mode Selection

Changing between Fan, Cool, and Dry modes using the remote.

Air Swing Control

Activating/deactivating the air swing feature with the remote's SWING button.

Econo (Energy Saving)

How to enable the energy-saving mode for reduced power consumption.

Turbo Mode

Activating the Turbo mode for rapid cooling, with operational limits.

Sleep Mode

How to use the Sleep mode for gradual temperature adjustment during the night.

Cycle (Energy Saving)

Programming the unit for automatic ON/OFF cycles at 30-minute intervals.

Clock Setting

Instructions for setting the clock on the remote control.

Advanced Remote Functions

Louver Control Availability

Notes that the louver control feature is not available on this specific model.

On Timer Operation

How to set the timer for the unit to turn on automatically at a specified time.

Off Timer Operation

How to set the timer for the unit to turn off automatically at a specified time.

Run Hour Operation Management

Instructions for activating/deactivating and setting targets for the Run Hour operation feature.

Checking Balance Hours

How to check the remaining hours in the Run Hour feature and understand its display.

Care and Maintenance

Cleaning the Front Panel

Step-by-step guide for cleaning the detachable front panel of the air conditioner.

Cleaning Air Filters

Instructions on removing, cleaning, and maintaining various types of air filters.

Warranty Information

Warranty Certificate Overview

Details on the warranty coverage for parts and labor, including terms and conditions.

Warranty Exclusions

Conditions under which the warranty becomes void, such as improper installation or misuse.

Warranty Coverage Details

Specifics on what the warranty does and does not cover, including compressor and non-plastic parts.

Product Registration

Instructions and methods for registering the unit to facilitate warranty claims.

Related product manuals