Home
Casio
Electronic Keyboard
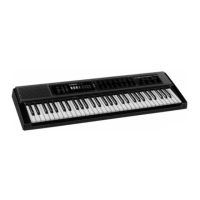
CTK-496
Casio CTK-496 Service Manual
5
of 1
of 1 rating
19 pages
Give review
Manual
Specs
To Next Page
To Next Page
To Previous Page
To Previous Page
Loading...
— 7 —
Note: Pay attention to the position of the LED(D225) when assembling the upper case.
Note:
Be careful of the height of the LED (D225) when replacing it.
17.5
±
0
.5
mm
SOLDER
SIDE
C
O
MP
O
N
E
NT
SIDE
6.
Remove four solders and two speakers.
7.
Remove two screws and unsolder one connector (CN31), and then remove the M627-MAA2 and M627-
MAA3 PCBs.
White
Orange
Brown
Connector (CN31)
M627-MAA2 PCB
M627-MAA3 PCB
Blue
8
10
Table of Contents
Table of Contents
2
Specifications
3
Block Diagram
5
Circuit Description
6
Printed Circuit Board
7
Disassembly
8
Diagnostic Program
12
Schematic Diagrams
14
Exploded View
16
Parts List
17
Other manuals for Casio CTK-496
User Guide
45 pages
5
Based on 1 rating
Ask a question
Give review
Questions and Answers:
Need help?
Do you have a question about the Casio CTK-496 and is the answer not in the manual?
Ask a question
Casio CTK-496 Specifications
General
MIDI-keyboard number of keys
61 keys
Interface
USB
DC-in jack
Yes
Dimensions (WxDxH)
956 x 354 x 132 mm
Power requirements
9 V DC
Weight and Dimensions
Weight
3800 g
Related product manuals
Casio CTK-491
49 pages
Casio CTK-451
46 pages
Casio CTK-411
14 pages
Casio CTK-480
18 pages
Casio CTK-450
19 pages
Casio CTK-401
19 pages
Casio CTK-431
19 pages
Casio CTK-485
13 pages
Casio CTK-481
49 pages
Casio CTK-4200
77 pages
Casio CTK-810
71 pages
Casio CTK-550
32 pages
 Loading...