34
Snapshot Tutorial
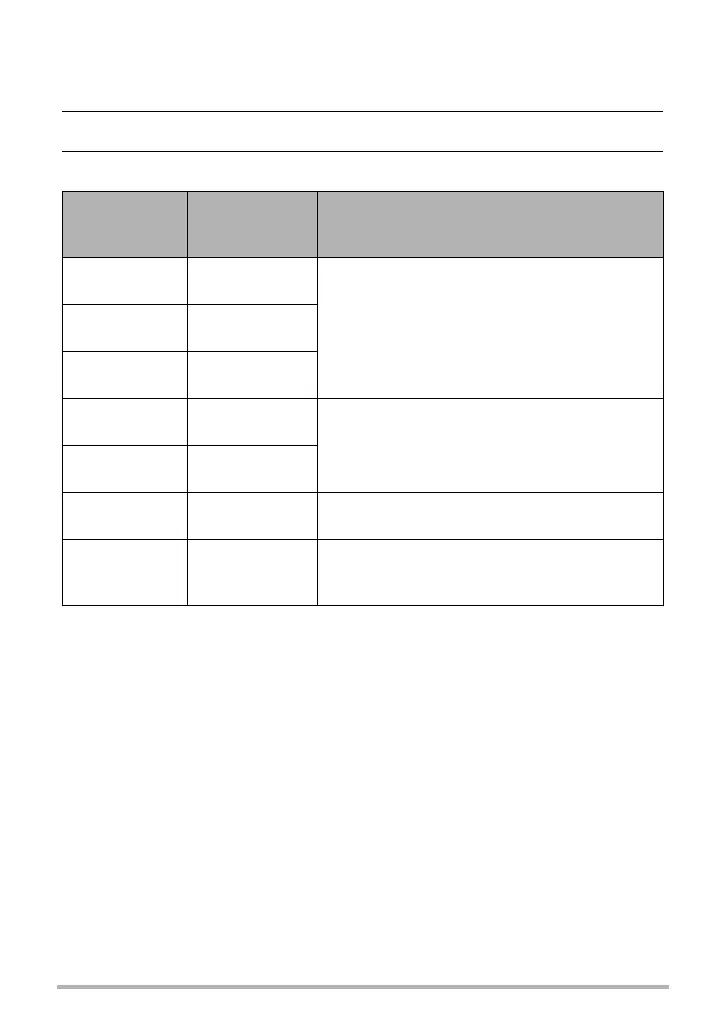
. To select the image size
1. In the REC mode, press [SET].
2. Use [8] and [2] to select the top Control Panel option (Image Size).
3. Use [4] and [6] to select an image size and then press [SET].
• The initial factory default image size setting is “14M”.
• Selecting “3:2” records images with an aspect ratio of 3:2, which matches the
standard aspect ratio of print paper.
• The letters “HDTV” stand for “High Definition Television”. An HDTV screen has an
aspect ratio of 16:9, which makes them wider than the usual 4:3 aspect ratio of
television screens of the past. Your camera can record images that are compatible
with the aspect ratio an HDTV screen.
• You should regard the print paper sizes suggested here as guidelines only (200 dpi
print resolution).
Image Size
(Pixels)
Suggested
Print Size and
Application
Description
14M
(4320
x
3240)
Poster Print
Good detail for better clarity even for images
cropped (page 104) from the original
3:2
(4320
x
2880)
Poster Print
16:9
(4320
x
2432)
HDTV
10M
(3648
x
2736)
Poster Print
Good detail
6M
(2816
x
2112)
A3 Print
3M
(2048
x
1536)
3.5"
x
5" Print
Best when preserving memory capacity is
relatively more important than image quality.
VGA
(640
x
480)
E Mail
Image files are smaller, which is better when
attaching images to e-mail. However, images
are relatively coarser.
 Loading...