12
made to the product will relieve
the manufacturer from all
responsibilities.
• Do not leave anything inside the
carry cot that might reduce its
depth.
• WARNING: This carry cot is only
suitable for use on the CHICCO
strollers fitted with the CLIK CLAK
system.
• Make sure that the carry cot is
correctly attached to the stroller
before placing the child inside.
• Keep the plastic bags away from
children to prevent suffocation
risks.
• Products exposed to direct sun-
light will heat up; let them cool
down before placing a child in-
side.
• The carry cot is not designed for
children to sleep for a long pe-
riod of time: this product is not a
substitute for a cot.
• It is recommended to air the car-
ry cot in case it has been used for
a long time.
• Before carrying or lifting the base
shall be adjusted in the lowest
position.
• Head of the child in the carry cot
should never be lower than the
body of the child.
• WARNING: The restraint sys-
tem must be used only when
transpor ting your child in the car.
• WARNING: The restraint system
must be removed when the pro-
duct is used outside the car.
• Keep the carrycot out of reach of
children when it is not in use.
CLEANING AND MAINTENANCE
CLEANING
Clean the fabric parts with a damp sponge and
neutral detergent. Please refer to the product’s
care label.
Routinely wipe clean plastic parts with a soft
damp cloth.
Always dry the metal parts to prevent the forma-
tion of rust if the carry cot has come into contact
with water.
MAINTENANCE
Lubricate the moving parts only if necessary, with
a light application of a silicone based lubricant.
Always dry the metal parts to prevent the forma-
tion of rust. Do not submerge the carry cot in wa-
ter. Routinely wipe clean plastic parts with a soft
damp cloth. To avoid friction, ensure that the lock-
ing devices of the carry cot and pram are free from
dust or sand. Do not leave the product exposed to
the sun for a long period of time; it may cause the
fabric to fade.
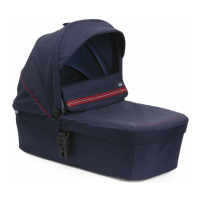
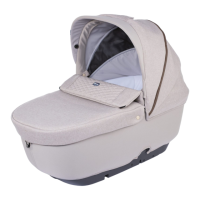
CARRY COT FEATURES
HOOD
The carry cot is equipped with a sun canopy and
windbreaker that can be adjusted to various posi-
tions.
MOUNTING AND REMOVAL
1- Check that the clips located on the end of the
metal arch are properly fastened to the but-
tons located on the fabric part. The buttons are
properly fastened if the two ends of the metal
arch (fig 1) are easily visible.
2- Insert the two metal ends in the B and C sup-
ports located in the central part of the carry cot
until you hear a click (figure 2A); fasten the four
tabs of the rear arch (figure 2 B).
NB: The coupling system is located inside the
plastic B and C supports, the round button on the
supports serve only for removing the hood (see
point 3).
3- To remove the hood, first pull out the 4 tabs of
the rear arch (figure 3A) and then remove the
front arch by pushing the two buttons located
on the base of the locking device (fig. 3B).
WARNING: Improper removal of the hood could
result in the tabs breaking.
HOW TO USE THE HOOD
4- Inside the hood, between the visor and the first
 Loading...