Upgrading Cisco 4500, Cisco 4500-M, Cisco 4700, and Cisco 4700-M Memory 15
Memory Replacement Procedures
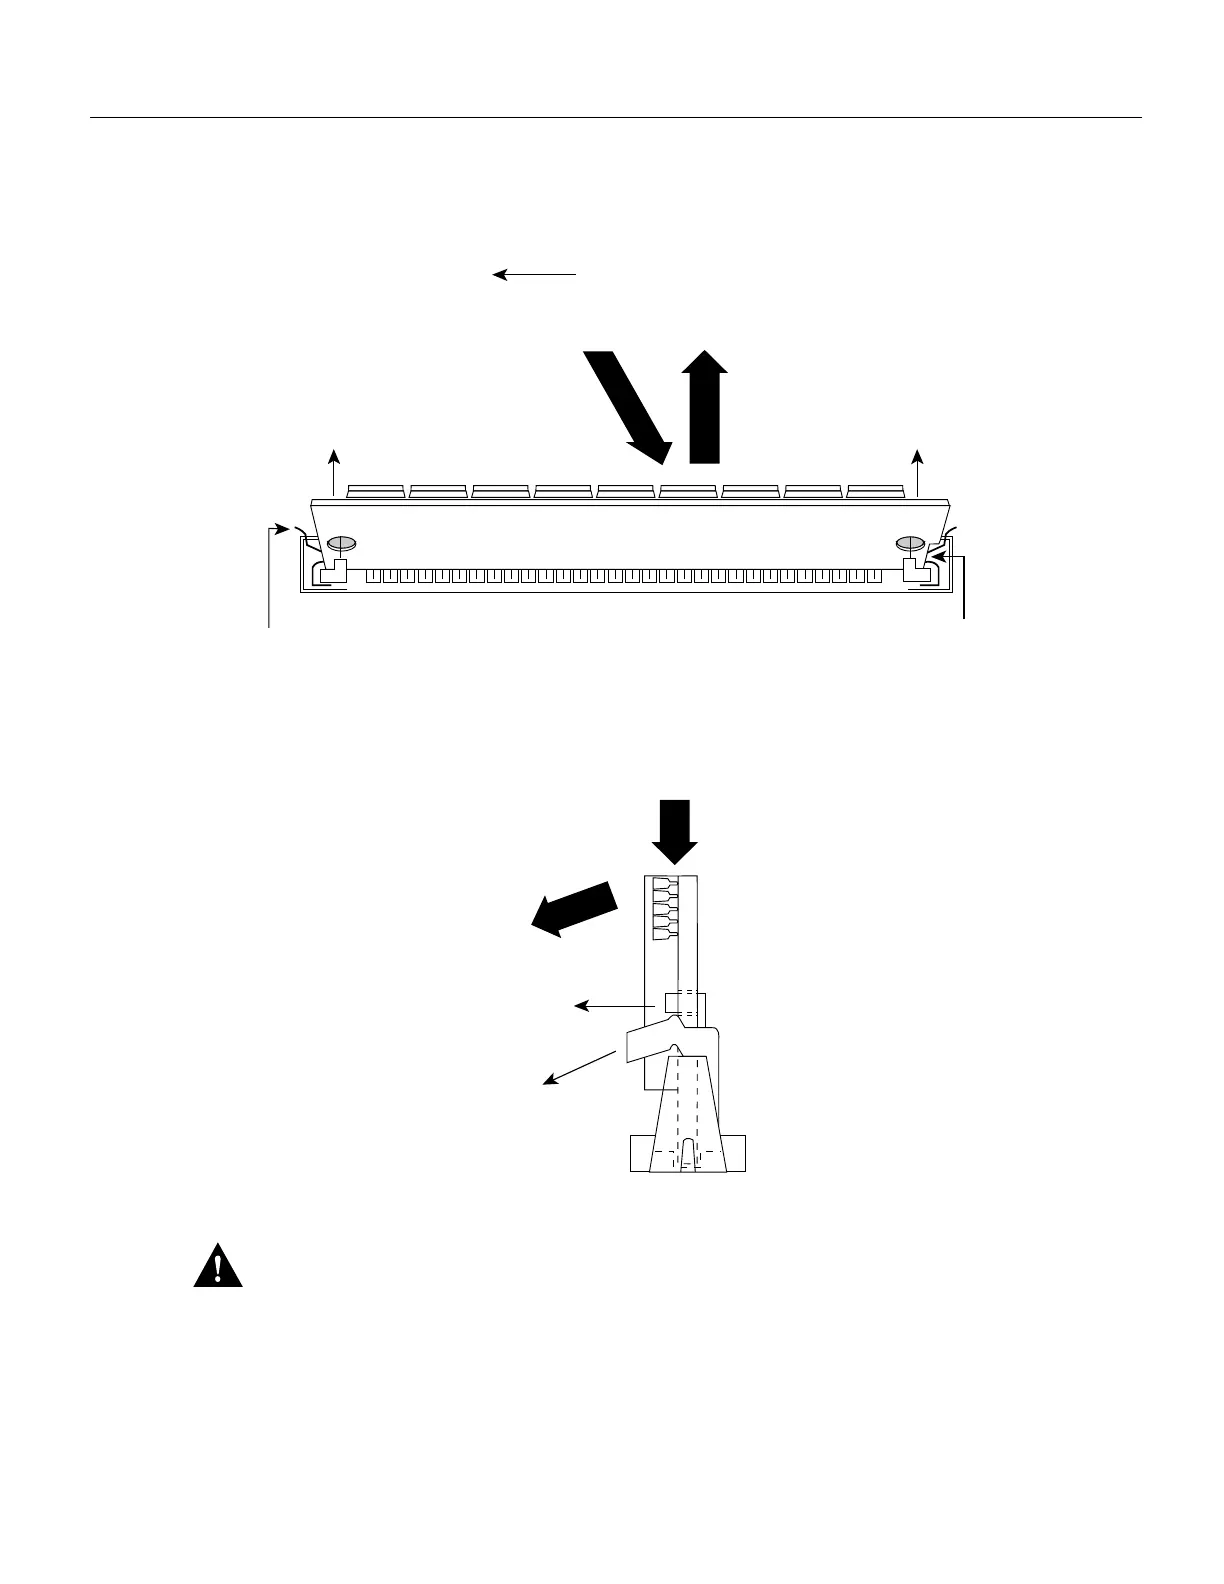
Figure 11 Removing Main Memory SIMMs
Caution
You will feel some resistance, but do not use excessive force on the SIMM and do not
touch the surface components to avoid damaging them.
Step 6 Repeat Step 2 through Step 5 for each main memory SIMM.
If you have completed all SIMM replacement procedures, proceed to the section “Replacing
Network Processor Modules” on page 22.
2. Push the SIMM down and forward.
The socket guide posts
release through the SIMM
holes (on both sides).
3.
Pull the locking spring clips
(on both sides) outward to
enable the SIMM to rock
forward. The SIMM will
not release unless
the clips have cleared
the back of the SIMM.
1.
SIMM
polarization
notch
Top view
Front of the chassis
H1153
2. Push the SIMM down andforward.
Side view
Pull the locking spring clips
outward to enable the SIMM
to rock forward. The SIMM will
not release unless the clips have
cleared the back of the SIMM.
1.
The socket guide posts release
through the SIMM holes
(on both sides).
3.
 Loading...