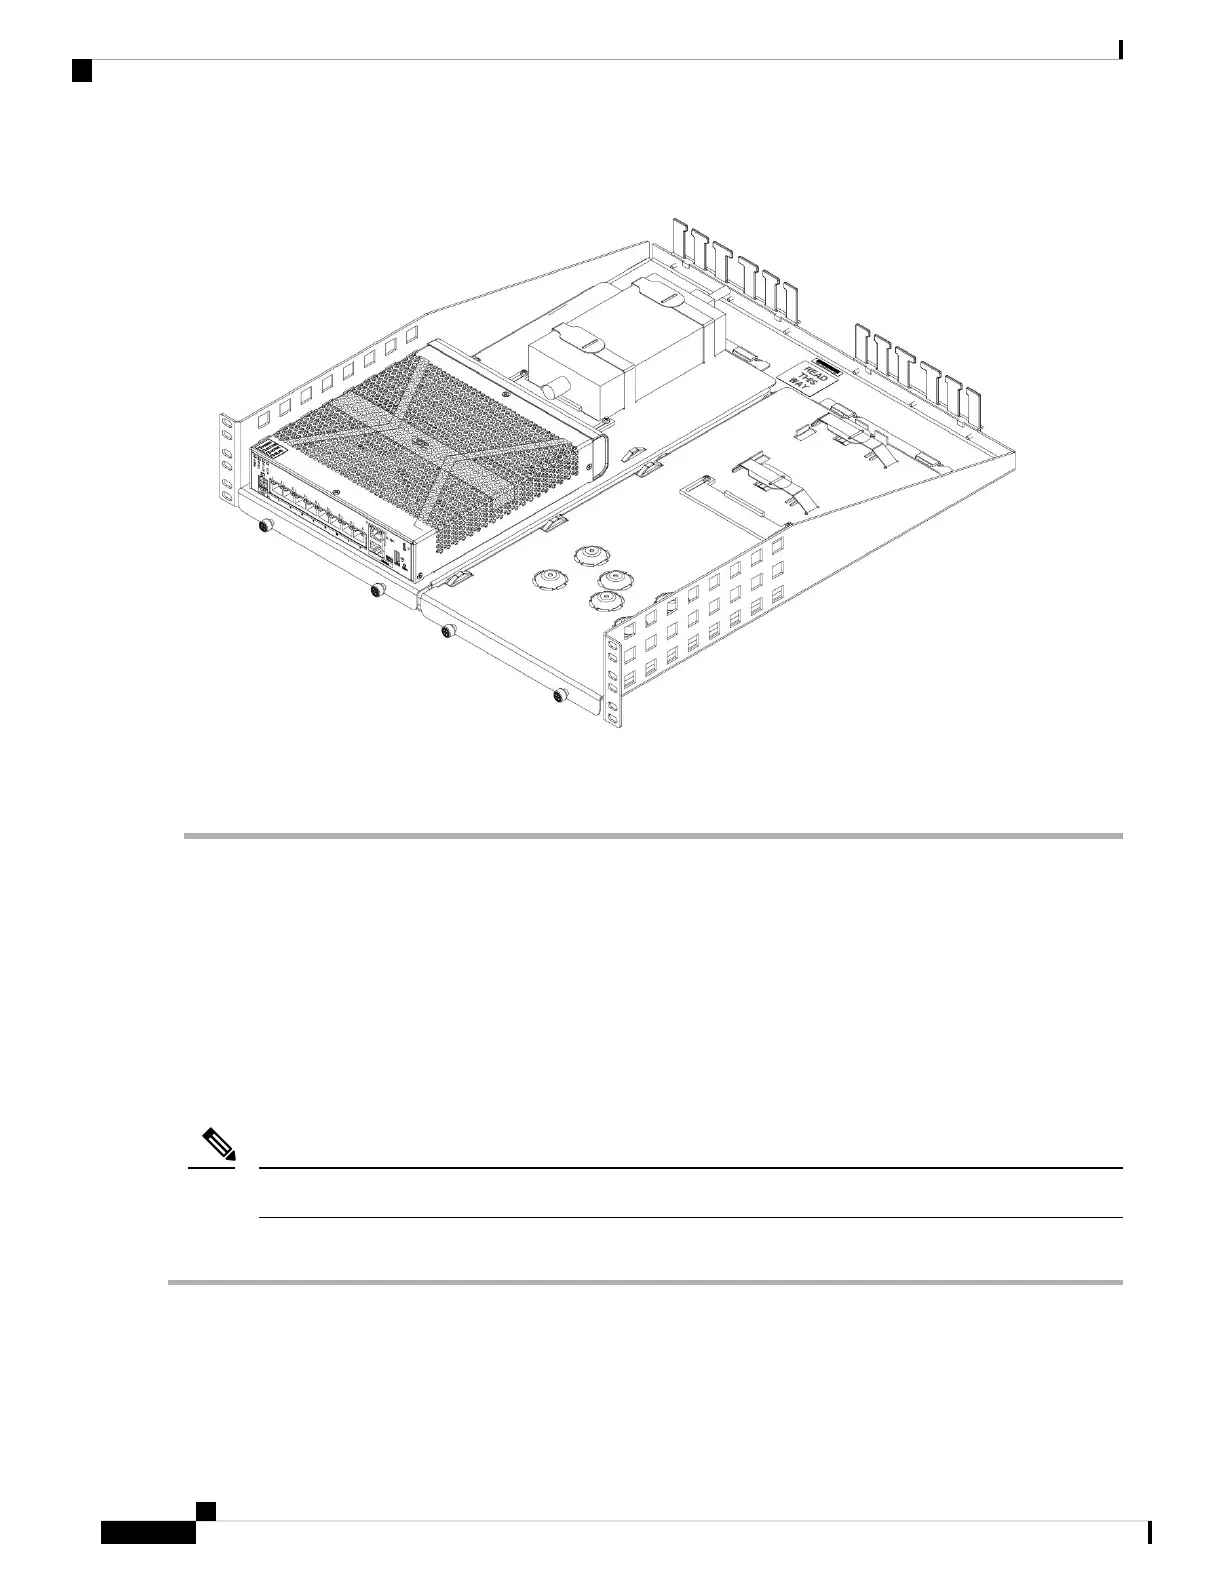
Figure 7: Completed Rack Shelf/Tray Installation
Step 10 Install the sliding-rack tray into your rack using the correct screws (12-24 x 0.75 inch or 10-32 x 0.75 inch) from the
rack-mount kit that fit your rack type.
What to do next
Install the cables according to your default software configuration as described in the Cisco ASA 5506-X
Series Quick Start Guide.
Install the ASA 5506H-X in a DIN Rail
You can use the 7.5 mm thick 45 mm wide top hat DIN rail for the ASA 5506H-X. Secure the DIN rail to the
mounting surface approximately every 7.8 inches (200 mm) and use end-anchors appropriately.
We recommend that you install the ASA 5506H-X on a steel DIN rail for extra stability.
Note
To attach the ASA 5506H-X to a 35 mm wide DIN rail, follow these steps:
Step 1 Attach the DIN rail bracket to the back of the chassis using the four screws provided.
Mount the Chassis
8
Mount the Chassis
Install the ASA 5506H-X in a DIN Rail
 Loading...


