Cisco ASA 5512-X, ASA 5515-X, ASA 5525-X, ASA 5545-X, and ASA 5555-X Quick Start Guide
4. Modify the Initial Configuration for the ASA FirePOWER Module (Optional)
Cisco ASA 5512-X, ASA 5515-X, ASA 5525-X, ASA 5545-X, and ASA 5555-X Quick Start Guide
9
object network obj_any
subnet 0 0
nat (any,outside) dynamic interface
!
http server enable
http 192.168.1.0 255.255.255.0 inside
!
dhcpd address 192.168.1.5-192.168.1.254 inside
dhcpd auto_config outside
dhcpd enable inside
!
logging asdm informational
9. Save the new configuration:
write memory
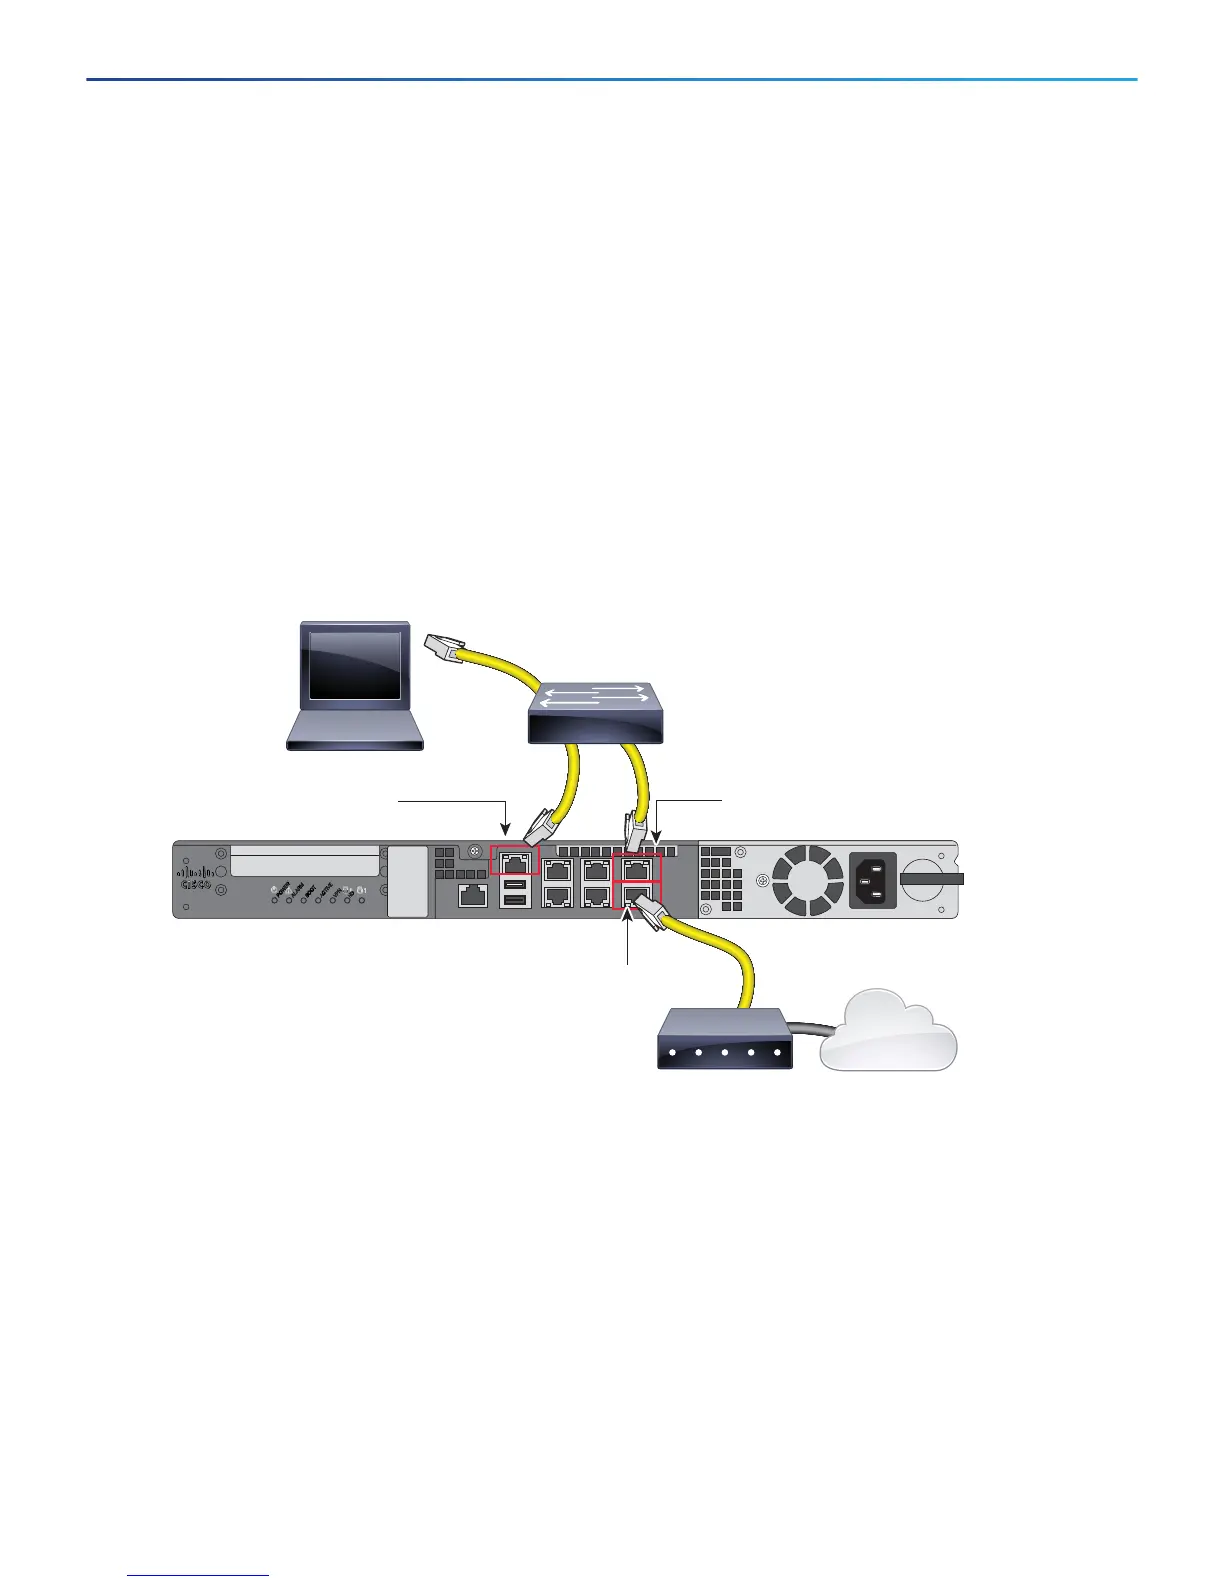
1. Cable the following:
a. Cable the following to a Layer 2 Ethernet switch:
— GigabitEthernet 0/1 interface (inside)
— Management 0/0 interface (for the module)
— Your computer
Note: You can connect inside and management on the same network because the management interface acts like a separate
device that belongs only to the ASA FirePOWER module.
b. Connect the outside GigabitEthernet 0/0 interface to your upstream router or WAN device.
Note: If the cable modem supplies an outside IP address that is on 192.168.1.0/24 or 192.168.10.0/24, then you must change
the ASA configuration to use a different IP address. Interface IP addresses, HTTPS (ASDM) access, and DHCP server settings
can all be changed using the Startup Wizard. If you change the IP address to which you are connected to ASDM, you will be
disconnected when you finish the wizard. You must reconnect to the new IP address.
GigabitEthernet 0/0
outside, DHCP from modem
Management 0/0
192.168.1.2
(Module management)
Layer 2 Switch
WAN Modem
Management Computer
DHCP from ASA: 192.168.1.x
GigabitEthernet 0/1
inside, 192.168.1.1
(ASA management; Gateway)
Internet
 Loading...


