4
Cisco UCS C240 M3 NEBS Server Service Note
OL-28629-01
Features Specific to the Cisco UCS C240 M3 NEBS Server
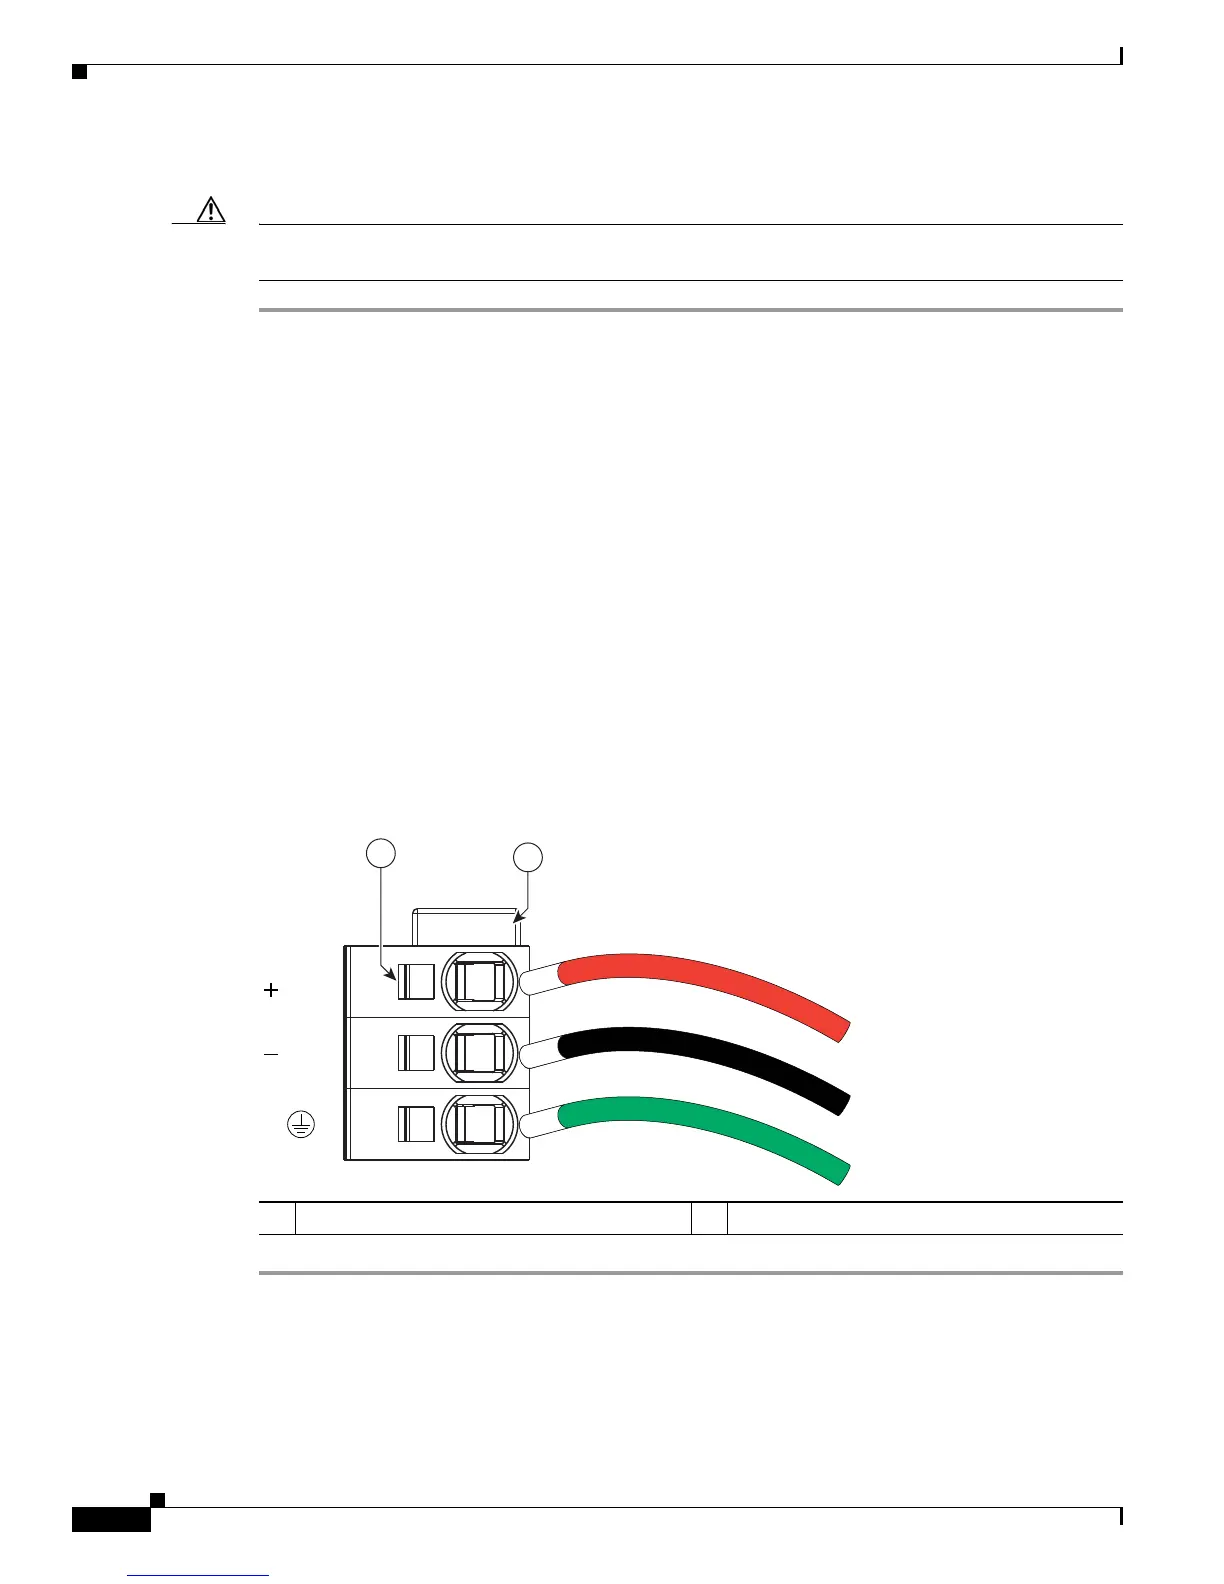
Use the following procedure to connect wires to the DC power supply connector:
Caution Before beginning this wiring procedure, turn off the DC power source from your facility’s circuit breaker
to avoid electric shock hazard.
Step 1 Turn off the DC power source from your facility’s circuit breaker to avoid electric shock hazard.
Step 2 Remove the DC power connector block from the power supply. (The spare PID for this connector is
UCSC-CONN-930WDC=.)
To release the connector block from the power supply, push the orange plastic button on the top of the
connector inward toward the power supply and pull the connector block out.
Step 3 Strip 15mm (.59 inches) of insulation off the DC wires that you will use.
Step 4 Orient the connector as shown in Figure 1-2, with the orange plastic button toward the top.
Step 5 Use a small screwdriver to depress the spring-loaded wire retainer lever on the lower spring-cage wire
connector. Insert your green (ground) wire into the aperture and then release the lever.
Step 6 Use a small screwdriver to depress the wire retainer lever on the middle spring-cage wire connector.
Insert your black (DC negative) wire into the aperture and then release the lever.
Step 7 Use a small screwdriver to depress the wire retainer lever on the upper spring-cage wire connector. Insert
your red (DC positive) wire into the aperture and then release the lever.
Step 8 Insert the connector block back into the power supply. Make sure that your red (DC positive) wire aligns
with the power supply label, “+ DC”.
Figure 1-2 930 W, –48 VDC Power Supply Connector Block
1 Wire retainer lever 2 Orange plastic button on top of the connector
 Loading...