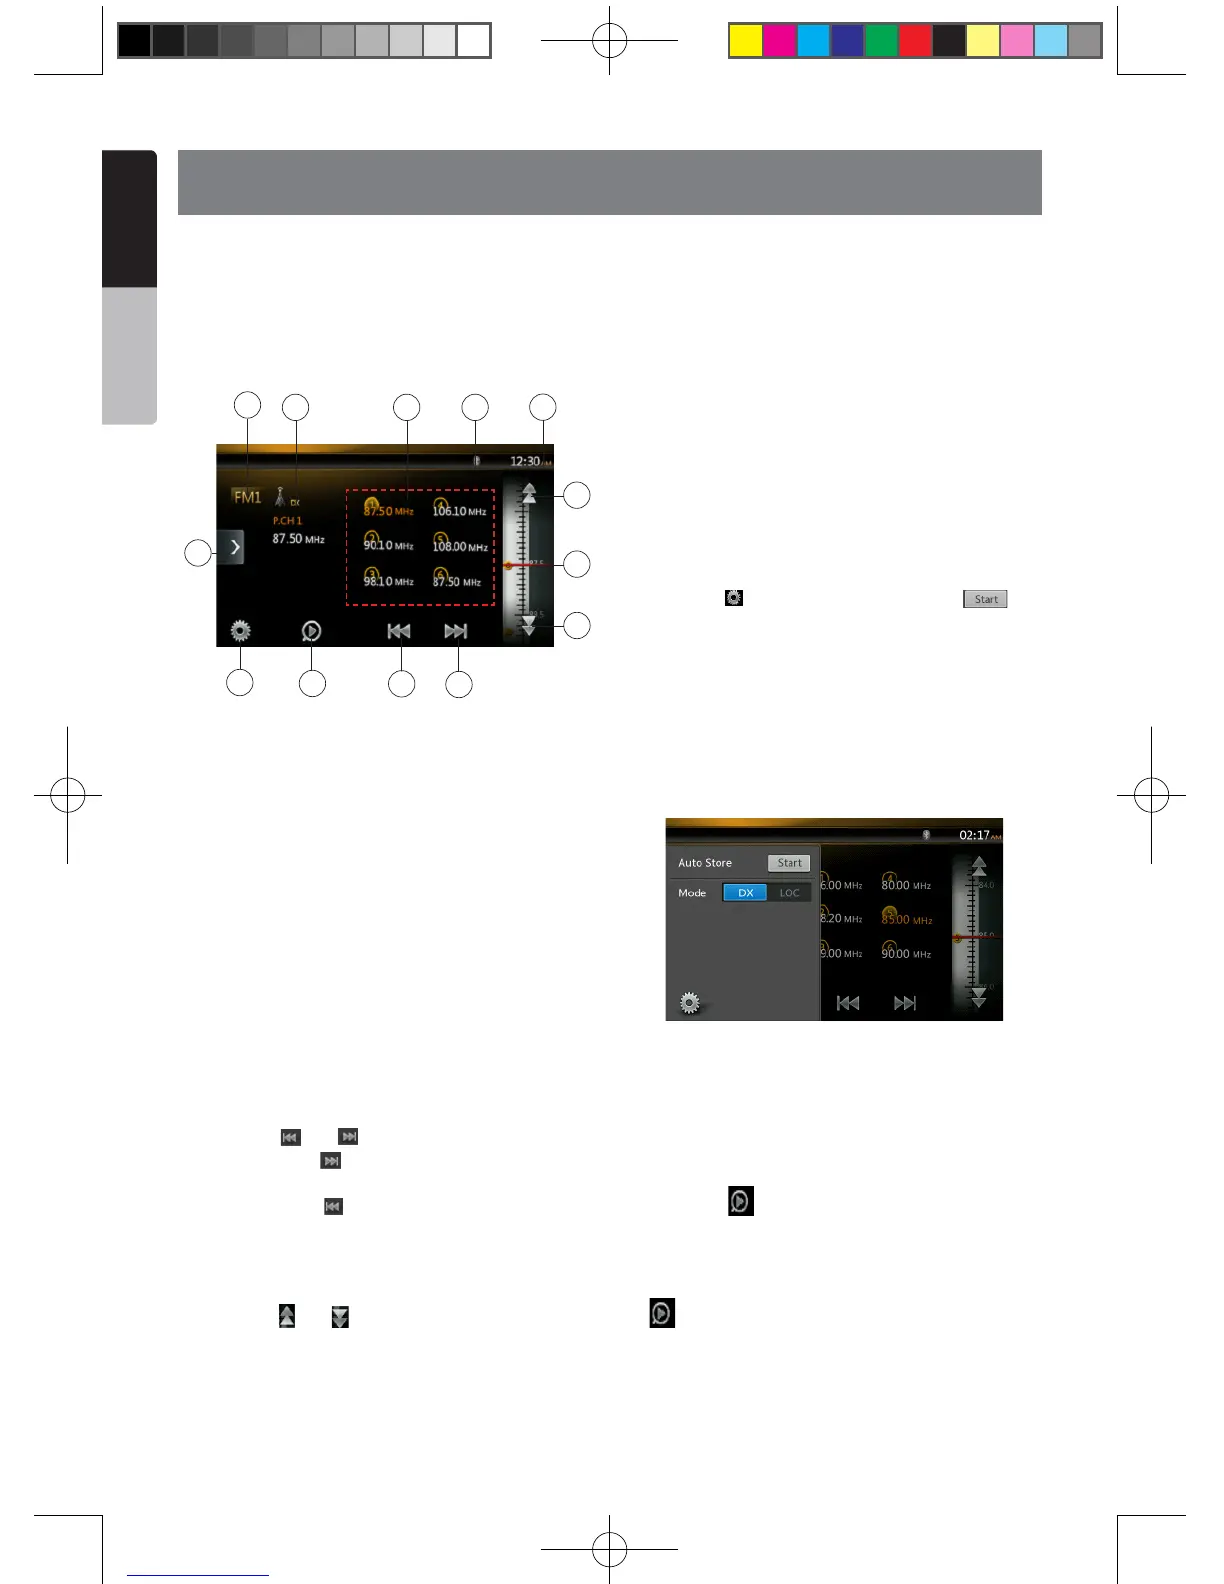
14. Tuner Operations
Listening to the Tuner
1. Touch the Tuner button on the Main menu display.
The tuner mode screen is displayed.
2. Press the [FM1/2/3/AM] button to select the radio
band. Each time the button is pressed, the radio
reception band changes in the following order: FM1-
>FM2->FM3->AM -> FM1...
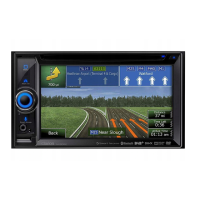
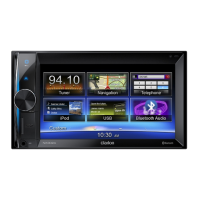
1. Preset Scan Button
2. Seek Down
3. Seek Up
4. Step Down
5. Step Up
6. Frequencies Display
7. System time
8. Bluetooth status
9. Preset List
10. DX/Local Display
11. Band Button
12. Shortcut Button
13. Option Button
Seek Tuning
1. Press the [FM1/2/3/AM] button to select the radio
band (FM or AM).
2. Touch the [ ] or [ ] button
• When Press the [ ] button, the station is searched
in the direction of higher frequency.
• When Press the [ ] button, the station is searched
in the direction of lower frequency.
Step Tuning
1. Press the [FM1/2/3/AM] button to select the radio
band (FM or AM).
2. Touch the [ ] or [ ] button in frequency menu to
tune up or down by one step.
Recalling a preset station
1. Press the [FM1/2/3/AM] button to select the desire
band (FM or AM) on the tuner.
2. Press the preset station (1 to 6) on Preset List.
Manual memory
1. Touch the desired Band key to select the band you
wish to store.
2. Tune to a station you want to store using the seek
tuning, step tuning, or preset tuning.
3. Touch and hold the desired Preset key you want to
store for about 3 seconds.
Auto Store
The Auto Store is a function for storing up to 6 stations
that are automatically searched in sequentially. If the
number of receivable stations cannot reach to 6, the
previous stored station remains.
1. Touch the [FM1/2/3/AM] button to select the
desired band. (FM or AM)
2. Press the [ ] button, and then press the [ ]
button to start the Auto Store.
A beep sounds and the stations with good reception
are stored automatically to the preset list.
Notes:
1. After auto store, the previous stored stations will be
overwritten.
2. The unit has 4 bands, but FM3 and AM can store by
AS function.
Preset Scan
The Preset Scan receives the stations stored in the
preset memory in order. This function is useful when
searching for the desired station in memory.
1. Touch the [FM1/2/3/AM] Button to select the desired
band. (FM or AM)
2. Touch the [ ] button to start the Preset Scan.
The unit starts scanning each station for 10 seconds
sequentially. But the station stored is not a valid
station; the scanning time is only 2 seconds.
3. When the desired station is tuned in, touch the
[ ] button again to stay in that station.
DX/Local Setting
The DX / Local setting changes the tuner sensitivity in
order to separate closely spaced stations. This feature
is useful in areas that have many radio stations in
close proximity.
113
12
7
11
8910
2
3
4
6
5
NX403A_Usermanual_EN.indd 36 2013-7-11 16:33:48
 Loading...