English
GREAT BRITAIN •
for consumer contact, please visit www.clasohlson.co.uk and click on customer service.
Ver. 201104
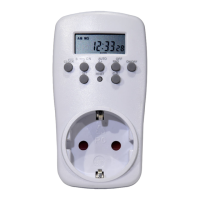
Digital Timer Switch
Art.no 18-2029/18-2175 Model EMT757-UK
36-2901/36-3979 EMT757
Please read theentire instruction manual before use and save it for future reference. Wereserve
theright for any errors in text or images and for making any necessary technical changes to this
document. Ifyou should have any questions concerning technical problems please contact our
Customer Services.
1. Productdescription
• Digital timer switch with 20 on/off operations.
• Countdown.
• Random function (random on and off).
• LCD display.
• Safety shutters
Buttons and functions
6. Use[ ▲+ ] and [ ▼- ] to set theminutes.
7. Press[ CLOCK ] to return to normal mode.
2.3 Setting Summer Time
Press [ CLOCK ] and [ ▼- ] at thesame time to switch between Summer Time and standard time.
“S” is shown on thedisplay to indicate Summer Time.
2.4 Setting programmes
1. Makesure that thedisplay is in normal mode.
2. Press[ ON/OFF ] to set thetimer switch to AUTO (“auto” appears at thebottom of thedisplay).
3. Press[ ▲+ ] to enter theprogramming mode (“1ON” appears in thebottom left corner of
thedisplay). “1” indicates programme 1 of 20.
4. Settheon/off operation for programme 1 (where “ON” is theactivation time and “OFF” is
thedeactivation time).
a. Press [ SET ].
b. All thedays of theweek flash on thedisplay (MO TU WE TH FR SA SU). Press[ SET ]
to confirm that theprogramme is for every day of theweek. Theactivation days can be
altered as desired*.
c. The hour setting flashes on thedisplay. Use [ ▲+ ] and [ ▼- ] to set thehour of
activation. Push[ SET ] to confirm.
d. The minute setting flashes on thedisplay. Use [ ▲+ ] and [ ▼- ] to set theminutes.
Push[ SET ] to confirm.
e. Press [ ▲+ ] to programme thedeactivation time, “1OFF” appears in thebottom left
corner of thedisplay. Setthetime in thesame way as you did earlier.
f. Continue in thesame way for all therequired on/off operations (up to 20 can
beprogrammed).
* Use [ ▲+ ] to change thedays of theweek before confirming by pressing [ SET ]. Thefollowing
combinations of days can be chosen:
• MO TU WE TH FR SA SU (every day of theweek)
• MO → TU → WE → TH → FR → SA → SU (choose one of thedays)
• MO WE FR (Monday, Wednesday and Friday)
• TU TH SA (Tuesday, Thursday and Saturday)
• SA SU (Saturday and Sunday)
• MO TU WE (Monday to Wednesday)
• TH FR SA (Thursday to Saturday)
• MO TU WE TH FR (Monday to Friday)
• MO TU WE TH FR (Monday to Saturday)
To delete individual programmes
Press [ ▲+ ] and [ ▼- ] to come to theprogramme which is to be deleted. Thenpress [ ON/OFF ]
to delete, thedisplay will show - - : - - when theprogramme has been deleted. Press[ CLOCK ]
to confirm thedeletion.
2.5 Display programmed times
Use [ ▲+ ] and [ ▼- ] to browse theprogrammed times.
2.6 Countdown function
Set thecountdown time
The countdown interval is from 1 second to 99 hours, 59 minutes and 59 seconds.
1. Withthedisplay in normal mode, press [ ▼- ] to enter theprogramming mode for
thecountdown function. “d ON” or “d OFF” will appear on thedisplay. “d” indicates that
thecountdown function is activated.
2. Press[ SET ] until “ON” or “OFF” flashes on thedisplay.
3. Use[ ▲+ ] and [ ▼- ] to switch between ON or OFF.
ON if thetimer switch is e.g. to turn alight on after thecountdown.
OFF if thetimer switch is e.g. to turn alight off after thecountdown.
4. Push[ SET ] to confirm. Thehour display will start to flash.
5. Use[ ▲+ ] and [ ▼- ] to set thehours.
6. Push[ SET ] to confirm. Theminutes display will begin flashing.
7. Use[ ▲+ ] and [ ▼- ] to set theminutes.
8. Push[ SET ] to confirm. Theseconds flash.
9. Use[ ▲+ ] and [ ▼- ] to set theseconds.
10. Push[ SET ] to confirm and then push [ CLOCK ] to return to normal mode.
2.7 Starting thecountdown
1. Setthecountdown time according to theinstructions above.
2. Connectthedevice to thetimer switch and connect thetimer switch to awall socket.
3. Press[ ON/OFF ] to set thetimer switch in AUTO mode.
4. Press[ CD ] to begin thecountdown. “d ON” or “d OFF” flashes on thedisplay depending
on what has been programmed.
5. Push[ CD ] again to start thecountdown function.
6. Whenthecountdown has come to 00:00:00, thecontrolled device (e.g. lamp) turns on or
off depending on what has been programmed.
2.8 Random on and off
1. Connectthedevice to thetimer switch and connect thetimer switch to awall socket.
2. Press[ ON/OFF ] to set thetimer switch to AUTO mode.
3. Push[ RND ], “r OFF” flashes on thedisplay. The voltage is now switched off for
26 to 42 minutes before it comes on again at random. Thevoltage will then be on for
10 to 26 minutes.
4. Todeactivate thefunction, press [ RND ] once again. “r OFF” or “r ON” will now disappear
from thedisplay.
Note: The random on/off function does not work continuously:
it only works between theprogrammed on and off times.
2.9 Turning theswitch on and off manually
Push [ ON/OFF ] to manually activate or deactivate thetimer switch.
• ON – The voltage turns on regardless of thesetting and theconnected device can be used.
• AUTO – The timer switch operates in accordance with theprogrammed times.
• OFF – The voltage turns off and theconnected device cannot be used.
3. Safety
• The timer switch is intended for use indoors and may not be used outdoors!
• Devices connected to thetimer switch must be constructed for thesame voltage
specified below.
• The built-in batteries are fully charged after approx. 2 hours use.
4. Troubleshooting
Display is blank:
Plug thetimer switch into awall socket and press [ RESET ] to reset it.
5. Disposal
Follow local ordinances when disposing of this product.
If you are unsure how to proceed, contact your local authority.
6. Specifications
Mains supply 230 V AC, 50 Hz
Max load 2000 W (8.7 A)
Operating temperature 0–55 °C
Protection class IP20
Minimum time interval 1 minute
1. LCD display
2. [ ▼- ] – Adjusts time, week, and
program group.
3. “S”– Press [ CLOCK ] and
[ ▼- ] simultaneously to switch
between Summer Time and
standard time.
4. [ CLOCK ] – Press to return to
normal mode (time).
5. [ SET ] – Sets time and week day
and also confirms settings.
6. [ ▲+ ] – Adjusts time, week, and
program group.
7. [ RND ] – Randomly activates on
and off when thetimer switch is
in AUTO mode.
8. [ ON/OFF ] – Changes function
on thetimer switch: ON, AUTO
or OFF.
9. [ CD ] – Starts or stops
thecountdown function when
thetimer switch is in AUTO mode.
10. [ RESET ] – Press one time to
reset thetimer switch to factory
settings.
11. Connectorfor plug.
2. Operation
2.1 Time display
The clock is showing 12 or 24 hour display. Tochange between 12 and 24 hour display, press
and hold [ CLOCK ] until thetime format on thedisplay changes.
• In 12-hour display, either “AM” or “PM” is shown on thedisplay.
• In 24-hour display, neither “AM” nor “PM” is shown on thedisplay.
2.2 Setting thetime
Note: The timer switch must be in normal (time display) mode in order for time and day settings
to be made. Press[ CLOCK ] to return to normal mode.
1. Pressand hold [ SET ] until theweek indicator flashes.
2. Press[ ▲+ ] to change theday of theweek forwards, or [ ▲- ] to change it backwards.
Theselected week day is shown on thedisplay.
3. Push[ SET ] to confirm. Thehour setting flashes on thedisplay
4. Use[ ▲+ ] and [ ▼- ] to set thehours.
5. Push[ SET ] to confirm. Theminute setting flashes on thedisplay.
1
2
3
4
5
6
7
8
9
10
11