5 Clover One Starter Kit Quick Start Guide
English 6
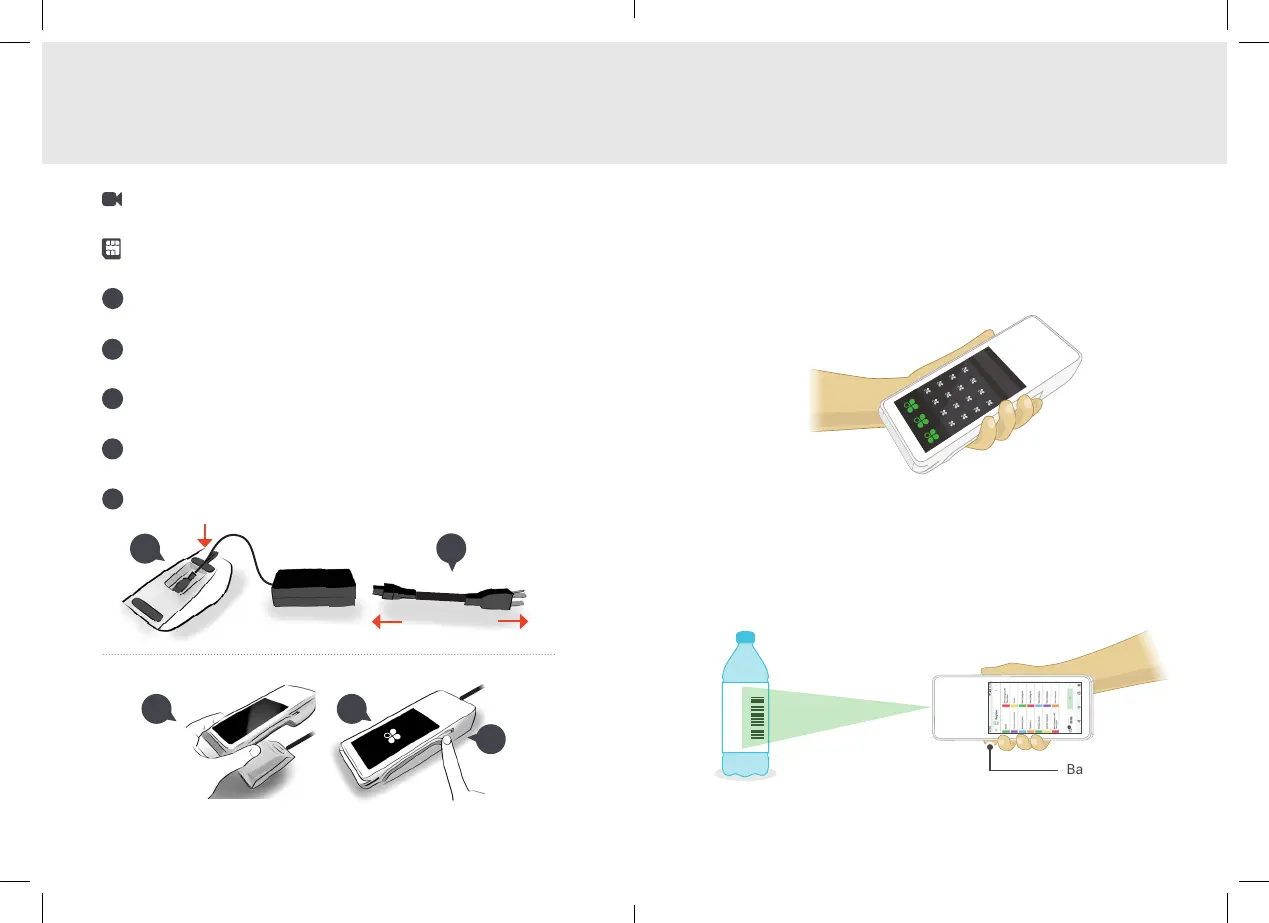
Set Up your Clover One Recommended Usage
Clover One should be held with the chip-card reader facing
toward you and the printer pointed away from you. We recom-
mend holding it with your non-dominant hand and using your
dominant hand to tap the screen and take payment.
Barcode Scanning
Point the scanner toward the barcode on the item or the
receipt and hold down the barcode trigger. You will get the best
results by holding the device 4–10 inches (10cm–25cm) from
the item.
Barcode trigger
Hand Holding Position
(Only for EU) Install the micro SIM card. See page 8 for
more details. SIM cards have been pre-installed for US.
Plug the power brick into the charging cradle and press the
cord into the rubber base so that it is ush on the counter.
Attach the power cord to the power brick and plug the
power cord into a power source.
Place the device on the charging cradle. If it's properly
connected, a battery icon will appear on the screen.
While it charges, press and hold the power button until the
Clover logo appears on the screen.
Follow the on-screen instructions to continue setting up.
1
2
1
2
4
3
5
3
4
5
Video set up: clover.com/setup
EU: eu.clover.com/setup
 Loading...