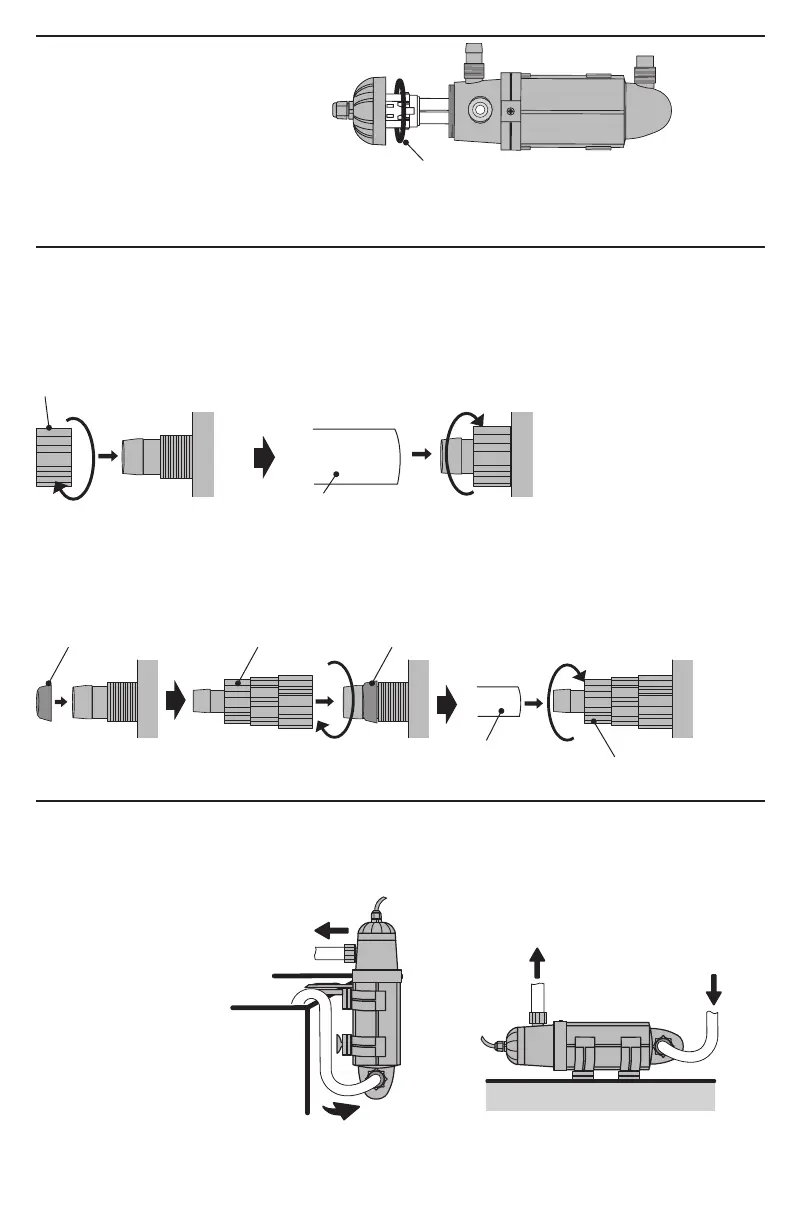
Make sure that the flat O-ring gasket is
properly positioned inside the threaded
cap (already installed in unit). Screw the
threaded cap tightly back into place.
3. Reassembly
Hose barb adapter installation.
4. Attaching the hose lock nuts
5. Installing the Turbo-Twist
➀ Position the hose lock nuts on the
hose-barb inlet and outlet.
Hang-on Positioning
Hang the unit using the Turbo-Twist
bracket and suction cup on the
outside of the aquarium. Adjust
the tank bracket to secure the
Turbo-Twist UV Sterilizer.
Horizontal Positioning
Attach Turbo-Twist bracket with screws
on a fixed surface.
➀ Place the O-ring on hose
barb inlet/outlet, watching
for taper orientation.
➁ Hand tighten the hose
barb adapter onto the
Turbo-Twist.
➂ Use flexible tubing to connect the sterilizer
to the water supply. Turn the hose lock nut
counter-clockwise to tighten flexible
tubing onto the hose barb.
➁ Use flexible tubing (not supplied) to connect the sterilizer
to the water supply. Turn the hose lock nut counter-
clockwise to tighten flexible tubing onto the hose barb.
Hose lock nuts require only hand tightening.
Note: The plug and cord should be turned together
when screwing the threaded cap back into place.
Note: Do not use
O-ring when larger
hose barbs are
being used.
Note: Water will leak if the O-ring is not in place.
HOSE LOCK NUT
O-RING O-RINGHOSE BARB ADAPTER
SMALL HOSE LOCK NUT
FLEXIBLE
TUBING
AQUARIUM
FLEXIBLE
TUBING
O-RING GASKET
4
 Loading...