EasyManua.ls Logo

Craftsman 917.374362 User Manual

Craftsman 917.374362
52 pages
To Next Page IconTo Next Page
To Previous Page IconTo Previous Page
Page #30 background imageLoading...
Page #30 background image
PARA VACIAR EL RECOGEDOR DE
CO:SPED
Vacie el recogedor de cesped cuando los
recortes son visibles en la ventana Ilena del
indicador de bolsa liana.
1. Levante el recogedor de cesped usando el
mango del bastidor.
2. Remueva el recogedor de cesped, con los
recortes, de debajo del mango de la sega-
dora.
3. Vacie los recortes de la bolsa.
AVlSO: No arrastre la bolsa cuando la vacie;
se producira un desgaste innecesario.
Mango det
bastidor
del
edor
de cesped
ANTES DE HACER
ARRANCAR EL MOTOR
AGREGUE ACEITE
Su segadora fue enviada sin aceite en el motor.
Para el tipo y el grado del aceite a utilizar, vea
el "MOTOR" en la secci6n del Mantenimiento
de este manual.
,_PRECAUCl6N: NO sobrellene el motor con
aceite, o fumara pesa demante del silenciador
cuando Io valla a arrancar.
1. AsegOrese que la segadora este nivelada.
2. Remueva la varila medidora de aceite del
tubo de desarga de aceite.
3. Usted recibe un envase de aceite con la
unidad. Vierta lentamente el envase entero
de aceite en el tubo de relleno del motor.
AVlSO: El terraplen inicial del aceite requiere
solamente 18 onzas debido al aceite residual
en el motor de la prueba de calidad de 100%
del fabricante. AI cambiar el aceite puede
necesitar 20 onzas.
4. Inserte y apriete la varilla medidora de
aceite.
IMPORTANTE:
Revise el nivel del aceite antes de cada uso.
Agregue aceite si es necesario. Llene hasta
la linea de Ileno en la varilla medidora de
nivel.
Cambie el aceite despues de 25 horas de
operaci6n o una vez por temporada. Puede
necesitar cambiar el aceite mas a menudo
cuando las condiciones son polvorosas o su-
cias. Vea "PARA CAMBIAR EL ACEITE DEL
MOTOR" en la seccion de Mantenimiento de
este manual.
AGREGUE GASOLINA
Llene el estanque de combustible hasta la
parte inferior del cuello de relleno del es-
tanque de gasolina. No Io Ilene demasiado.
Use gasolina regular, sin plomo, nueva y lim-
pia con el minimo de 87 octanos. No mezcle
el aceite con la gasolina. Para asegurar
que la gasolina utilizada sea fresca compre
estanques los cuales puedan ser utilizados
durante los primeros 30 dias.
PRECAUClON: Limpie el aceite o el
combustible derramado. No almacene, derrame
o use gasolina cerca de una llama expuesta.
_I_,PRECAUCI(DN: Los combustibles
mezclados con alcohol (conocidos como
gasohol, o el uso de etanol o metanol) pueden
atraer la humedad, la que conduce a la
separaci6n y formaci6n de acidos durante el
almacenamiento. La gasolina acidica puede
dafiar el sistema del combustible de un motor
durante el almacenamiento. Para evitar los
problemas con el motor, se debe vaciar el
sistema del combustible antes de guardarlo
por un periodo de 30 dias o mas. Vacie el
estanque del combustible, haga arrancar el
motor y hagalo funcionar hasta que las lineas
del combustible y el carburador queden vacios.
La pr6xima temporada use combustible nuevo.
Vea las Instrucciones Para El Almacenamiento
para mas informaci6n. Nunca use productos de
limpieza para el motor o para el carburador en
el estanque del combustible pues se pueden
producir dafios permanentes.
Tapa del
deposito de
aceite
Tapa del
rellenador
de
gasolina
PARA PARAR EL MOTOR
Para parar el motor, suelte la barra de con-
troles que exigen la presencia del operador.
PARA HACER ARRANCAR EL MOTOR
AVISO: Debido alas capas protectoras del mo-
tor, una cantidad pequefia de humo puede es-
tar presente durante el uso inicial del producto
y se debe considerar normal.
1. Para hacer arrancar un motor fdo, empuje
el cebador tres (3) veces antes de tratarlo.
Empuje firmemente. Este paso normal-
mente no es necesario cuando se hace
arrancar un motor que ya ha estado funcio-
nando pot unos cuantos minutos.
2. Sujete la barra de control que exige la
presencia del operador abajo en el mango y
gire la Ilave para el arranque electrico en el
sentido de las manillas del reloj para hacer
arrancar el motor.3O
Question and Answer IconNeed help?

Do you have a question about the Craftsman 917.374362 and is the answer not in the manual?

Craftsman 917.374362 Specifications

General IconGeneral
BrandCraftsman
Model917.374362
CategoryLawn Mower
LanguageEnglish

Summary

Warranty Information

2-Year Full Warranty Coverage

Details the manufacturer's warranty coverage for defects in material or workmanship.

Safety Rules and Precautions

General Safety Warnings

Highlights the dangers of the cutting machine and the importance of following instructions.

Preventing Accidental Starting

Instructs on disconnecting the spark plug wire to prevent accidental starts during service.

California Emissions Hazard Warning

Warns about cancer and reproductive harm chemicals in engine exhaust.

Battery Lead Compound Warning

Alerts to lead and lead compounds in battery components known to cause harm.

Hot Surface Burn Hazard

Warns about hot muffler and engine parts causing severe burns upon contact.

Operational Guidelines

General Operation and Safety

Safe use instructions, avoiding moving parts, clearing area, and proper footwear.

Slope Operation Safety

Guidelines for mowing on slopes, emphasizing caution and proper technique.

Child Safety Awareness

Emphasizes keeping children away from the mowing area for their safety.

Gasoline Handling Safety

Critical safety instructions for handling flammable gasoline safely.

Gasoline Handling and General Service

Refueling Safety Procedures

Detailed steps for safe refueling, including container placement and nozzle contact.

Routine Maintenance and Checks

Covers general service tasks like checking fasteners, cleaning, and safety device inspection.

Spark Arrester Requirement

Mentions the requirement for a spark arrester in certain areas due to law.

Accessories and Maintenance

Available Mower Accessories

Lists accessories available for the lawn mower, not shipped with the unit.

Maintenance Components Overview

Shows images of various maintenance parts like filters, plugs, belts, and oil.

Assembly and Pre-Operation

Removing Mower from Carton

Step-by-step instructions for unpacking the lawn mower from its shipping carton.

Unfolding the Handle

Guidance on safely unfolding and setting up the mower's handle for operation.

Assembly and Preparation

Grass Catcher Assembly

Instructions for putting together the grass catcher bag and frame.

Battery Charging Procedure

Steps for charging the lawn mower battery before first use and for storage.

Attachment Conversion Reference

Refers to the Operation section for converting the mower for mulching or discharging.

Operation and Controls

Lawn Mower Controls Overview

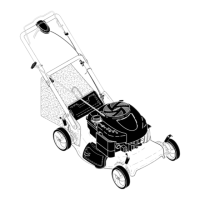
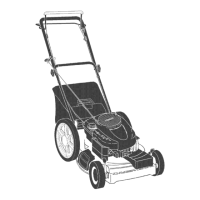
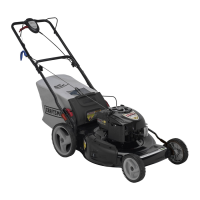
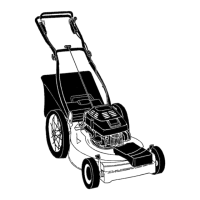
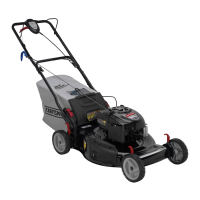
Identifies and explains the function of key controls and safety features on the mower.

Safety Symbols Explained

Illustrates and defines common symbols found on the lawn mower and manual.

CPSC Safety Compliance

States that the mower meets Consumer Product Safety Commission standards.

Using Your Lawn Mower

Engine Speed and Control Bar

Explains factory-set engine speed and the function of the operator presence control bar.

Drive Control System Operation

Details how to engage, disengage, and adjust the self-propelling drive control.

Adjusting Cutting Height

Provides instructions for adjusting the mower's cutting height for different lawn conditions.

Mower Conversion

Rear Bagging Setup

Instructions for attaching the grass catcher for rear bagging.

Side Discharging Setup

Steps for setting up the mower for side discharge operation.

Conversion Mode Summary

A quick reference guide for converting the mower to different modes.

Engine Startup Procedures

Grass Catcher Emptying

Instructions on when and how to empty the grass catcher.

Adding Engine Oil and Gasoline

Details on checking and adding the correct type and amount of oil and gasoline.

Starting and Stopping the Engine

Procedures for safely stopping and starting the lawn mower engine.

Mowing Best Practices

General Mowing Tips

Tips for efficient and safe mowing, including blade usage and cleaning.

Mulching Mowing Techniques

Recommendations for optimal mulching, including housing cleanliness and cutting techniques.

Maintenance and Lubrication

Maintenance Schedule Overview

A chart detailing maintenance checks and tasks based on usage frequency.

Lubrication Chart and Guidelines

Visual guide and recommendations for lubricating mower components.

Tire, Wheel, and Blade Maintenance

Tire and Drive Wheel Care

Instructions for inspecting and cleaning tires and drive wheels.

Blade Removal, Installation, and Sharpening

Procedures for safely removing, replacing, installing, and sharpening the mower blade.

Component Maintenance

Grass Catcher and Gear Case Care

Instructions for maintaining the grass catcher and gear case.

Engine Oil and Air Filter Service

Details on draining and refilling engine oil and servicing the air filter.

Cleaning and Component Checks

Muffler, Spark Plug, and Housing Cleaning

Information on inspecting the muffler, replacing the spark plug, and cleaning the mower.

Water Washout Feature Usage

Instructions for using the water washout feature to clean the mower's underside.

Drive Cover Cleaning

Guidance on cleaning the underside of the drive cover.

Service and Adjustments

Drive Belt Replacement

Procedures for removing and replacing the mower's drive belt.

Handle Height Adjustment

Instructions for adjusting the handle height for operator comfort.

Engine and Storage Preparation

Engine Speed and Carburetor Details

Explains factory-set engine speed and that the carburetor is not adjustable.

Mower and Handle Storage Procedures

Steps for cleaning, lubricating, and folding the mower for long-term storage.

Engine Storage and Troubleshooting

Fuel System and Engine Oil for Storage

Instructions for preparing the fuel system and changing engine oil for storage.

Engine Starting Troubleshooting

Lists common causes and corrections for the engine failing to start.

Troubleshooting Mower Performance

Common Operational Issues and Solutions

Addresses various operational problems like loss of power, poor cut, and vibration with solutions.

Drive, Push, and Handle Adjustment Troubleshooting

Covers troubleshooting for drive problems, pushing difficulty, and handle adjustments.

Additional Support Resources

Online Help and Manuals

Directs users to managemyhome.com for further assistance and product manuals.

Customer Support and Services

Online Resources and Expert Help

Information on accessing online resources and expert help for product support.

In-Home and Carry-In Repair Services

Details Sears' services for appliance, lawn equipment, and HVAC repairs at home or carry-in.

Protection and Maintenance Agreements

How to purchase protection or maintenance agreements for serviced products.

Related product manuals