5
ENGLISH
2. Lift the power head
13
off the collection
tank
5
.
3. Remove the contents from inside the
collection tank
5
; make sure you have all
contents as listed on page 2.
ASSEMBLY
Caster System Assembly
4. Turn the collection tank upside down and
insert the four caster feet
6
into the slots
on the collection tank and tighten with
supplied screws
17
. Verify that the caster
feet
6
are mounted correctly. Do not over-
tighten screws. Fig. 1.
Fig. 1
GENERAL SET UP
5. Your vacuum comes ready for dry vacuum
cleaning. If the cartridge filter is not
installed, refer to page 8 for installation
instructions.
6. For wet vacuum cleaning, remove the
cartridge filter, and install the supplied foam
wet filter. See page 9-10 for the foam wet
filter installation instructions.
7. Place the power head back on the collection
tank and secure into place using the latches.
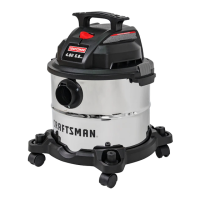
8. Insert the larger end of the hose
18
into the
vacuum port on the collection tank
5
and
lock into place. Fig. 2.
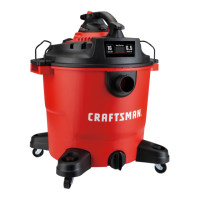
9. Choose the desired accessory
21
23
25
and/or extension wands
19
and insert onto
the end of the hose
18
. Fig. 3.
Fig. 3
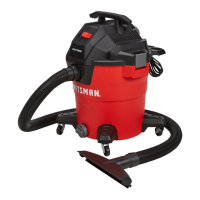
10. For quiet operation, install the noise
diffuser
20
into the blower port
12
by
inserting the locking end of the diffuser
into the blower port
12
and turning
clockwise to lock into place.
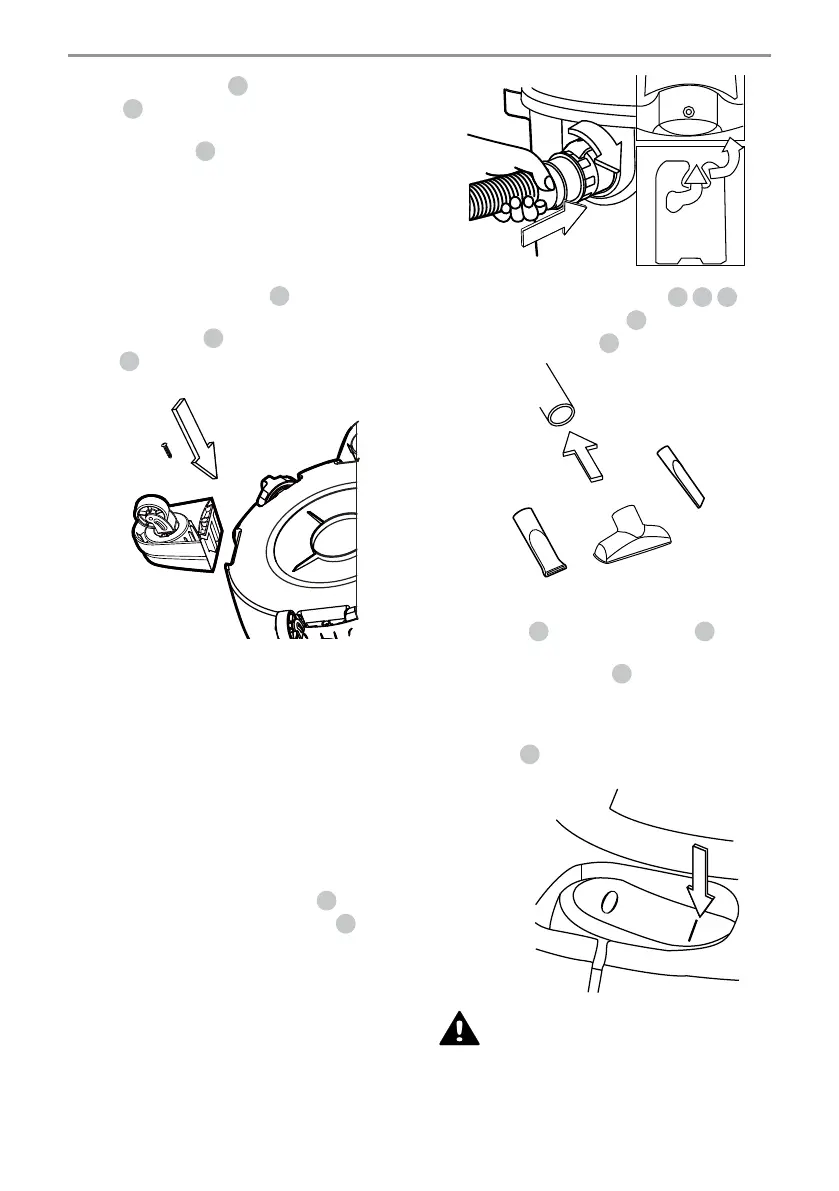
11. Plug the power cord into the outlet.
Turn the motor on by flipping the on/off
switch
15
to the ‘I’ ON position and begin
vacuuming. Fig. 4.
Fig. 4
WARNING:
ONCE YOU HAVE
COMPLETED VACUUMING, FLIP THE
ON/OFF SWITCH TO THE ‘O’ OFF POSITION
AND UNPLUG THE POWER CORD FROM THE
OUTLET. O = OFF I = ON
Fig. 2
 Loading...