2. Unboxing
01
06
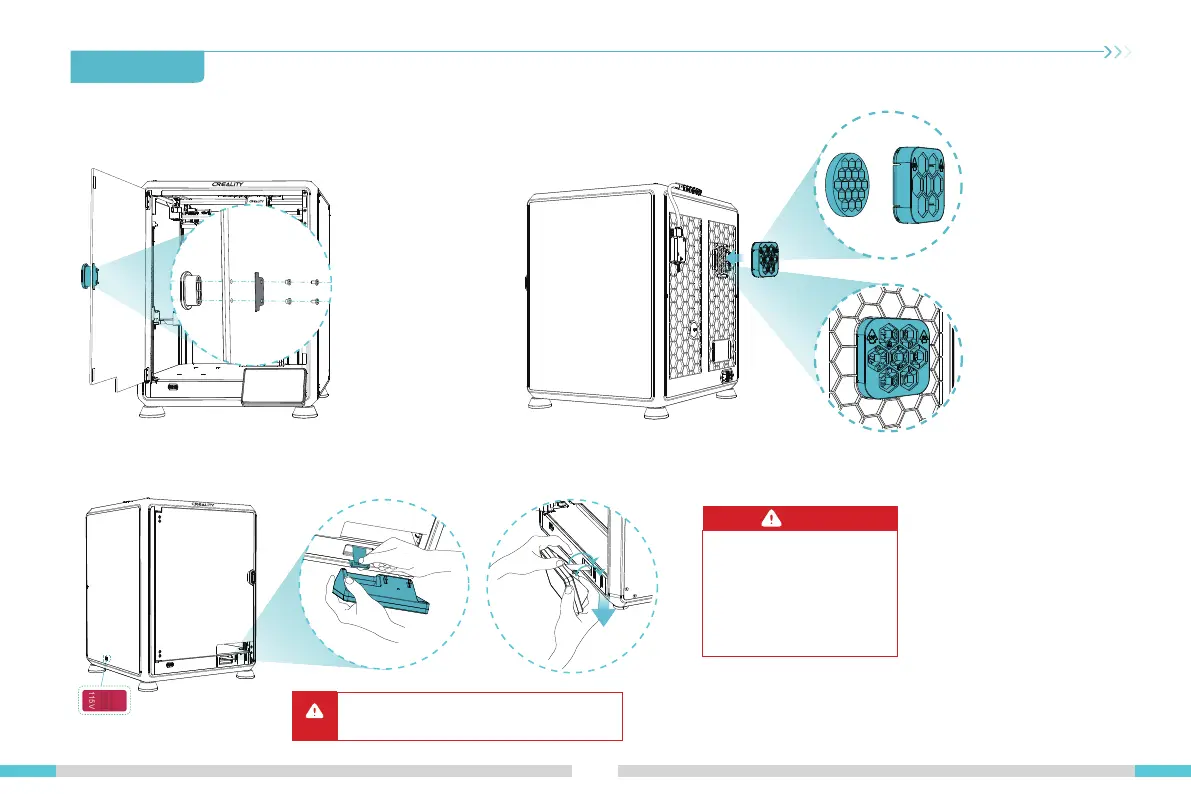
2.2 Install the Product
③ Take the touch screen out of the tool box and connect the touch screen to the flat cable extended from the base according to Figure A. Then snap the touch
screen into the slot in the baseplate, as shown in Figure B. (The direction is as shown in the figure; otherwise, the screen interface may be damaged.)
B
Push
down
115V
230V
A
① Install the door handle on the front door as shown in the diagram. ② Install the air filter cartridge assembly.
●
Please ensure the correct position for the
power supply switch and mains before
supply connection, in order to avoid damage
to the device.
●
If the mains between 100V and 120V,
please select the 115V for the power supply
switch with a straight screwdriver.
●
If the mains between 200V and 240V,
please select the 230V for the power supply
switch (default is 230V) with a straight
screwdriver.
Caution:
Caution:
●
Do not power up the machine while you are connecting or
disconnecting the touch screen.
●
The flexible flat cable of the base is pulled lightly and
broken carefully.
+