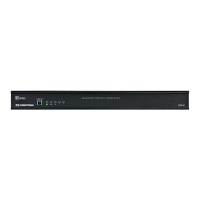
The Crestron® CP4-R 4-Series control processor provides a secure, high-performance, rack-mountable control processor with an embedded
Crestron Pyng® OS 2 operating system. The CP4-R is designed exclusively to function as the core of a Crestron Pyng home automation system, and
features enhanced processing power to handle larger home automation, home theater, multiroom video, and MDU (multidwelling unit) applications.
Check the Box
Item Qty
CP4-R 1
Bracket, Rack Ear, 1U (P/N 2032122) 2
Cable, USB 2.0, A - B, 6 ft (1.83 m) (P/N 2014966) 1
Connector, 3-Pin (P/N 2003575) 2
Connector, 4-Pin (P/N 2003576) 1
Connector, 5-Pin (P/N 2003577) 1
Connector, 8-Pin (P/N 2003580) 4
Connector, 9-Pin (P/N 2003581) 1
Foot, 0.5 in. x 0.5 in. x 0.23 in., Rubber, Black (P/N 2002389) 4
IR Emitter, with Terminal Block Connector, IRP2 (P/N 4500152) 4
Power Cord, 5 ft 10 in. (1.78 m) (P/N 2042043) 1
Power Pack, 24 VDC, 2.5 A, 100-240 VAC (P/N 2045873) 1
Install the Device
The CP4-R may be mounted into a rack or placed onto a flat surface.
Mount into a Rack
The CP4-R occupies 1U of rack space. Use a #1 Phillips screwdriver to remove the required screws from the CP4-R assembly (shown in the
illustration below), and then attach the two included rack ears with the removed screws. Mount the CP4-R into the rack with four mounting screws
(not included).
Rack ears (2)
CP4-R
Place onto a Flat Surface
When the CP4-R is placed onto a flat surface or stacked with other equipment, attach the four included feet near the corners on the underside of
the CP4-R.
Connect the Device
Make all necessary connections to the CP4-R as shown in the illustration below.
RELAY OUTPUT (1–8):
To contact closure
devices
I/0 (1–8):
To controllable
devices
IR - SERIAL (1–8):
To TLL/RS-232
devices
COM1:
To serial
controlled
devices
To serial
controlled
devices
MEMORY:
SD-compatible
card slot
USB:
To storage
devices
LAN:
100/1000BASE-TX
Ethernet to LAN
NET:
To any Cresnet®
network device
24V, 2.0A:
From AC
power pack
Ground
NOTE: Ensure that the included SD card is seated fully in the MEMORY slot prior to powering on the CP4-R.
Observe the following when connecting the CP4-R:
• Use Crestron power supplies for Crestron equipment.
• The CP4-R may be powered with the included 24 VDC power supply or via Cresnet® network power with the NET 4-pin terminal block port.
• The included cables may not be extended.
• Connect the chassis ground lug to a known earth ground circuit (for example, building steel) to ensure that the CP4-R is grounded properly.
• Apply power after all connections have been made.
COM 1 Connections
Port RS-232 RS-422
1
RS-485
G GND GND GND
2
TX TX (from CP4-R) TX- (from CP4-R) TX-/RX-
RX RX (to CP4-R) RX+ (to CP4-R) Not used
RTS RTS (from CP4-R) TX+ (from CP4-R) TX+/RX+
CTS CTS (to CP4-R) RX- (to CP4-R) Not Used
1. RS-422 transmit and receive are balanced signals that require two lines plus a ground in
each direction. RXD+ and TXD+ should idle high (going low at start of data transmission).
RXD- and TXD- should idle low (going high at start of data transmission). If necessary,
RXD+/RXD- and TXD+/TXD- may be swapped to maintain correct signal levels.
2. A ground terminal connection is recommended but not required.
Download the Crestron Pyng Configuration App
The Crestron Pyng configuration app may be downloaded onto an Apple® iPad® device from the App Store® online store.
NOTES:
• An Apple ID is required to download the Crestron Pyng configuration app. Refer to
https://support.apple.com/kb/HT2731 for help with creating an Apple ID.
• For a comprehensive list of iOS® hardware and software versions that are compatible with the Crestron Pyng configuration app, refer to OLH
article 5655 at https://support.crestron.com/app/answers/detail/a_id/5655.
To download the Crestron Pyng configuration app:
1. Tap the App Store icon on the iPad device home screen.
2. Tap the search field, and enter the search term “Crestron Pyng.”
3. Tap Search.
4. Tap the Crestron Pyng app icon .
5. Follow the prompts to download the app to the device.
CP4-R
4-Series Control Processor for Crestron Pyng® OS 2