EasyManua.ls Logo

Cub Cadet 3X User Manual

Cub Cadet 3X
48 pages
To Next Page IconTo Next Page
To Previous Page IconTo Previous Page
Page #20 background image
20 Section 7— Service
7. Loosen and remove the shoulder bolt which acts as a belt
keeper. See Figure 7-5.
Figure 7-5
7. Remove the belt from around the auger pulley, and slip the
belt between the support bracket and the auger pulley.
See Figure 7-6.
NOTE: Engaging the auger control will ease removal and
reinstallation of the belt.
Friction Wheel
Figure 7-6
8. Replace the auger belt by following instructions in reverse
order.
NOTE: Do not forget to reinstall the shoulder bolt and
reconnect the spring to the frame after installing a
replacement auger belt.
9. After replacing the auger belt, perform the Auger Control
test on page 11 of the Assembly and Set-Up section.
Drive Belt
NOTE: Special tools are required and several components must
be removed in order to replace the snow thrower’s drive belt. See
your authorized service dealer to have the drive belt replaced or
phone Customer Support as instructed on page 2 for assistance.
Friction Wheel Inspection
If the snow thrower fails to drive with the drive control engaged,
and performing the drive control cable adjustment fails to
correct the problem, the friction wheel may need to be replaced.
NOTE: Special tools are required and several components must
be removed in order to replace the snow thrower’s friction wheel
rubber. See your authorized service dealer to have the friction
wheel rubber replaced or phone Customer Support as instructed
on page 2 for assistance.
To inspect the friction wheel, proceed as follows:
1. Allow the engine to run until it is out of fuel. Do not
attempt to pour fuel from the engine.
2. Carefully pivot the snow thrower up and forward so that it
rests on the auger housing.
3. Remove the frame cover from the underside of the snow
thrower by removing four self-tapping screws which secure
it. See Figure 7-4.
4. Examine the friction wheel for signs of wear or cracking.
Question and Answer IconNeed help?

Do you have a question about the Cub Cadet 3X and is the answer not in the manual?
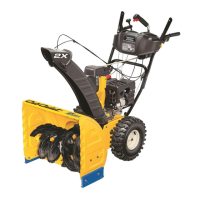
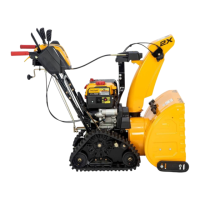
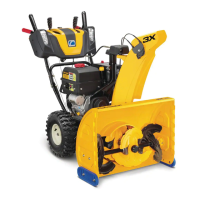
Cub Cadet 3X Specifications

General IconGeneral
Stage Type3-Stage
Intake Height21 inches
Impeller Diameter12 inches
Chute Rotation200 degrees
Heated Hand GripsYes
Chute MaterialSteel
Warranty3-year limited
Start TypeElectric start
SteeringPower steering
HeadlightLED

Summary

To The Owner

Customer Support

How to contact Cub Cadet for assistance with assembly, operation, or maintenance issues.

Important Safe Operation Practices

Preparation

Inspect the area, remove debris, wear safety gear, and check machine readiness before operation.

Safe Handling of Gasoline

Clearing a Clogged Discharge Chute

Maintenance & Storage

Safety Symbols

Assembly & Set-Up

Adjustment: Skid Shoes

Auger Control Test

Controls and Features

Shift Lever

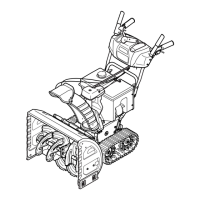
Explains the function and positions of the shift lever for ground speed and direction.

Augers

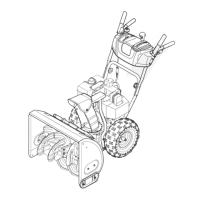
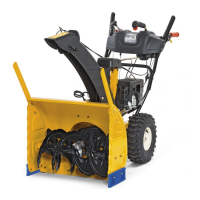
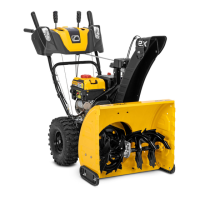
Describes the function of the augers in drawing snow into the housing.

Chute Assembly

Explains how snow is discharged via the chute assembly.

Auger Control

How to engage and disengage the augers for snow throwing.

Drive Control / Auger Clutch Lock

How to engage drive, lock auger control, and their interaction.

Chute Clean-Out Tool

Detailed steps for safely clearing a clogged chute using the tool.

Operation

Replacing Shear Pins

Procedures and warnings for replacing shear pins.

Maintenance & Adjustments

Shift Cable

Auger Control

Skid Shoes

Drive Control

Service

Friction Wheel Inspection

Troubleshooting

Related product manuals