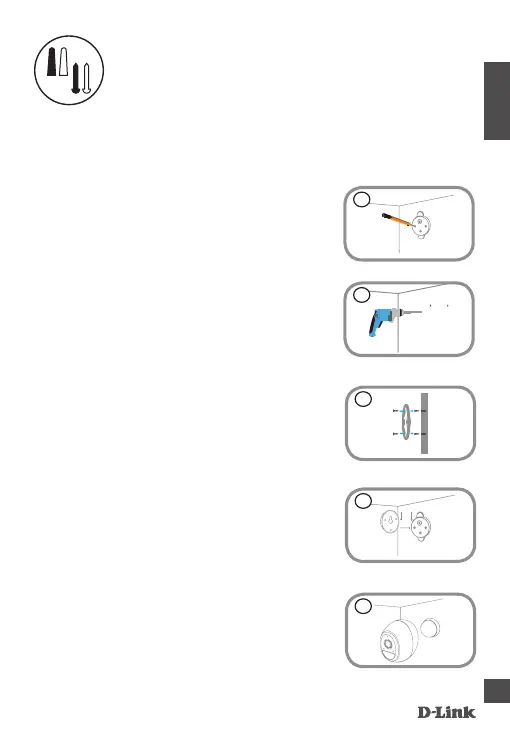
9
DCS-2800LH-EU
ENGLISH
Step 1:
Place the baseplate at the desired location, assuring
that it is at least 20cm from the ceiling. Make sure
the screw is facing up and the holes are level. Use a
pencil to mark the holes.
Step 2:
Using a 6 mm drill bit, drill two 25 mm deep holes
over the pencil marks. For a plaster, drywall, or
concrete wall, insert the plastic anchors to support
the screws rst.
Step 3:
Place the baseplate over the holes. Use the supplied
screws to attach the baseplate to the wall.
Step 4:
Align the large top screw with the largest hole on
the snap mount. Slide the mount down to lock into
place.
Step 5:
Attach the back of the camera to the mount. Adjust
the angle as desired.
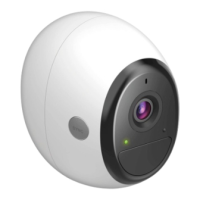
Camera Mounting Instructions
1
2
3
4
5
Snap Mount