Check SiUS121827E
242 Part 6 Service Diagnosis
8.13 Main Circuit Short Check
Check No.20 Check to make sure that the voltage between (+) and (–) of the diode bridge (DB1) is about
0 V before checking
Measure the resistance between the pins of the DB1 referring to the table below.
If the resistance is ∞ or less than 1 kΩ, short circuit occurs on the main circuit.
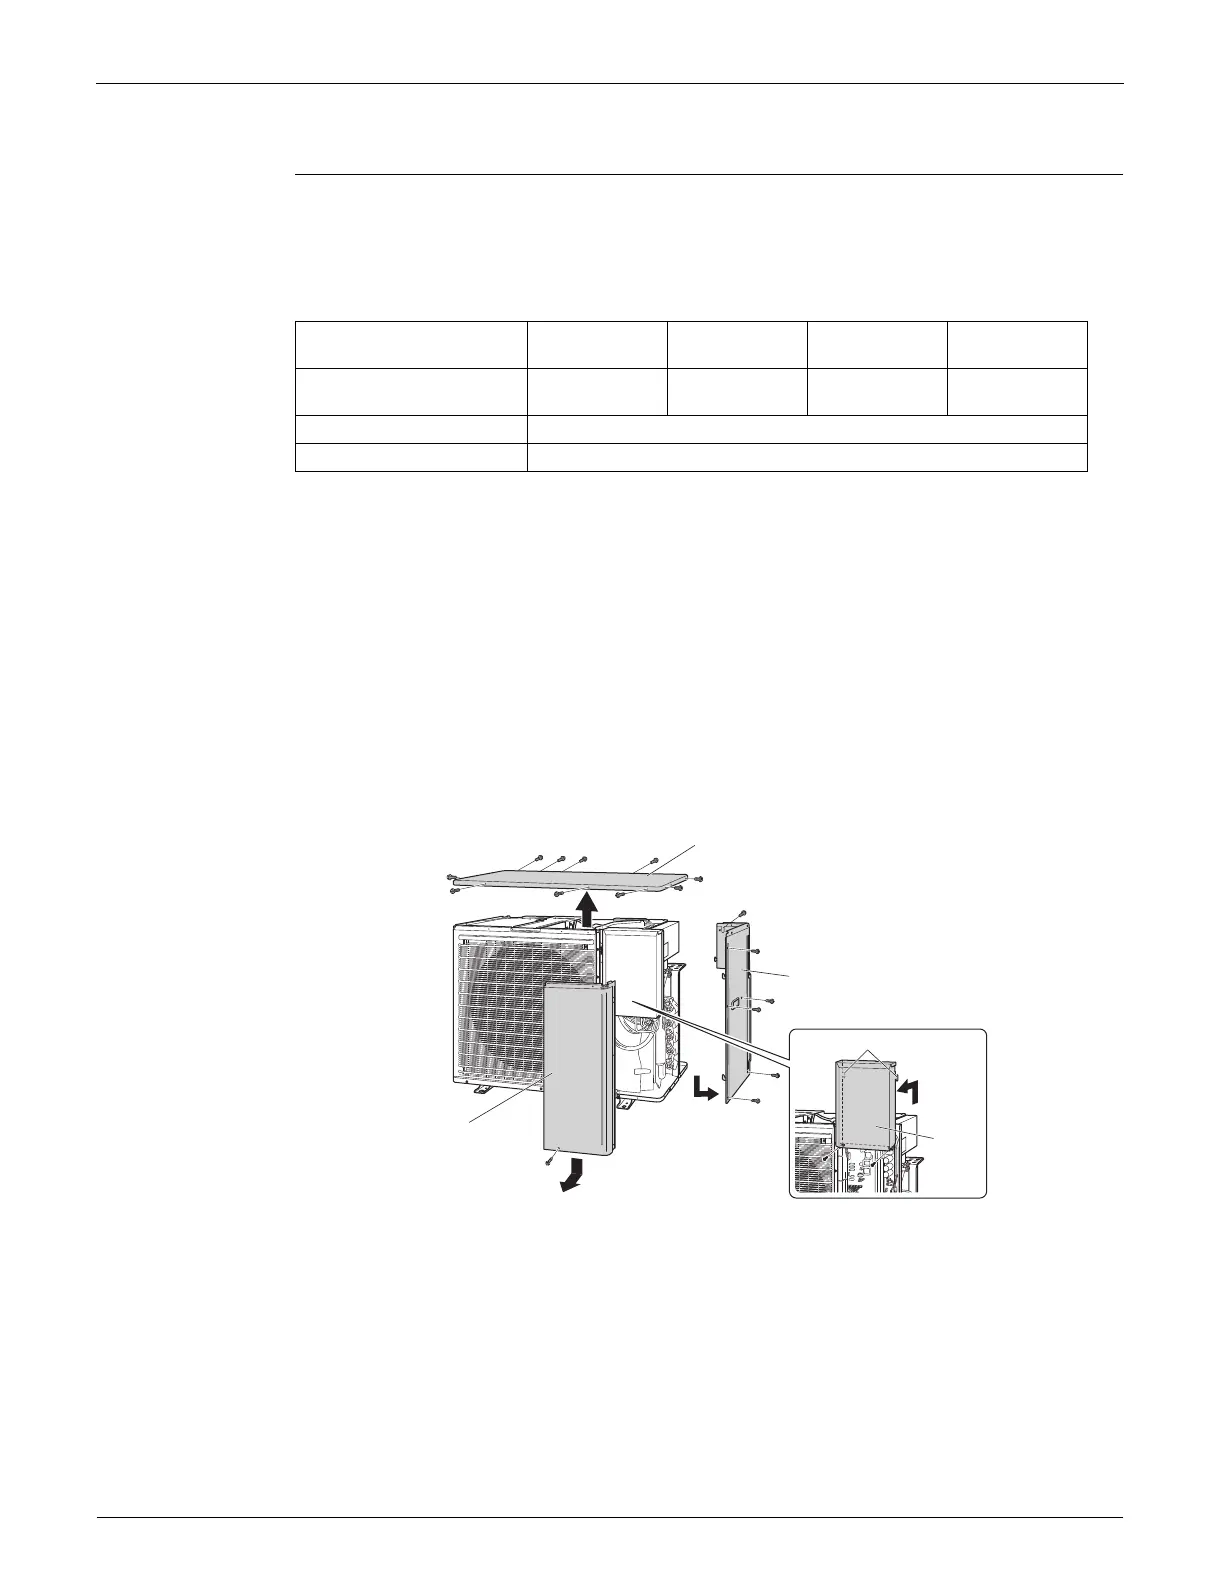
1. Turn the power off.
2. Remove the top plate (10 screws).
3. Remove the right side plate (6 screws).
4. Remove the front plate (1 screw).
The front plate is heavy, so take care.
5. Remove the shield plate (2 screws).
6. Measure the resistance of the pins under the refrigerant pipe cover.
7. In the case it is difficult to insert the probes from the front side, take out the PCB in the following
procedure and measure the resistance from the rear side of the PCB.
Remove the 3 screws and open the refrigerant cover.
Disconnect the connectors.
Remove 13 screws of the PCB.
Pull the PCB upward to remove.
R6000584
Positive terminal (+) of
digital multimeter
~ (2, 3) + (4) ~ (2, 3) – (1)
Negative terminal (–) of
digital multimeter
+ (4) ~ (2, 3) – (1) ~ (2, 3)
Resistance is OK. several kΩ ~ several MΩ
Resistance is NG. 0 Ω or ∞
Top plate
Right side plate
Shield
plate
Front plate
Hooks
 Loading...