12 English
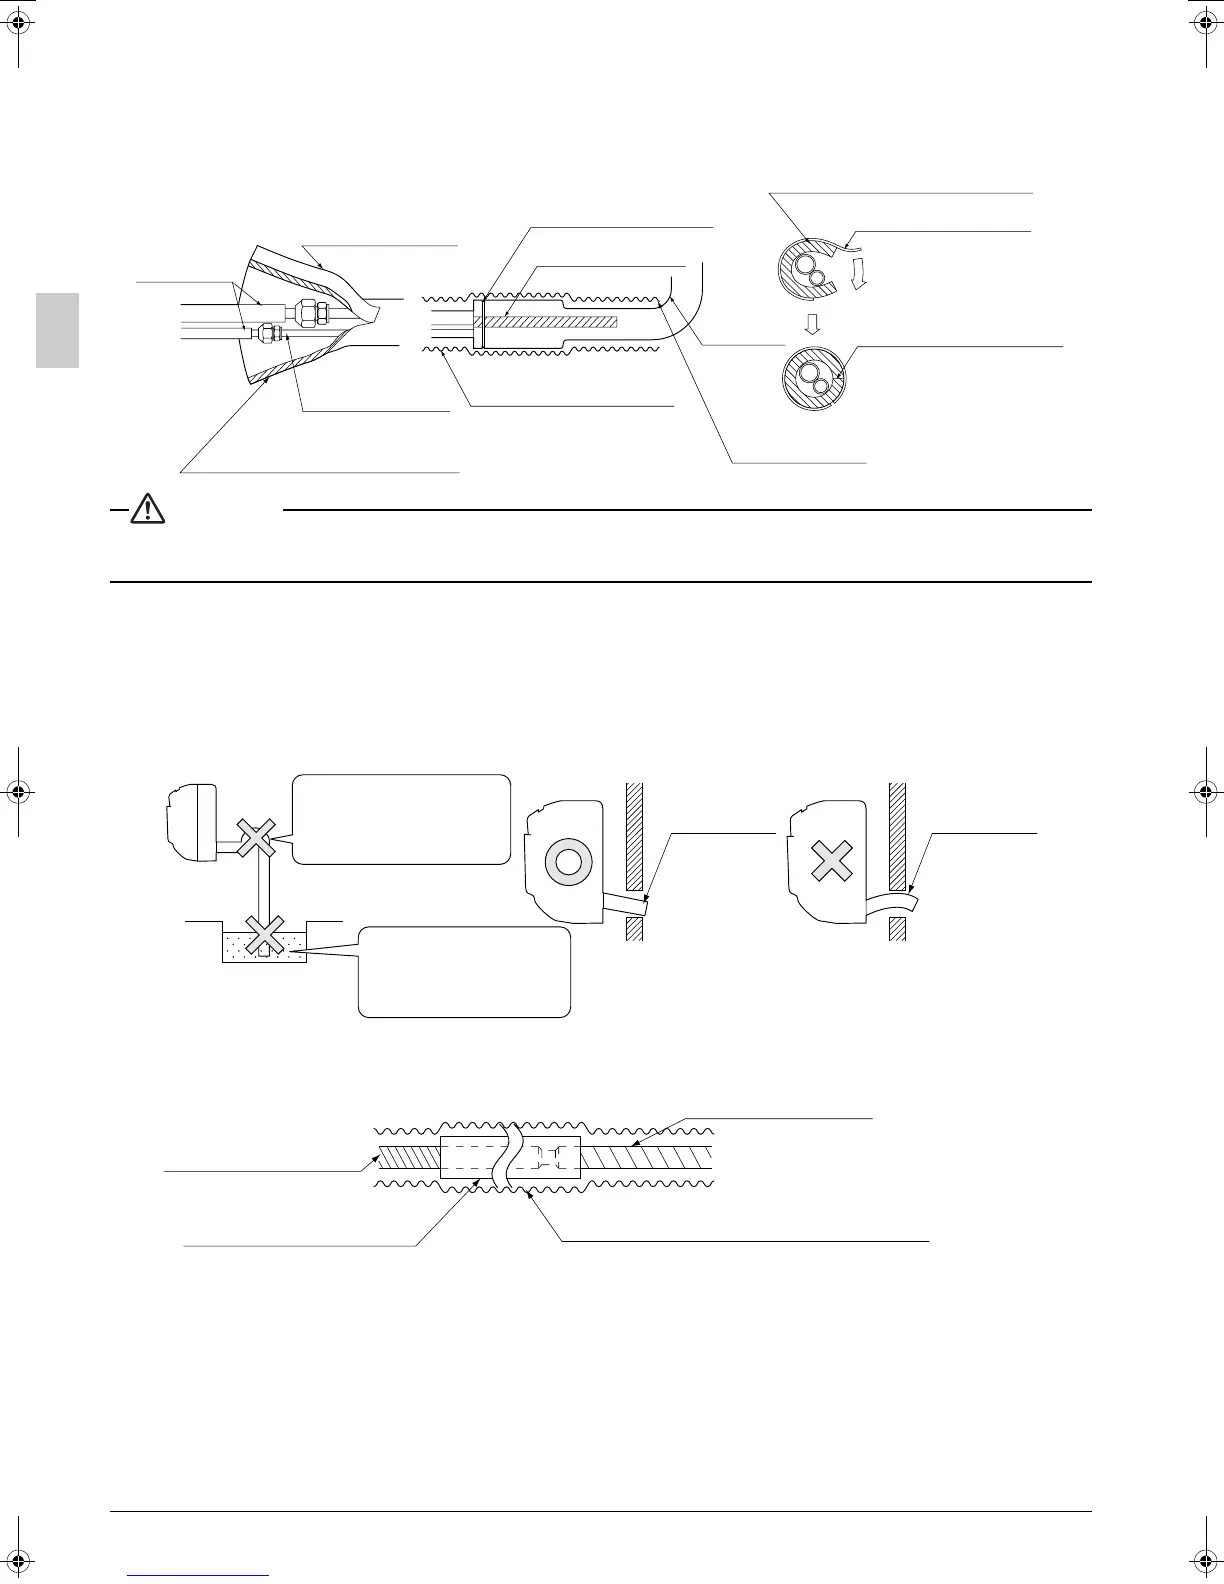
• After checking for gas leaks, be sure to insulate the pipe connections using the supplementary piping
insulation tubing and insulating tape (4). The insulating tape (4) should be wrapped from the L-shaped bend
all the way to the end inside the unit. (Refer to Fig. 15)
CAUTION
Be sure to insulate any field piping all the way to the piping connection inside the unit. Any exposed piping
may cause condensation or burns if touched.
6. DRAIN PIPING WORK
(1) Install the drain piping. (Refer to Fig. 16)
• The drain pipe should be short with a downward slope and should prevent air pockets from forming.
• Watch out for the points in the Fig. 16 when performing drain work.
• When extending the drain hose, use a commercially available drain extension hose, and be sure to
insulate the extended section of the drain hose which is indoors. (Refer to Fig. 17)
• Make sure the diameter of the piping is the same as the piping (hard vinyl chloride, nominal diameter
13mm) or bigger.
Insulating tubing tape
Insulating tubing tape
Local piping
Indoor unit piping
Indoor unit piping insulation tubing
Clamping material large
(accessory) (5)
Insulating tape (accessory) (4)
L-shaped
bend
Start wrapping
See “4. INDOOR UNIT
INSTALLATION”
Indoor unit piping insulation tubing
Insulating tubing tape
Insulation tubing seam
Attach the insulation tubing
tape so that there are no gaps
in the insulation tubing seam.
Fig. 15
Fig. 16
Make sure the drain
hose is at a downward
slope.
Make sure the tip does
not go underwater even
when water is added.
Drain hose Drain hose
(Downward
slope)
Indoor unit drain hose
Extension drain piping
(commercially available)
Insulating tube
(commercially available)
Insulating tape (accessory) (4)
( See “4. INDOOR UNIT INSTALLATION” )
Fig. 17
01_EN_3P366851-14C.fm Page 12 Wednesday, October 14, 2015 3:02 PM
 Loading...