1.
2.
3.
4.
1.
a.
b.
2.
3.
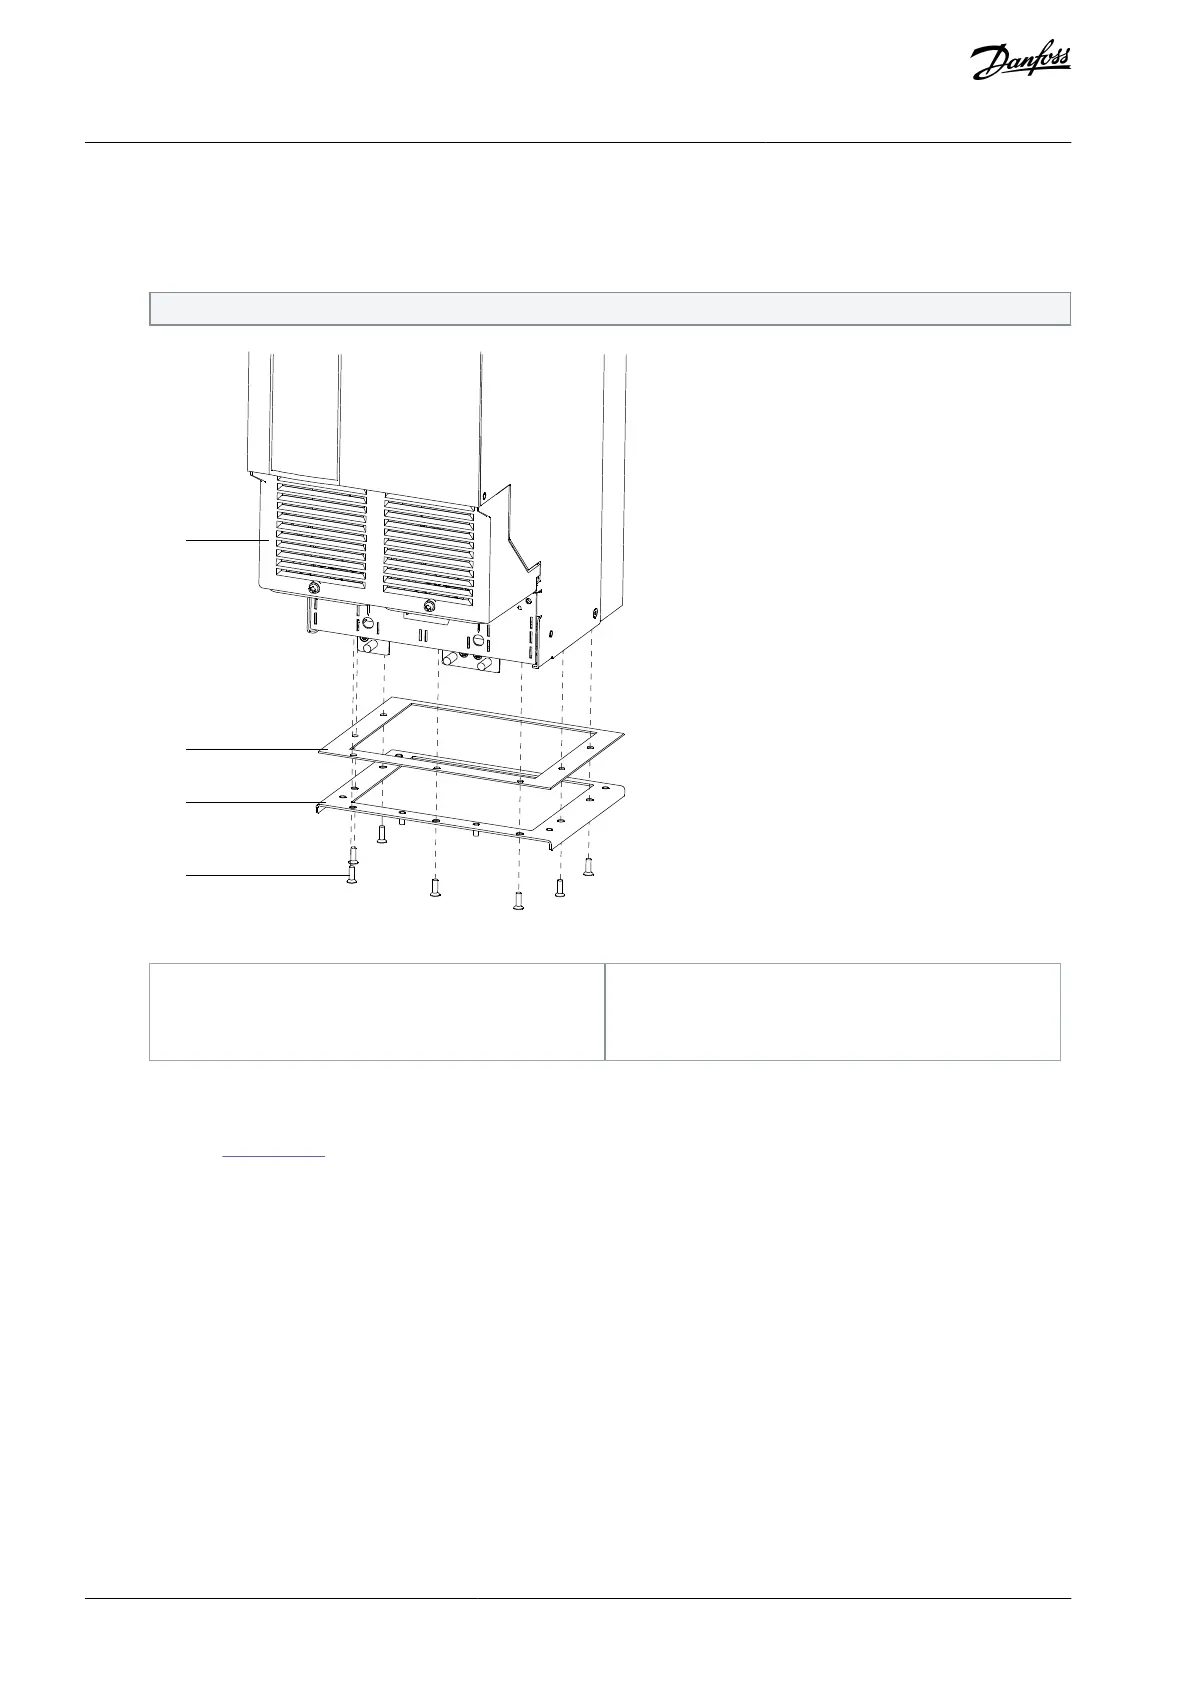
Remove the paper backing from the duct support plate gasket.
Adhere the gasket to the upper surface of the duct support plate.
Position the duct support plate at the lower end of the frequency converter.
Secure the duct support plate to the frequency converter using 7 M5x16 countersunk screws (T25).
Torque fasteners to 2.3 Nm (20 in-lb).
Illustration 11: Installation of the Duct Support Plate
Duct support plate gasket
2.9 Assembling the Bottom Duct
The bottom duct is a telescopic duct that collapses to simplify installation. To assemble the duct prior to installation, use the follow-
ing steps. Refer to Illustration 12.
Procedure
Cut the strip of ribbed EPDM rubber seal into 2 pieces. Use the following measurements:
For FA09 frequency converters, cut 2 strips of 682 mm (26.9 in).
For FA10 frequency converters, cut 2 strips of 877 mm (34.5 in).
Peel the paper off the self-adhesive seals.
Place 1 rubber seal strip on the outside bottom edge of the inner sleeve of the duct, and 1 rubber seal strip on the upper
inside edge of the outer sleeve of the duct.
AN371942757356en-000101 / 136R025214 | Danfoss A/S © 2022.03
Installation
In-bottom/Out-back Cooling Kit for FA09-FA10
Installation Guide
 Loading...