B-2
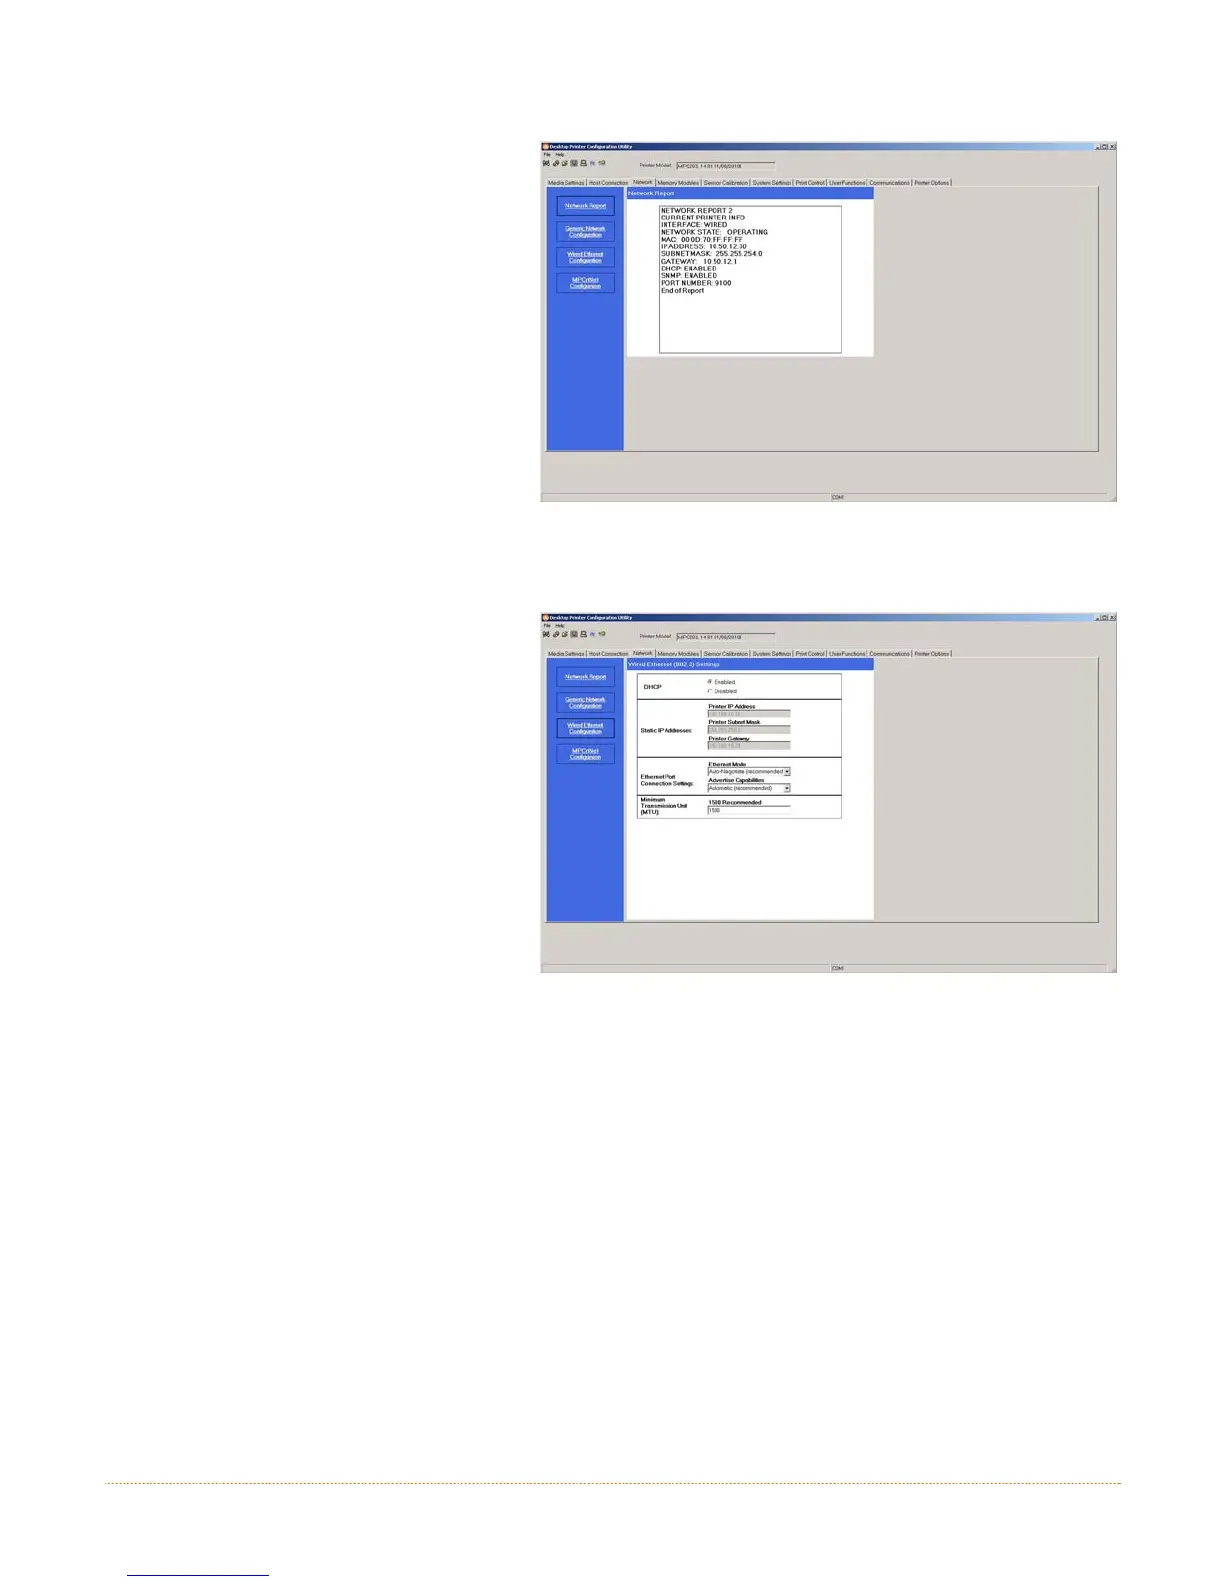
3. Next select the Network Tab. Click
on the Network Report Button. This
report will display the printers
current IP address as well as other
current network settings.
If the IP address shown is valid for
you network. Then this IP can be
used for the windows driver setup.
If the IP address shown is not valid
for your network then a static IP
address will need to be assigned.
For static IP setup only
1. Click on the Wired Ethernet
Configuration button
2. Set DHCP to Disabled, then set
the following with appropriate
values for your network:
Printer IP Address
Printer Subnet Mask
Printer Gateway
3. Send the settings to the printer
using the Configure Printer toolbar
button.
4. The printer will reset and will
connect to your network using the
IP you provided.
Once the previous steps have been successfully completed you may now use the IP Address to install a printer
driver, and start printing from your Windows
applications; see Section 3.2.
 Loading...