10 11
• Place the speaker carefully into the cutout. If you have a level, use it to help you correctly align rectangular speaker models.
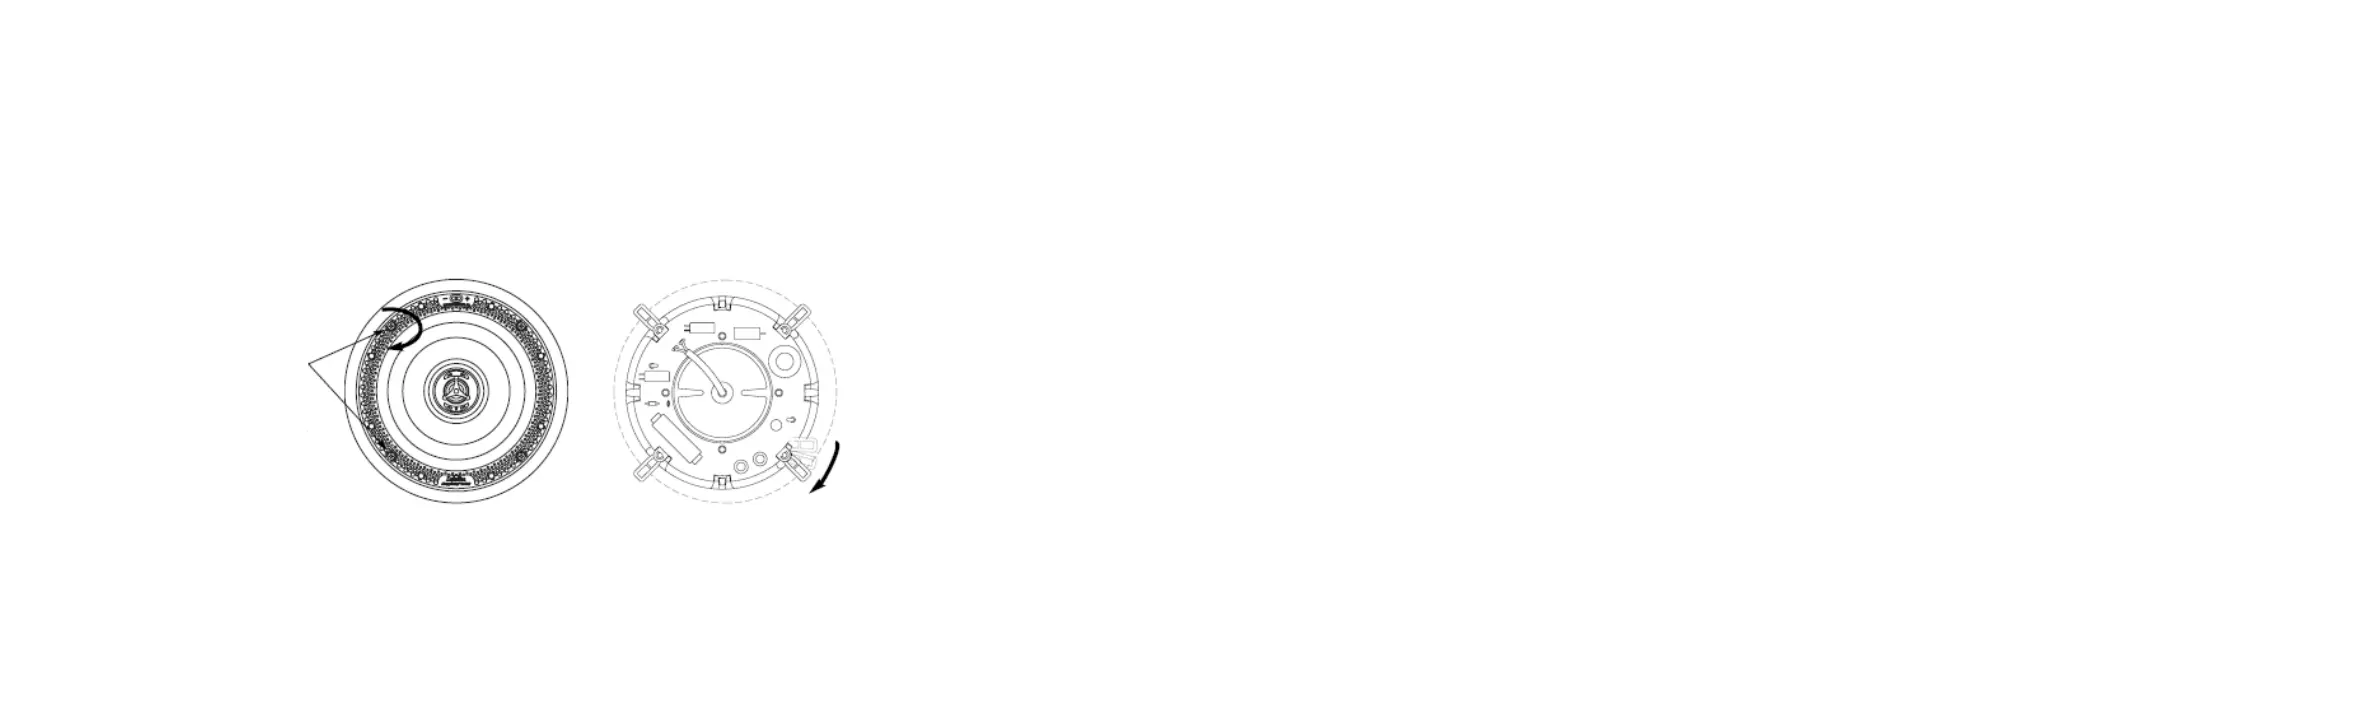
Tighten the lock arm screws with a screwdriver [Figure 15]. This will rotate the lock arms [Figure 16] and secure the speaker
to the wall/ceiling.
Do not over-tighten the lock arm screws. If you are using a powered screwdriver or drill, set the torque to a value of
7 in. – lb. (8dN – m). Install the grille on the speaker frame. Powerful magnets hold the grille in place.
Safety First
When installing your Di Series In-Wall Loudspeakers, be aware of the weight of your particular model and the sturdiness of the material
into which you are installing the speaker. Also be aware of any concealed studs, electrical wiring or plumbing in the wall or ceiling into
which you are installing the speakers. If you are not sure of a safe way to install these speakers, consult a professional installer, your
authorized Denitive Technology dealer, or a building contractor.
Technical Assistance
It is our pleasure to offer assistance if you have any questions regarding your Denitive Technology loudspeakers. Please contact your
nearest Denitive Technology dealer or call us directly at (800) 228-7148 (US & Canada), 01 (410) 363-7148 (international)
or e-mail info@denitivetech.com.
Service
Service work on your Denitive loudspeakers will normally be performed by your local Denitive Technology dealer. If your dealer is
unable or unwilling to perform service contact us for alternative options. Please note that the address given in this manual is the address
of our ofces only. Under no circumstances should loudspeakers be shipped to our ofces or returned without contacting us rst and
obtaining return authorization.
Figure 15 Figure 16
Lock arm screws.
Turn clockwise to tighten
lock arms and secure
speakers to surface.
 Loading...