EasyManuals Logo

Dell Latitude E6400 XFR Setup And Features Information

Dell Latitude E6400 XFR
21 pages
To Next Page IconTo Next Page
To Previous Page IconTo Previous Page
Page #7 background imageLoading...
Page #7 background image
Dell
Latitude™ E6400 XFR Setup and Features Information
Page 7
NOTE:
See hard drive removal instructions adhered to the edge of the hard drive.
2. Press in the blue locking button on the right side of the compartment
.
3. While pressing in the blue locking button, use the tab on the edge of the hard drive to pull the
hard drive from the compartment.
Hard Drive Installation
1. Insert hard drive until you hear a click and a mechanical stop.
2. Rotate the door into place and press until it clicks into its closed position.
Operation of the PrimoSeal™ Doors
Docking Device Connector Door
The docking device connector door is opened by sliding the door towards the front of the computer to
its fully open position. Reverse this procedure to close the door.

Other manuals for Dell Latitude E6400 XFR

Questions and Answers:

Question and Answer IconNeed help?

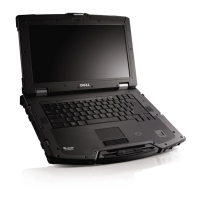
Do you have a question about the Dell Latitude E6400 XFR and is the answer not in the manual?
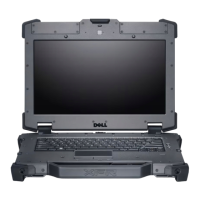
Dell Latitude E6400 XFR Specifications

General IconGeneral
ProcessorIntel Core 2 Duo
StorageUp to 250GB HDD or 128GB SSD
Warranty3-year limited warranty
Display14.1-inch WXGA (1280x800)
RAMUp to 8GB DDR2
GraphicsIntel GMA 4500MHD
Operating SystemWindows Vista, Windows XP
Rugged FeaturesMIL-STD-810F
ChipsetIntel GM45 Express Chipset
WirelessWi-Fi 802.11a/g/n, Bluetooth 2.1
ConnectivityGigabit Ethernet, Modem
PortsVGA
Card SlotsSmart Card Reader
Battery6-cell or 9-cell Lithium Ion
NetworkingGigabit Ethernet
SecurityTrusted Platform Module (TPM), Fingerprint Reader, Smart Card Reader

Related product manuals