4. Connect the power-adapter port cable, speaker cable, keyboard-control board cable, touchpad cable, and touch-screen
cable to the system board.
5. Connect the display cable to the system board.
6. Align the display-cable bracket with the screw hole on the system board and replace the screw (2).
7. Install the components as per the process.
8. Follow the procedures in After working inside your computer..
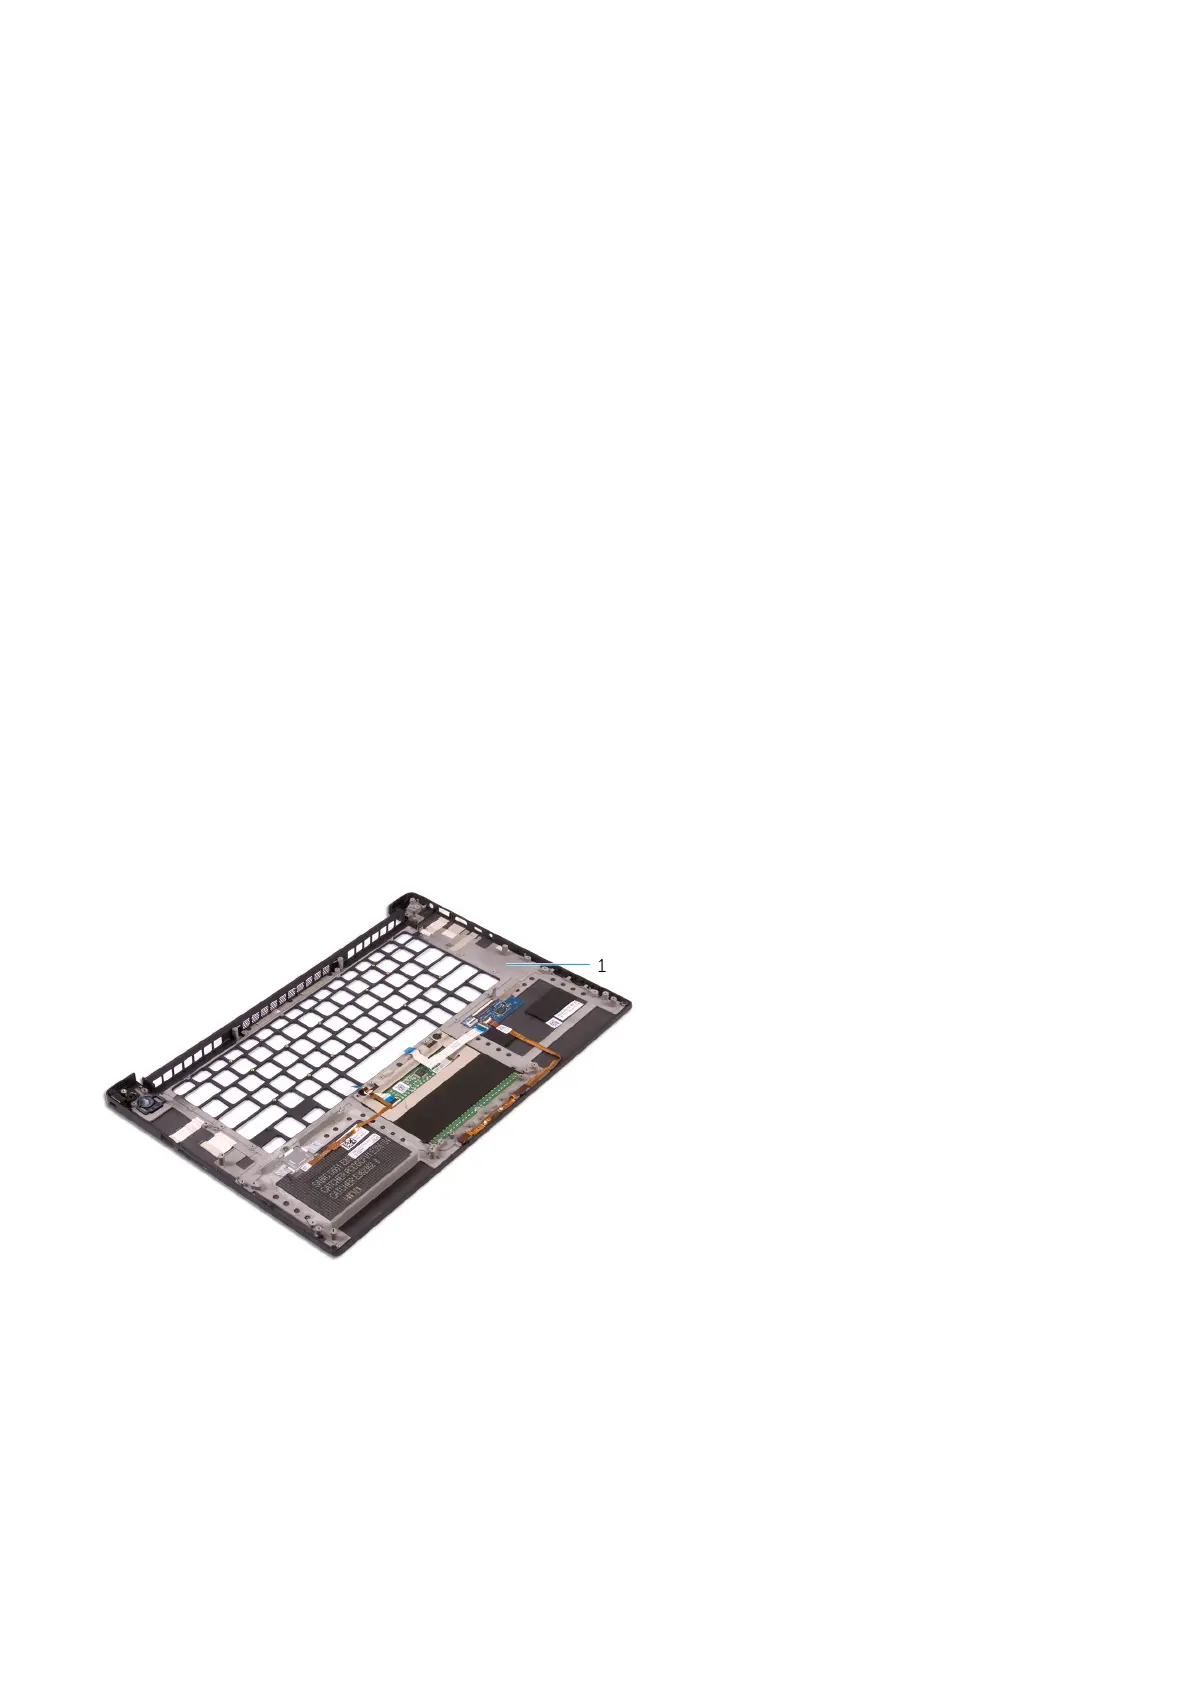
Palm rest
Removing the Palmrest Assembly
Steps
1. Follow the procedures in Before Working Inside Your Computer.
2. Remove the:
a. base cover
b. battery
c. memory modules
d. hard drive
e. WLAN card
f. speakers
g. heatsink assembly
h. fans
i. display assembly
j. power adapter port
k. system board
l. keyboard
3. After performing the above steps, we are left with the palmrest assembly [1].
Installing the Palm rest Assembly
Steps
1. Align the palm rest assembly on the display assembly.
2. Tighten the screws to secure the display hinges to the palm rest assembly.
3. Press down on the palm rest assembly to close the display.
4. Install the:
Disassembly and reassembly
33
 Loading...