EasyManua.ls Logo

Delta 25768LF User Manual

Delta 25768LF
6 pages
To Next Page IconTo Next Page
To Previous Page IconTo Previous Page
Page #3 background image
3 88859 Rev. B
SHUT OFF WATER SUPPLIES.
Remove old faucet. Place gasket (1) on bottom of new faucet. Place faucet through mounting holes in sink.
Option: If sink is uneven, use silicone under the gasket (1).
Secure faucet to sink using locknuts (2) provided.
1
CIERRE LOS SUMINISTROS DE AGUA.
Quite la llave vieja. Coloque el empaque (1) in la parte inferior de la llave. Coloque la llave de agua a través de los
agujeros de instalación en el lavamanos.
Opción: Si el lavamanos está desnivelado, utilice silicóndebajo del empaque (1).
Fije la llave al lavamanos con las contratuercas (2) proporcionadas.
INTERROMPEZ L’ARRIVÉE D’EAU.
Déposez le vieux robinet. Placez le joint (1) contre le dessous du robinet nuef.
Option: Si la surface dulavabo est inégale, appliquez du composé à la silicone sous le joint (1).
Fixez le robinet l'évler à l'aide des écrous autofreinés (2) fournis.
1
2
Question and Answer IconNeed help?

Do you have a question about the Delta 25768LF and is the answer not in the manual?

Delta 25768LF Specifications

General IconGeneral
BrandDelta
Model25768LF
CategoryKitchen & Bath Fixtures
LanguageEnglish

Summary

Two Handle CenterSet Bathroom Faucet

Register Online

Register your product online for warranty and updates.

Replacement Parts and Product Information

Access replacement parts, technical documents, and product information online.

Customer Support Contact

Contact Delta customer service via phone or email for assistance.

Safety and Installation Warnings

Read all instructions before installation to prevent injury or product failure.

Required Tools and Parts

List of items you may need for installation.

Cleaning and Care

Installation Steps

Shut Off Water Supplies

Turn off water supply before starting installation.

Install Faucet Base

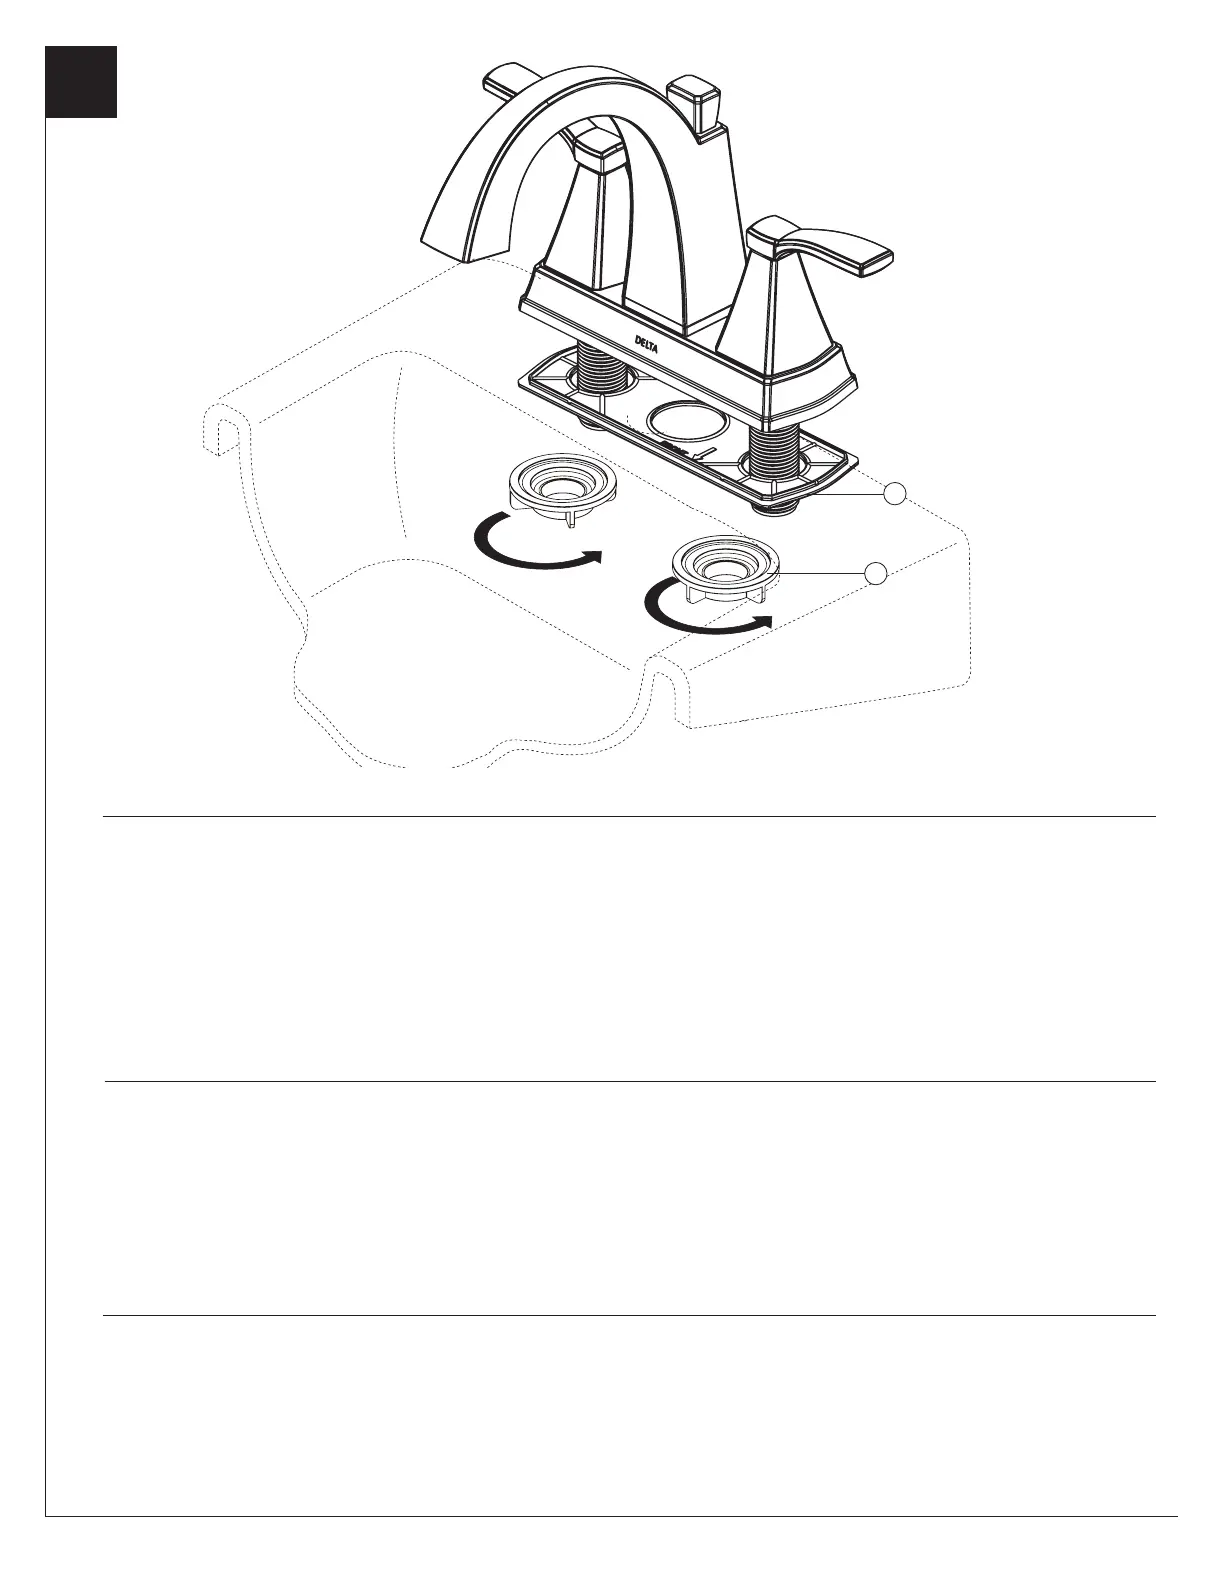
Place gasket and position faucet through sink holes, securing with locknuts.

Install Pop-Up Assembly

Assemble and install the pop-up drain mechanism.

Connect to Water Supplies

Connect water supply lines to the faucet.

Flush System and Check for Leaks

Flush lines and check all connections for leaks after installation.

Maintenance

Shut Off Water Supplies for Maintenance

Turn off water supply before performing maintenance.

Troubleshooting Low Flow

Steps to address low water flow issues, including aerator and seat cleaning.

Related product manuals