17
Connecting an HDMI-incompatible device
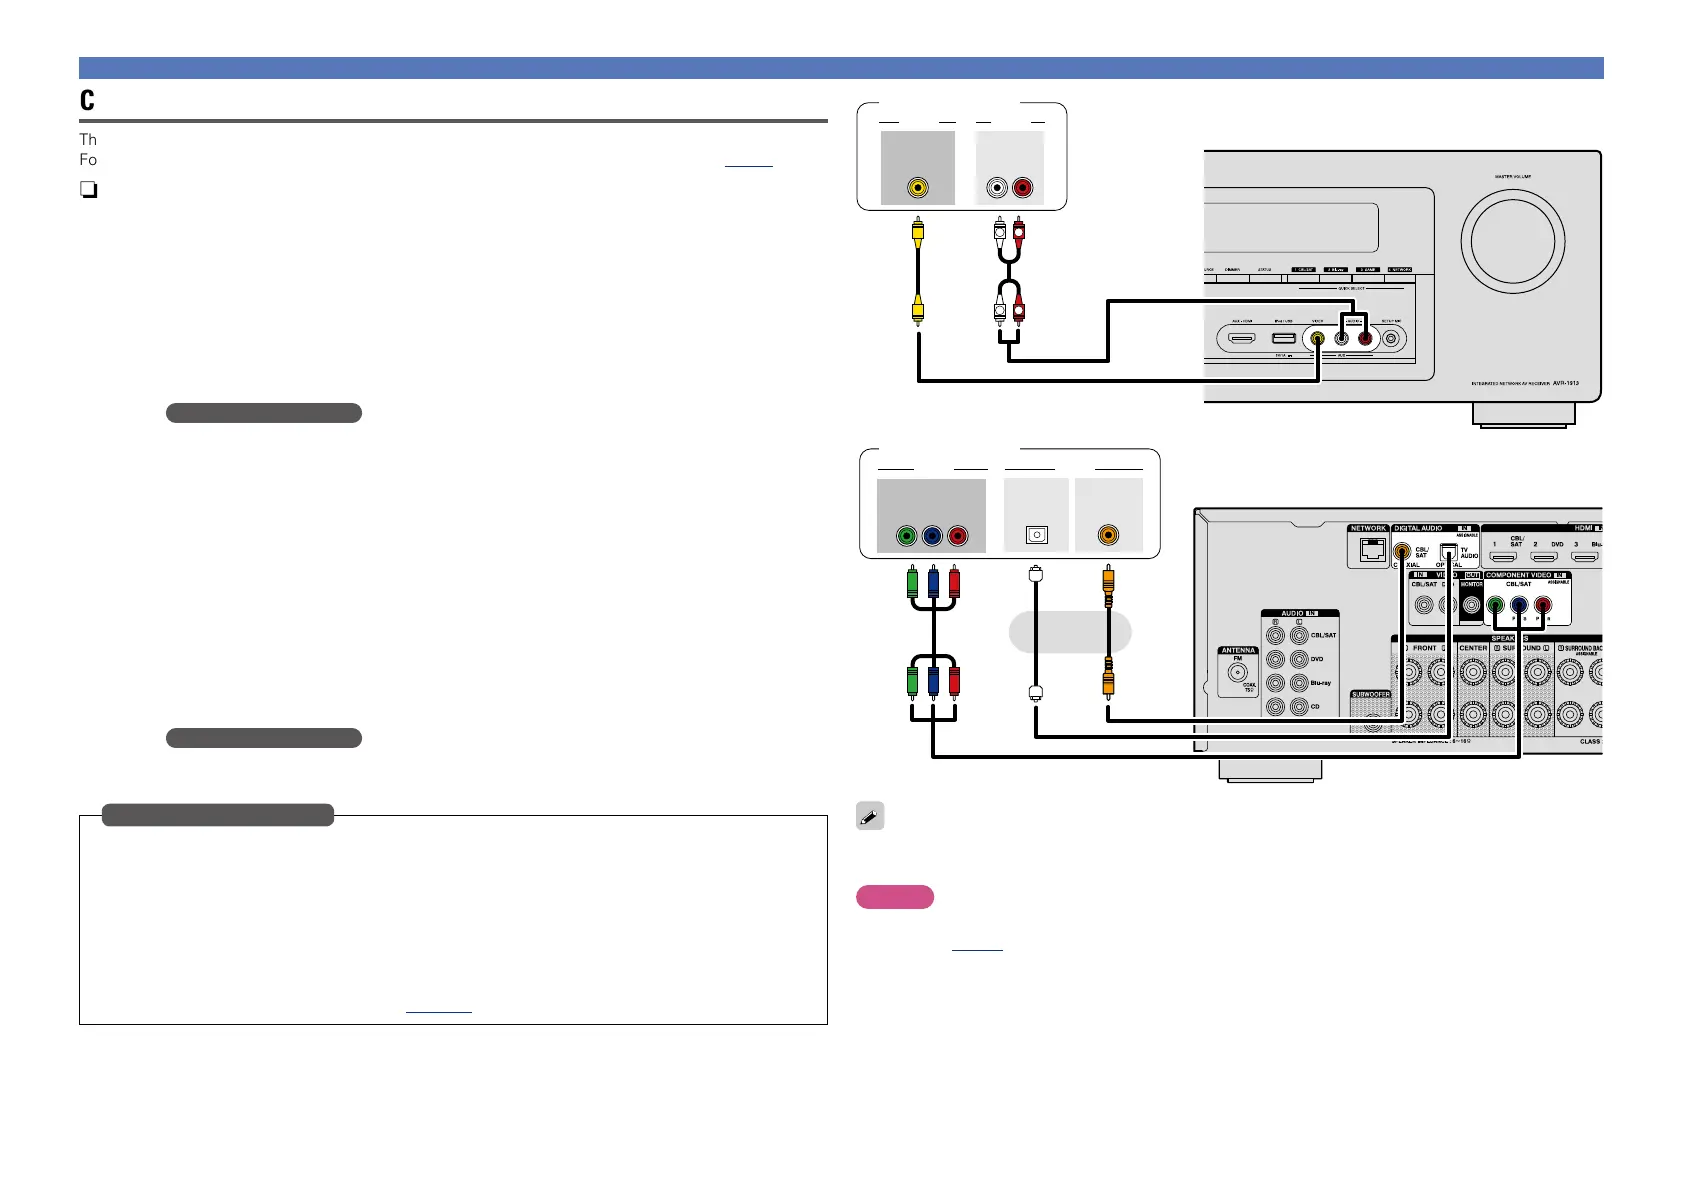
Connecting a digital camcorder
This section describes how to connect when your digital camcorder does not support HDMI connections.
For instructions on HDMI connections, see “Connecting an HDMI-compatible device” (vpage7).
n Audio connection
The following methods are available for connecting to this unit. Use either of the methods to make
a connection.
The numbers prefixed with connectors indicate the recommendation order. The smaller the number is,
the higher playback quality is achieved.
a DIGITAL AUDIO COAXIAL connector
DIGITAL AUDIO OPTICAL connector
When a multichannel audio (digital bit stream audio) is input, this unit decodes the audio to play
back surround sound.
When making this type of connection, you must change the settings on this unit.
(v Input connector setting )
s AUDIO IN (AUX) connector
This makes an analog audio connection. This type of connection converts digital audio to analog
audio, so the output audio may be degraded compared to connections a.
n Video connection
The following methods are available for connecting to this unit. Use either of the methods to make
a connection.
The numbers prefixed with connectors indicate the recommendation order. The smaller the number is,
the higher playback quality is achieved.
a COMPONENT VIDEO IN connector
This makes an analog video connection. This connection method separates video signals into 3
signals for transmission based on color components, achieving the best quality video playback
among analog video connections, with less signal degradation.
When making this type of connection, you must change the settings on this unit.
(v Input connector setting )
s VIDEO IN (AUX) connector
This makes an analog video connection.
When making the following connection, you must change the input connector settings.
a DIGITAL AUDIO COAXIAL connector
Change the default “CBL/SAT” to “AUX”.
DIGITAL AUDIO OPTICAL connector
Change the default “TV AUDIO” to “AUX”.
a COMPONENT VIDEO IN connector
Change the default “CBL/SAT” to “AUX”.
For how to change, see “Input Assign” (vpage109).
Input connector setting
R
L
R
L
OUT
AUDIOVIDEO
VIDEO
AUDIO
RL
OUT
ss
Digital camcorder
GFront panelH
aaa
VIDEO AUDIO
COMPONENT VIDEO
Y P
B PR
OUT
OUT
COAXIAL
OPTICAL
OUT
Digital camcorder
GRear panelH
or
You can enjoy games by connecting a game machine via the AUX input connector. In this case, select the
input source to “AUX”.
NOTE
When a non-standard video signal from a game machine or some other source is input, the video conversion
function (vpage 6) might not operate. In this case, use the monitor output of the same connector
as the input.
 Loading...