ENGLISH
Getting Started Connections Playback Remote Control Information Troubleshooting SpecificationsMulti-Zone
Making the Optimum Settings for the Connected Speakers Automatically (Audyssey Auto Setup)
1
Check the speaker connections.
(vpage 11 “Connecting the Speakers”)
2
Turn on the power of the TV and subwoofer.
Set the TV’s input to the AVR-790.
3
Turn on the AVR-790’s power.
(vpage 17 “Turning the Power On”)
4
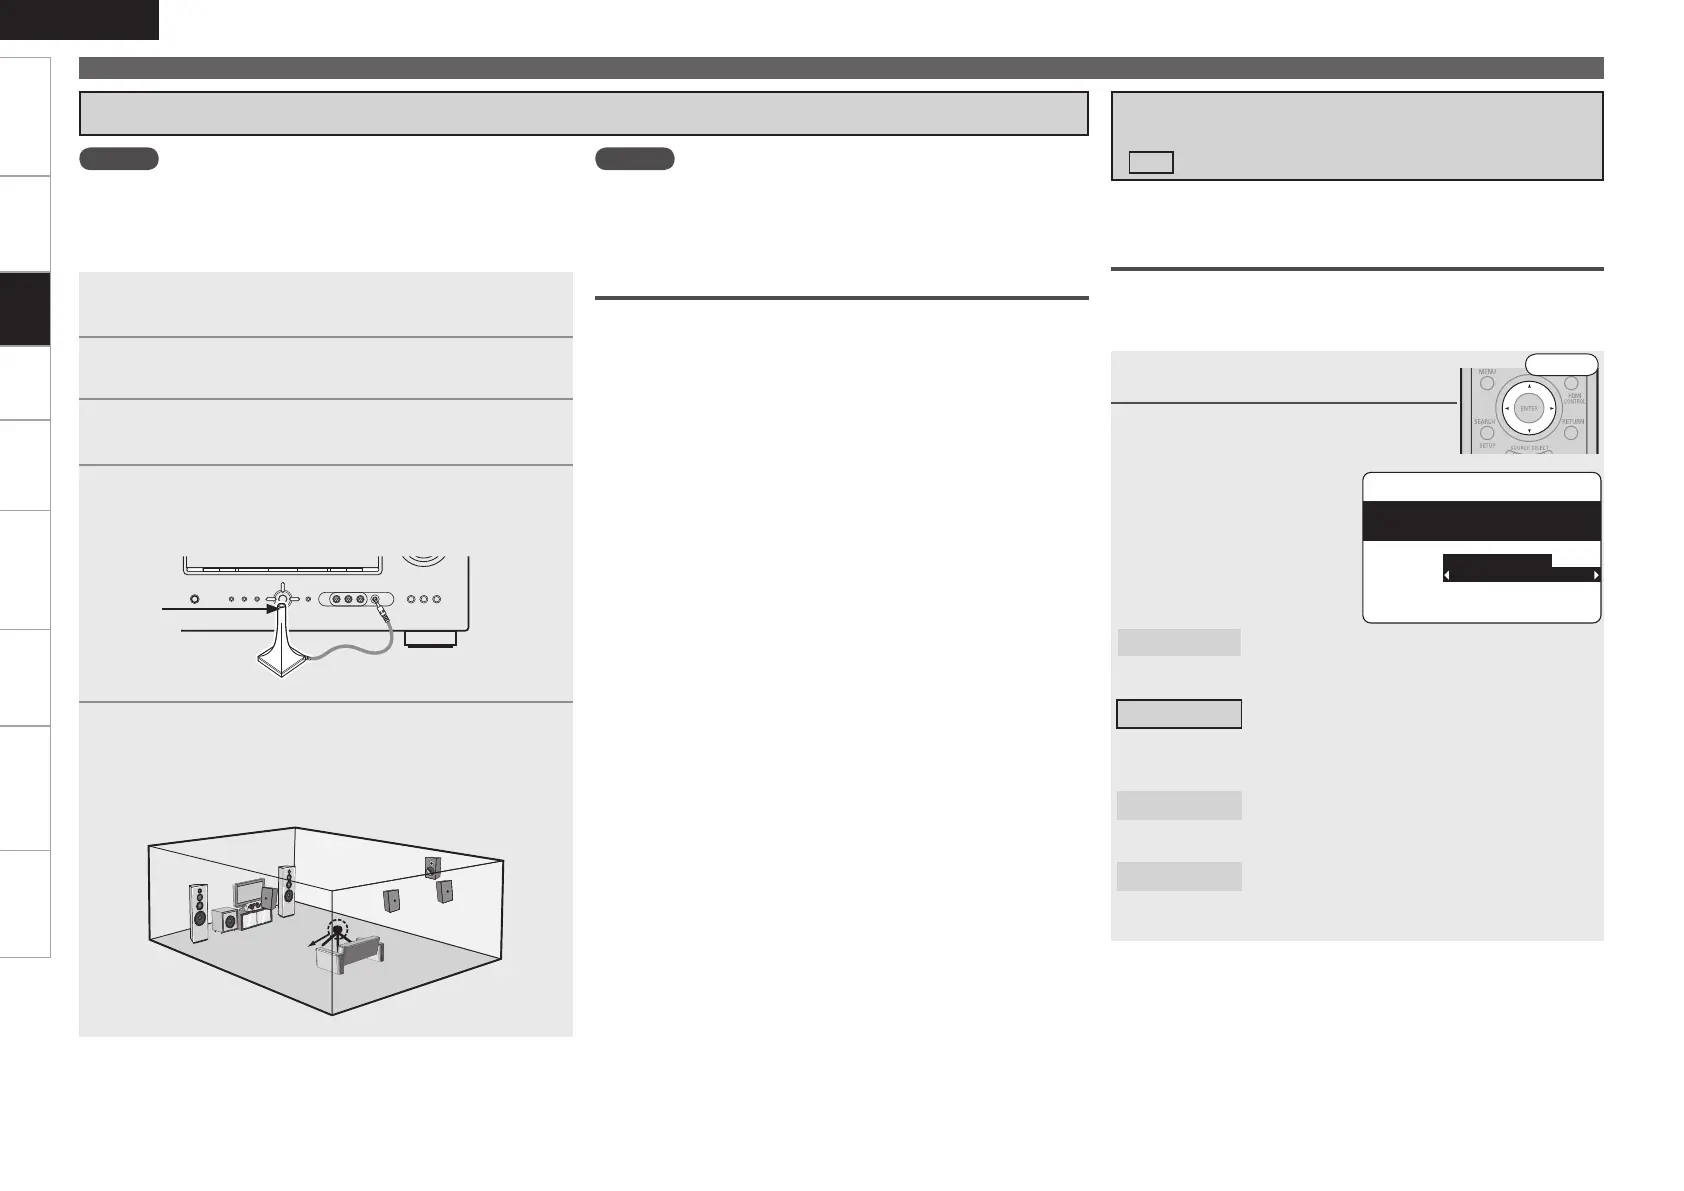
Connect the included calibrated setup microphone to
the SETUP MIC jack on the main unit.
The Audyssey Auto Setup screen appears automatically.
5
Mount the setup microphone on a tripod or stand and
install it at the main listening position.
When installing the setup microphone, adjust its height so that
the section where the sound is received is at the height of the
ears during listening.
Sound
receptor
Setup
microphone
Step 1 : Connect the included Setup Microphone
When using a subwoofer on which the volume can
be adjusted and the crossover frequency can be set
When using a subwoofer, make the following settings before starting
the Audyssey Auto Setup procedure:
n When using a subwoofer with a direct mode
Set the direct mode to “On” and disable the volume adjustment
and crossover frequency setting.
n When using a subwoofer without a direct mode
Make the following settings:
• Volume :“12 o’clock position”
• Crossover frequency :“Maximum/Highest Frequency”
• Low pass filter :“Off”
• Standby mode :“Off”
NOTE
• Do not hold the microphone in your hand during measurements.
• Avoid placing the microphone close to a seat back or wall as sound
reflections may give inaccurate results.
Step 2 : Audyssey Auto Setup
Preparations
around items indicate the settings made upon purchase.
If adjustment to the environment is necessary, set the following
items before proceeding.
NOTE
• Do not disconnect the setup microphone until the Audyssey Auto
Setup procedure is completed.
• When using headphones, unplug the headphones before starting
the Audyssey Auto Setup procedure.
Settings
1
Press ui to select “Amp Assign”.
2
Press o p to select
Amp Assign Mode.
Normal
: The sound of the surround back channel is output
from the speakers connected to the SURR.
BACK/AMP ASSIGN terminals.
ZONE2
: If the ZONE2 power is on, the sound of the
ZONE2 channel is output from the speakers
connected to the SURR. BACK/AMP ASSIGN
terminals.
Front Bi-Amp
: The sound of the front bi-amp channel is output
from the speakers connected to the SURR.
BACK/AMP ASSIGN terminals.
Front Height
: The sound of the front height channel is output
from the speakers connected to the SURR.
BACK/AMP ASSIGN terminals.
Changing the amplifier assignment (Amp Assign)
The signals output from the AVR-790’s SURR. BACK/AMP ASSIGN
speaker terminals can be switched to signals of the surround mode
being used.
3-1.Audyssey Auto Setup
MultEQ
at ear height at
Normal
Amp Assign:
Start
Cancel
[ENT]:Select [RTN]:Back
Please place microphone
main listening position.
n To cancel Audyssey Auto Setup
Use ui to select “Cancel”, then use o p to select “Yes”.
Front
 Loading...