3
ENGLISH
Getting started Connections Playback Troubleshooting
Specications
Part names and functions
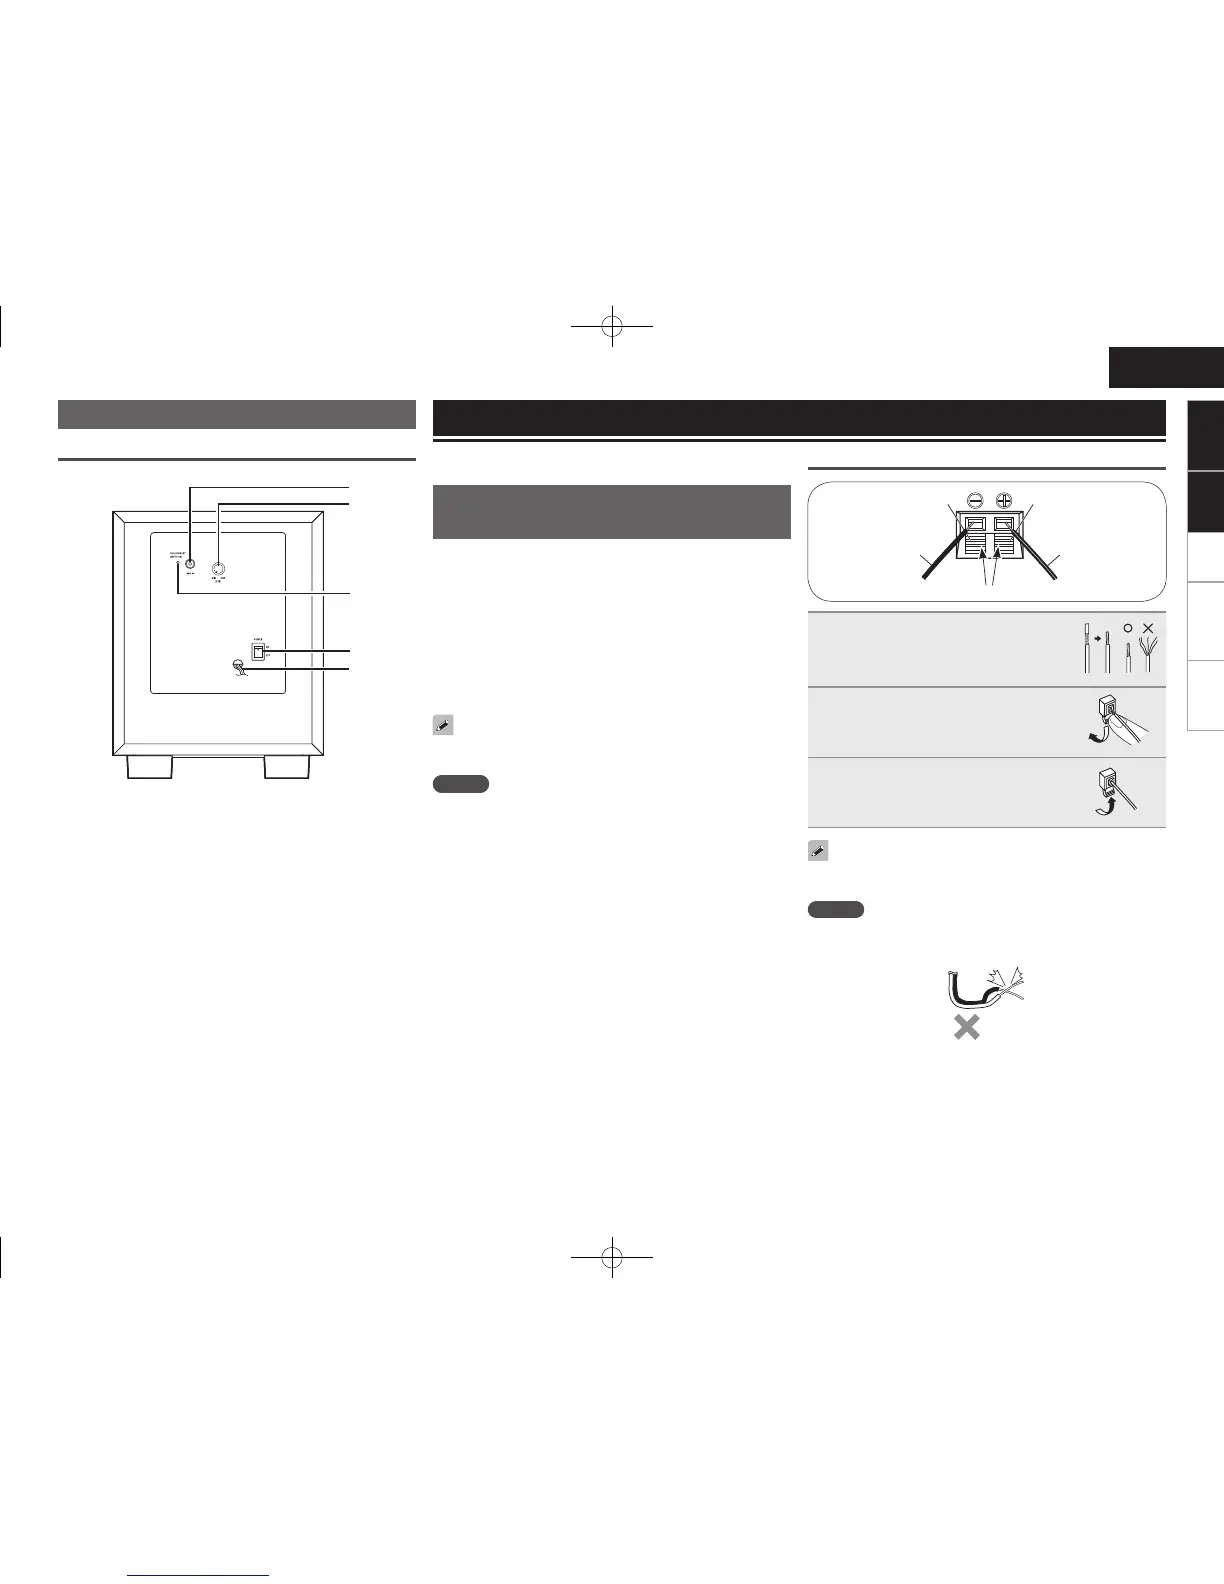
Rear panel (DSW-1312)
q
w
e
r
t
q Line input connector (LINE IN)
Connect this connector to the amplier’s “SUBWOOFER PRE
OUT” connector using the included audio cable.
w Volume adjustment control (LEVEL)
Use this control to adjust the volume of the subwoofer.
e Status indicator
The two-colored light indicates the subwoofer’s operating status,
as follows:
• Power “ON” ··································Lights green
• Standby mode ······························· Lights red
• Power “OFF” ·································Indicator off
r Power operation switch (POWER ON/OFF)
• Set this switch to “ON” to turn on power.
• Set this switch to “OFF” to turn off power.
t Power cord
When connecting the speakers to an amplier, be sure to read the
amplier’s owner’s manual carefully and connect properly.
Speaker connections
(SC-F1312, SC-C1312)
• Connect the input terminals on the rear panel of the speaker with
the speaker output terminals on the amplier, using the included
speaker cables.
• Labels on the back of each speaker are marked “FR”, “FL”, “C”, “SR”,
“SL”. Connect each speaker to the following amplier terminals. Be
sure to connect each speaker with correct polarity (+, –).
• FR To the amplier’s front-right speaker terminal.
• FL To the amplier’s front-left speaker terminal
• C To the amplier’s center speaker terminal
• SR To the amplier’s surround-right speaker terminal.
• SL To the amplier’s surround-left speaker terminal.
Ampliers have various speaker output terminals.
Check the owner’s manual of the amplier you are using for details.
NOTE
• Be sure to turn the amplier’s power off before connecting the
speakers to the amplier.
• If the polarities are inverted, the phase may be off and the sound
may have no bass component, making it seem unnatural. Be sure
to connect the polarities properly.
Connections
Connecting the speaker cables
Black : “–” (negative) Red : “+” (positive)
Black with
white line cable
Lever
Black cable
1
Peel off the sheath from the tip of
the speaker cable, then rmly twist
the wires by hand so that they do not
stick out and cause short-circuits.
2
Press and lower the lever, and insert
the cable’s core wire into the hole.
3
Release the lever.
Gently pull on the speaker cable to
check that it is rmly connected.
Once connections are completed, pull gently on the speaker cables
to check that they are securely connected.
NOTE
Do not let the core wires of two speaker cables touch each other.
Doing so will short-circuit the amplier circuitry and damage the
amplier.
Getting started Connections
1.SYS5.1_E1_ENG_00A.indd 3 2013/03/29 20:01:58

 Loading...