Strange or no measurement of Thermo Sensor
Strange or no measurement of Rain Sensor
Problem / Symptom Solution
1. Check the radiation shield.
2. Check the sensor casing.
1. Check the drain hole in the rain collector.
2. Check the balance of the rain gauge.
1. Change new batteries to the rain gauge.
2. Relocate the main unit and sensor closer to each other.
3. Make sure the main unit is placed away from other
electronic
appliances
that may interfere with the wireless communication
(TVs, computers,
microwaves).
4.
If problem continues, reset both main unit and the sensor.
(Signal lost for 15 minutes)
and
(Signal lost for 1 hour)and
displays on the outdoor weather window
Dimensions 95 x 155 x 23 mm (W x H x D)
Weight 212g without batteries
Battery 2 x AA size 1.5V batteries (Alkaline recommended)
Support channels Wireless sensor (Rain gauge, thermo sensor)
MAIN UNIT
Displayed range
20% to 90% RH (< 20%: LO; > 90%: HI) (Temperature between 0°C to 60°C)
Operating range 20% to 90%RH
Resolution 1%
Accuracy +/-5% typical @ 25°C (77°F)
Display modes
Current, Min and Max, Historical data for past 24 hours
Memory modes Max & Min from last memory reset (with time stamp)
INDOOR HUMIDITY
Alarm Hi / Lo Humidity Alert
Clock display
HH:MM / Weekday
Hour format
12hr AM/PM or 24hr
Calendar DD/MM/YR or MM/DD/YR
Weekday
Hour offset -23 to +23 hours
7 languages: EN, FR, DE, ES, IT, NL, RU
Temp. unit °C or °F
Displayed range -40°C to 70°C (-40°F to 158°F) (< -40°C: LO; > 70°C: HI)
-10°C to 50°C (14°F to 122°F)Operating range
Accuracy +/- 1°C or 2°F typical @ 25°C (77°F)
Resolution 0.1°C or 0.1°F
Display modes Current, Min and Max, Historical data for past 24 hours
Memory modes Max & Min from last memory reset (with time stamp)
Alarm Hi / Lo Temperature Alert
INDOOR TEMPERATURE
CLOCK
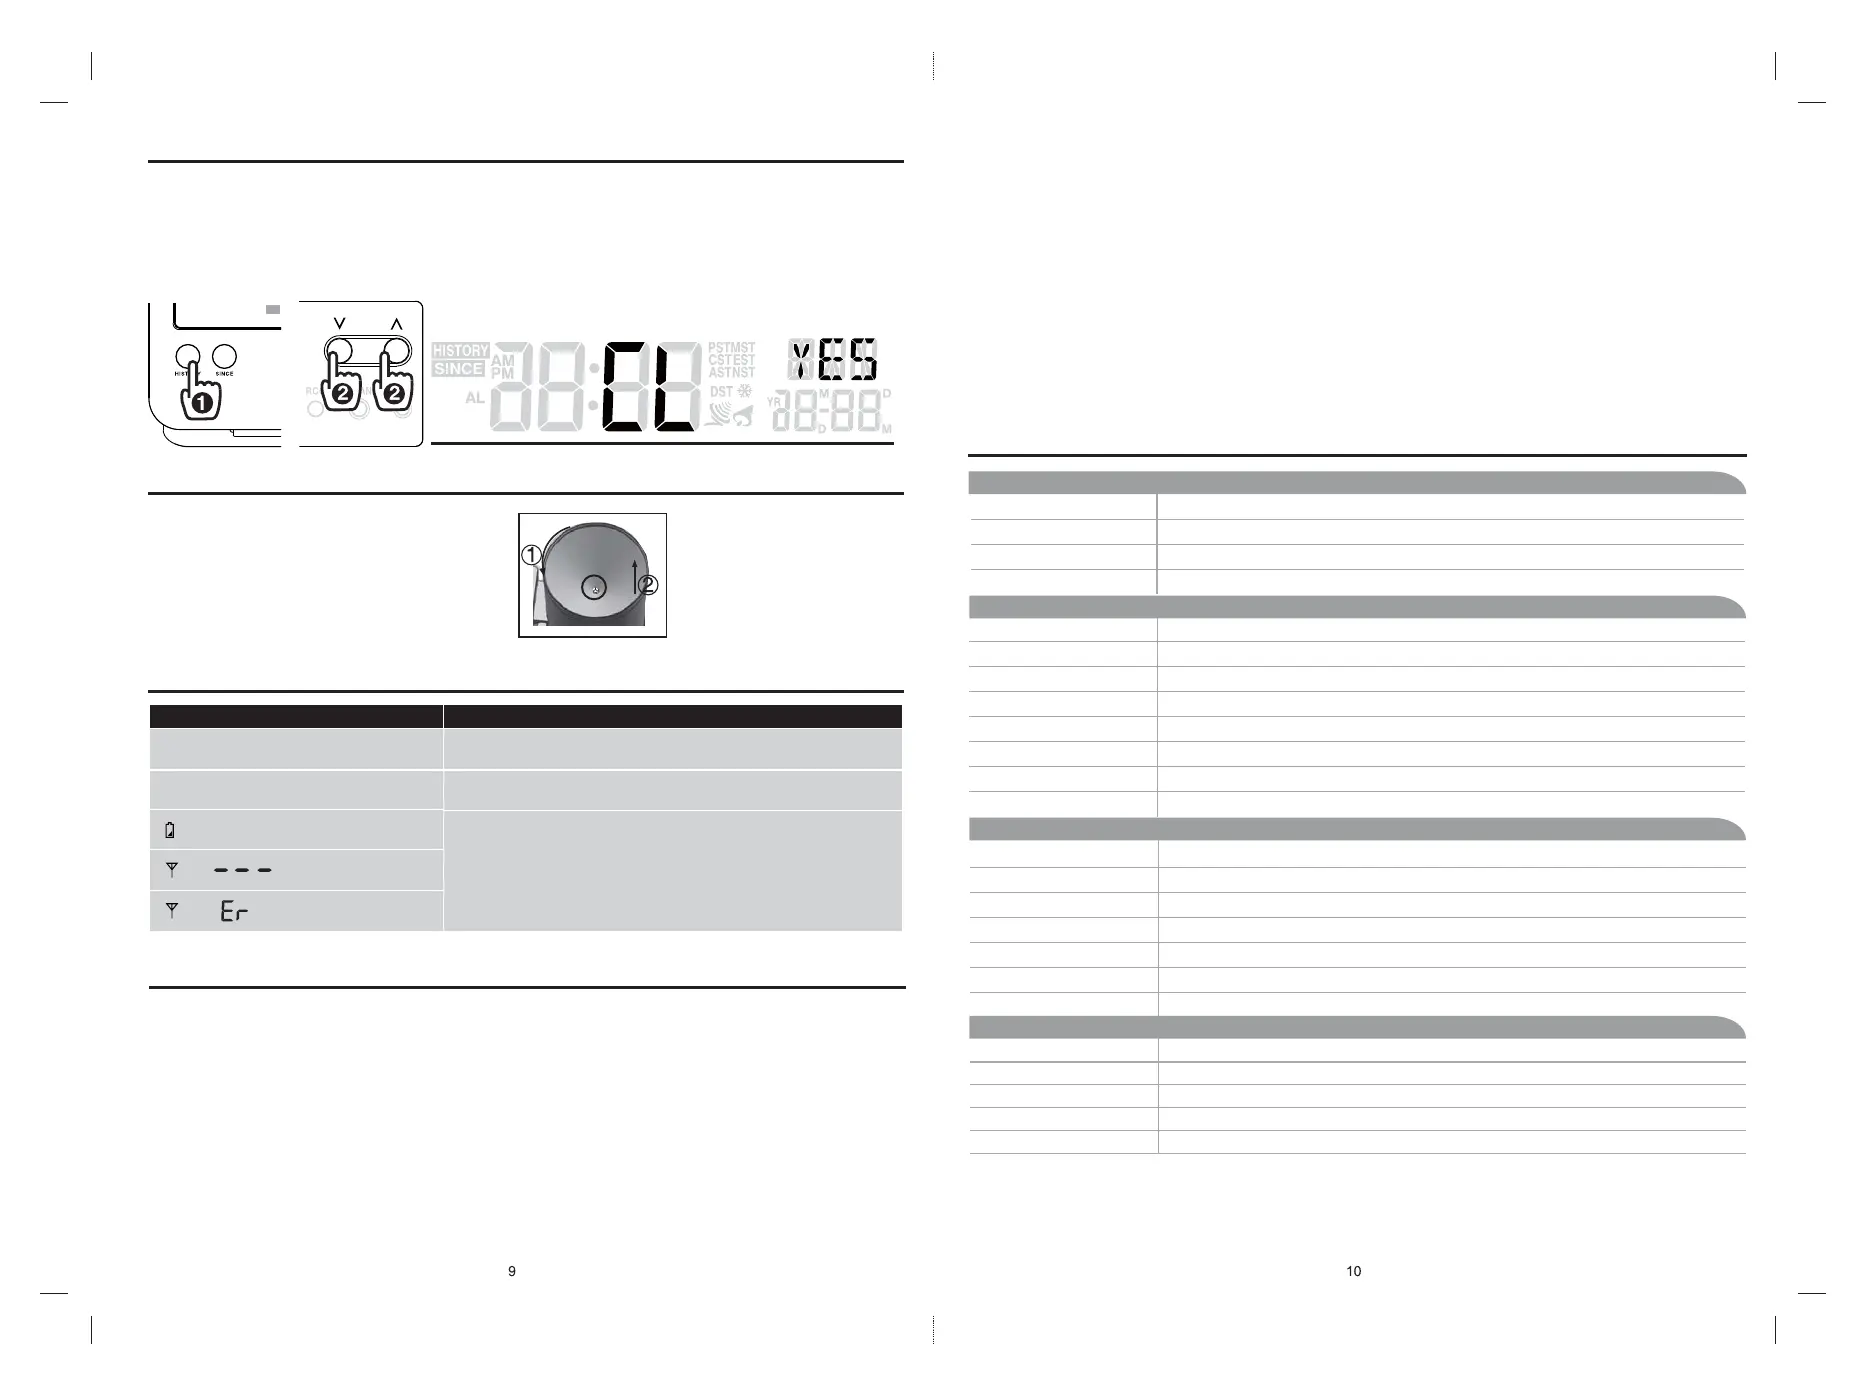
DATA CLEARING
During installation of the wireless sensor, the sensors were likely to be triggered, resulting in erroneous rainfall and wind
measurements. After the installation, user may clear out all the erroneous data from the Display Main Unit, without
needing to reset the clock and re-establish pairing.
1. Press and hold [HISTORY] button for 3 seconds.
2. Press [ UP ] or [ DOWN ] button to choose “YES” or “NO”.
3. Press [HISTORY] button to confirm . This will clear out any data recorded before.
MAINTENANCE OF RAIN GAUGE
1. Rotate the rain collector in anticlockwise direction.
2. Gently remove the rain collector.
3. Clean and remove any debris or insects.
TROUBLESHOOTING
PRECAUTIONS
• Read and keep these instructions.
• Heed all warnings.
• Follow all instructions.
•
Do not subject the unit to excessive force, shock, dust, temperature or humidity.
• Do not cover the ventilation holes with any items such as newspapers, curtains etc.
• Do not immerse the unit in water. If you spill liquid over it, dry it immediately with a soft, lint-free cloth.
• Do not clean the unit with abrasive or corrosive materials.
• Do not tamper with the unit’s internal components. This invalidates the warranty.
• Only use fresh batteries. Do not mix new and old batteries.
• Only use attachments / accessories specified by the manufacturer.
• Images shown in this manual may differ from the actual display.
• When disposing of this product, ensure it is collected separately for special treatment.
• Placement of this product on certain types of wood may result in damage to its
finishing for which manufacture will not
be responsible. Consult the furniture manufacturer’s care instructions for information.
• The contents of this manual may not be reproduced without the permission of the manufacturer.
• When replacement parts are required, be sure the service technician uses replacement parts specified by the
manufacturer that have the same characteristics as the original parts. Unauthorized substitutions may result in fire,
electric shock, or other hazards.
• Do not dispose old batteries as unsorted municipal waste. Collection of such waste separately for special treatment is
necessary.
• Please note that some units are equipped with a battery safety strip. Remove the strip from the battery compartment
before
first use.
• The technical specifications for this product and the contents of the user manual are subject to change without notice.
SPECIFICATIONS

 Loading...