EasyManua.ls Logo

Dometic MILENCO DM-3100 User Manual

Dometic MILENCO DM-3100
12 pages
To Next Page IconTo Next Page
To Previous Page IconTo Previous Page
Page #3 background imageLoading...
Page #3 background image
3
INSTALLATION
A. Prepare for Installation
1. Using a #2 Phillips screwdriver, remove pan
head screw (4 mm x 20 mm) from mirror hous-
ing. See (FIG. 2).
FIG. 2
2. Remove mirror housing from assembly.
3. Using a #3 Phillips screwdriver, unthread (2)
larger screws. See (FIG. 3).
FIG. 3
Large Screws
B. Installation
1. Assemble mirror clamps to vehicle mirror, slid-
ing “foot” of clamps between vehicle mirror and
vehicle mirror housing. See (FIG. 4).
Slide clamps in as far as possible for max-
imum clamp contact.
FIG. 4
Heel
Foot
2. Position blind spot mirror on vehicle mirror for
maximum viewing.
3. While pressing heel of clamps against vehicle
mirror (FIG. 4), tighten (2) large screws, using a
#3 Phillips screwdriver, securing mirror clamps
to vehicle mirror. See (FIG. 5).
FIG. 5
Do NOT overtighten screws. Do-
ing so could damage vehicle mirror housing.
4. Assemble mirror housing to mirror, aligning
screw hole in housing with screw hole in mirror.
5. Using a #2 Phillips screwdriver, assemble screw
to housing and tighten, securing housing to mir-
ror. See (FIG. 6).
Question and Answer IconNeed help?

Do you have a question about the Dometic MILENCO DM-3100 and is the answer not in the manual?

Dometic MILENCO DM-3100 Specifications

General IconGeneral
BrandDometic
ModelMILENCO DM-3100
CategoryIndoor Furnishing
LanguageEnglish

Summary

IMPORTANT SAFETY INSTRUCTIONS

A. Recognize Safety Information

Explains the safety alert symbol used to warn of potential physical injury hazards.

B. Understand Signal Words

Defines signal words like WARNING, CAUTION, and NOTICE to indicate hazard severity and type.

C. Supplemental Directives

Emphasizes reading and following all instructions to avoid injury and comply with standards.

D. Precautions

Advises against using automatic car washes to prevent damage to the mirror.

GENERAL INFORMATION

A. Scope Of Delivery

Lists the items included in the product package, specifically the mirror assembly.

B. Required Tools

Specifies the necessary tools for installation, mainly Phillips screwdrivers of sizes #2 and #3.

C. Vehicle Requirements

Outlines the vehicle's mirror design requirement for mounting the blind spot mirror, needing a gap.

INSTALLATION

A. Prepare for Installation

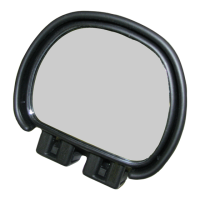
Details steps for disassembling the mirror housing using screwdrivers.

B. Installation

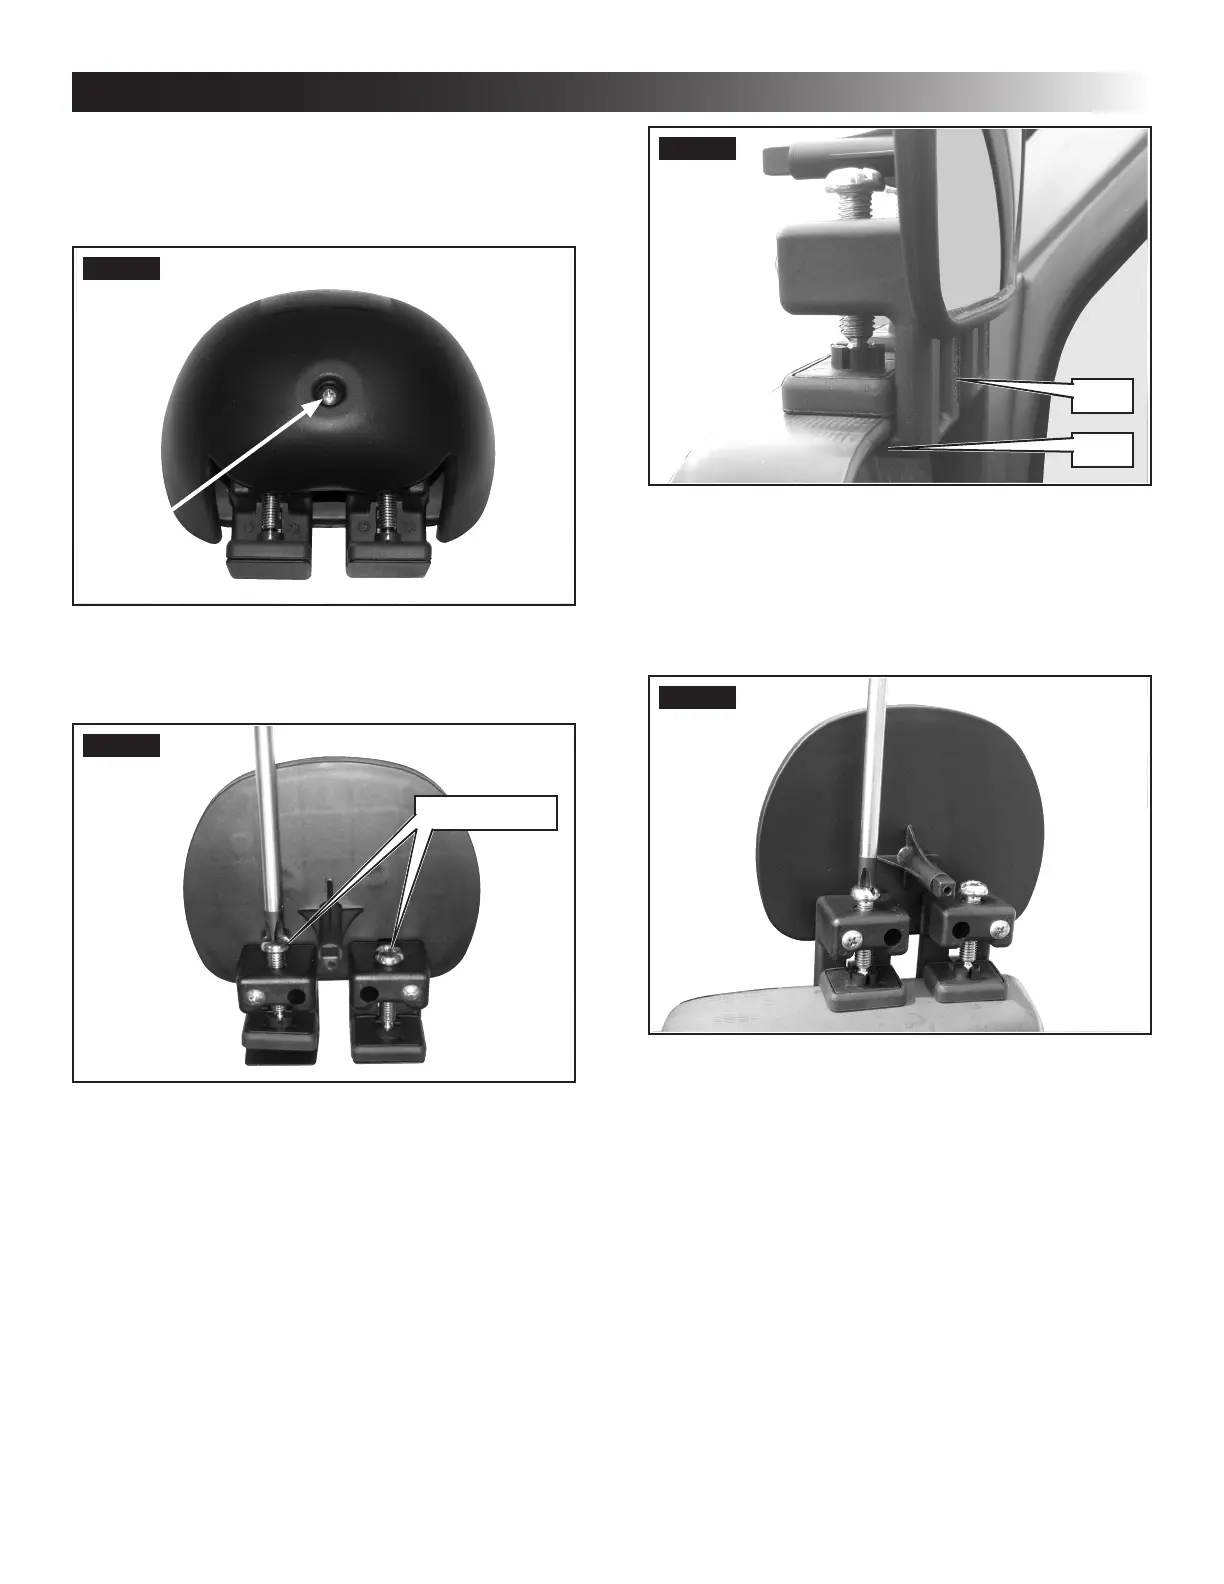
Describes attaching mirror clamps to the vehicle mirror and securing the housing.

C. Removal

Instructs on how to remove the blind spot mirror by reversing installation steps.

D. DM-1953 Aero Pad Replacement

Guides on replacing the aero pads, involving screw removal and pad attachment.

Related product manuals