22
Connecting AC output wires (optional for hardwire AC output)
Eaton 1250W / 1500W / 1800W Inverter Operation and Installation Guide IM SP180164 / Rev D www.eaton.com
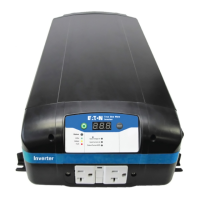
1. Feed the AC output cable into the knockout hole. Facing the front panel of the inverter this should be on the right, and
the label should read “AC OUTPUT.”
2. Using a screwdriver, loosen the terminal screws.
3. Fasten the ground (GND) wire first.
CAUTION
Reverse polarity - Connecting wires improperly (i.e. the neutral wire into the line termination) will cause the inverter to break
down and possibly cause permanent damage.
4. It is very important to not confuse the connections (i.e. putting the line conductor into the neutral termination). From the
AC cable, typical wire-color schemes are as follows:
• BARE COPPER or GREEN or GREEN/YELLOW insulation is GROUND wire
• BLACK insulation is the LINE wire
• WHITE insulation is the NEUTRAL wire
Confirm proper wires are in correct termination and tighten screws. Leave some wiring slack inside the compartment.
5. Connect the AC wires coming from the AC OUTPUT to the AC load panel.

 Loading...


