1.) (Alarm 1 'Buzzer') Indicator.
2.) (Alarm 1 'Radio') Indicator.
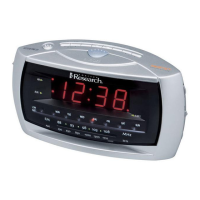
3.) AM Indicator.
4.) Time/Date Display.
5.) (Alarm 2 'Buzzer') Indicator.
6.) (Alarm 2 'Radio') Indicator.
7.) LOW BATT. Indicator.
8.) AC adapter (Back Cabinet).
9.) MONTH/DATE Setting /
Station Button.
10.) TIME Setting / Select Button.
11.) TIME ZONE / Button.
12.) SLEEP Button (Sleep To Music Timer).
STORE
BAND
MEMORY
Note: For buttons displayed with additional font or icons,
they have multiple function at different operation mode. Generally, the
functions displayed in font are for operation when Radio is ON.
INVERSED
INVERSED
IMP ORTAN T: T h e f i rst tim e yo u co n nec t yo u r n e w S m art S et cl o ck r adi o to the
AC outl et t he i nter nal comp uter wil l au toma tica lly set the time cor rect ly f or t he
Ea ste rn Ti me Zo ne, whic h i s the in itial de fault se tting . The di splay wi ll sc an for a
fe w s econd s a nd th en show the corr ect Day and Time in t he Easte rn zone. If you
live in the Eastern Time zone, there's nothing else to do. Your clock is set correctly
and running.
If y o u do no t l ive i n t he Ea s t e rn T ime z o n e you m u s t cha n g e the d e f ault z o n e
display to your own zone. You only do this one time and the Smart Set will remember
the new def ault zon e se ttin g an d wi ll a lway s re turn to that set ting aft er a pow er
interruption.
Th ere are 7 t ime z one s pro gra mmed int o you r S mart Set cl ock radi o a s fol low s :
ZONE 1 — Atlantic Time ZONE 2 — Eastern Time (Default Setting)
ZONE 3 — Central Time ZONE 4 — Mountain Time
ZONE 5 — Pacific Time ZONE 6 — Yukon Time
To c h an g e t h e d e fa u l t t i me z on e d i s p l a y,
depr e s s the T I M E ZON E b utton . The n u m b er
"2 " w ill a ppe ar on th e dis pla y ind ica ting tha t the
default zone is ZONE 2, Eastern Time.
.
ZONE 7 — Hawaiian Time
OWNER'S MANUAL
CKS1800
WARNING
TO PREVENT FIRE OR SHOCK HAZARD, DO NOT USE THIS PLUG WITH AN
EXTENSION CORD, RECEPTACLE OR OTHER OUTLET UNLESS THE BLADES
CAN BE FULLY INSERTED TO PREVENT BLADE EXPOSURE. TO PREVENT FIRE
OR SHOCK HAZARD, DO NOT EXPOSE THIS APPLIANCE TO RAIN OR MOISTURE.
1.) Re ad these instructi ons . Keep these instructions. Follow all instructions. Heed all warnings.
2.) Do no t use this apparatus near wat er.
3.) Clean on ly wit h dry cloth.
4.) Do no t block any ventilation openings. Install in ac cordance wit h the manufactu rer 's ins tru ctions.
5.) Do no t install near any heat so urc es suc h as radiators, heat registers, stoves, or othe r apparat us
(including amplifiers) that produce heat.
6.) Do no t defeat the safety purpose of the polarized or grounding-type plug. A polarized plug has two
blades with one wider than the ot her. A grounding type plu g has two blades and a third grounding
prong. The wide bla de or the third prong is provide d for your safety. If the provided plug do es not
fit into your outlet, consult an elec trician for rep lac ement of the obsolete outlet.
7.) Protect t he po we r cord fr om bein g wa lked on or p in ch ed pa rt ic ul ar ly at p lugs, c on venienc e
receptacles, and the poin t where they exit fr om the apparatu s.
8.) Only use attac hme nts / accessori es specif ied by the manufacturer.
9.) Unplug this ap par atus duri ng lig htn ing storm s or when unused for long periods of time.
10.) Refer all ser vic ing to qualifie d service personnel. Servicing is required when th e appa rat us has
been damaged in any way, such as power-su ppl y cord or plug is damaged, liquid has been spi lled
or objects have fal len into the apparatus, the apparatus has be en expose d to rain or moistur e,
does not operate no rmally, or has been dr opp ed.
11.) Use only with the ca rt, st and , trip od, brack et, or table specified by the manufact ure r, or
so ld with the apparatus. When a cart is used, us e caution when moving the
ca rt/ apparatus combination to av oid injur y from tip-over.
12.) The apparatus shall not be exposed to dripping or spla shing and that no
objects filled wi th liquid s, such as vases, sh all be placed on apparatus.
13.) Mains plug is used as di sconnect device an d it should remain readily
op era ble du rin g inte nded use. In order to disc onnect th e appa rat us fro m the
ma ins compl ete ly, the mains plug should be disco nne cted from the mains
so cke t outl et completel y.
14.) Battery shall no t be exposed to excessive heat such as sunshine, fire or the like.
CAUTION: Dan ger of explosion if battery is inco rre ctly repl aced. Rep lace only with the
same or eq uivalent type.
IMPORTANT SAFETY INSTRUCTIONS
1
1
2
2
PRÉCAUTION: Danger d’explosion si les piles sont remplacées de facon incorrect. Remplacer
les piles seu le ment par le méme ty pe d e pi le ou l’équival en t.
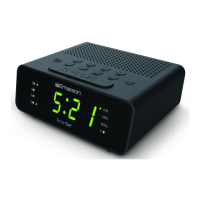
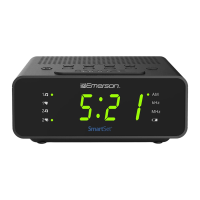
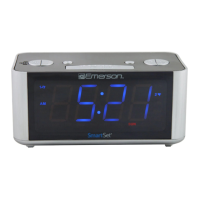
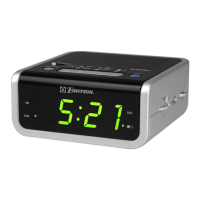
Th ank y ou fo r pur ch asing this Emer so n Sma rtSet Du al Ala rm Cl oc k R ad io.
Th is cl ock r ad io us es Em erson 's pa te nted Smart Se t Autom at ic Time S et tin g Syste m.
The f irst t ime y ou c o n nect t his c lock r adi o to y o u r A C ou t l et, a nd a f t ere v e ry p o wer
in terru pt ion, withi n sec on ds th e clo ck wi ll au to matic al ly se t i ts elf t o t h e c o rrect Ye a r,
Mon t h , Da t e, D a y, and Tim e . In a d dit i o n al l chan g es from Standa rd Ti me to Daylight
Saving Time, and b ac k to Standard Time , ar e made automati ca lly.
The re are dua l a l arm s t hat can be set an d us ed i nde pen den tly, and bot h o f t he a lar ms
ca n be progr am med f or ev eryda y ope ra tion, week da ys on ly, or weekends onl y.
There is a long lif e li thium battery i ns talled in this cl oc k radio when you bu y it .
This battery ca n ma intain the time a nd a larm settings f or 3 t o 5 years, or even lo ng er.
We hav e t ake n ev ery pre cau tio n to ma ke s ure th i s r adi o wa s i n pe rfe ct w ork ing or d er
when it left our fa ct ory. If you en co unter any probl em s with the set up or ope rat i on of t his
ite m, ple a se cal l th e E mer s on Con sum e r P rod uct s Co rp. ,
Customer Serv ic e Hotline, toll f re e, at 1 -800-898- 90 20.
IMPORTANT NOTES
FCC In formation
Th is equip men t has be en te ste d and fo und t o c omply wi th th e l imits fo r a C las s B
di git al de vic e, pu rsu ant t o P art 1 5 o f the FC C Rul es. T hes e lim its are des igned to
provide reasonable protection against harmful interference in a residen ti a l
installation. This equipment generates, uses, and can radiate radio frequency energy
and, if not installed and used in accordance with the instructions, may cause harmful
interference to radio communications. However, t h e r e i s n o g u a r a n t e e t h a t
interference will not occur in a particular installation. If this equipment does cause
ha rmf ul in ter feren ce to ra dio or t ele visio n r ecept ion , whi ch can b e d etermine d b y
turn i n g the e q u ipmen t o ff a n d on, t h e user i s encou r a g ed to t r y to c o r rect t h e
interference by one or more of the following measures:
• Reorient or relocate the receiving antenna.
Increase the separation between the equipment and receiver.
Conn ect the equi pmen t in to a n ou tlet on a ci rcui t di ffe r ent fro m th a t t o wh i ch
the receiver is connected.
Consult the dealer or an experienced radio/T V technician for help.
•
•
•
• Operate controls and switches as
described in the manual.
Befo r e turni n g on th e p ower, mak e
c e r t a i n t ha t t h e A C a d a p t e r i s
properly installed.
When moving the set, be sure to first
disconnect the AC adapter.
•
•
• Avoid installing this unit in places
ex pos ed to di rect sun light or clos e t o
heat radiating appliances such as
electric heaters, on top of other stereo
equi p m e nt th a t r a d iates t o o much
heat, places lacking ventilation or dusty
a r e a s , pl a c e s sub j e c t to c o n s t a n t
vibration and/or humid or moist areas.
Rem ove the radi o fr om t he c arto n an d re move all pac king mat eria l fr om t he
radio. We suggest that you save the packing material, if possible, in the unlikely
event that your radio ever needs to be returned for service. The original carton
an d p ackin g m ateri al is th e o nly s afe way to pack you r rad io to pr ote ct it fr om
damage in transit.
Re mov e any de scrip tiv e lab els or s tic kers on the f ron t or top of t he cabin et. Do
not remove any labels or stickers from the back or bottom of the cabinet.
No te the s eri al nu mbe r on the bott om of yo ur radio an d wri te this num ber i n t he
space provided on the War ra nt y pa ge of th is manual.
Pl ace your ra dio o n a leve l s urfac e s uch a s a tabl e, desk or shelf , c onven ien t
to an AC outle t, out o f d irect su nligh t, and a way from so urces of exce ss heat,
dirt, dust, moisture, humidity, or vibration.
Un win d the Li ne co rd conne cti ng th e AC ad apter an d ext end it t o i ts fu ll length.
Th e FM ant enna is built in to t his cord . I t mus t b e ful ly exten ded to p rov ide t he
best FM reception.
Thi s mo del is e quip ped with non -ski d ru bber 'fe et' to p reve nt t he p rodu ct f rom
mo vin g whe n y ou op era te th e c ontro ls. T hes e 'fe et' are mad e fro m n on-mi gra ting
ru bbe r mat eri al sp eci ally for mulat ed to av oid leav ing any mar ks or st ains on you r
furniture. However certain types of oil based furniture polishes, wood preservatives,
or clea ning spr ays may caus e th e ru bber 'fe et' to s ofte n, a nd l eave mar ks o r a
rubber residue on the furniture. To prevent any damage to your furniture we strongly
recommend that you purchase small self-adhesive felt pads, available at hardware
st ore s and ho me im pro vemen t c enter s e veryw her e, an d a pply the se pa ds to th e
bo tto m of the rubb er 'feet ' b efore yo u pla ce the p rod uct o n f ine w ood en fu rni ture.
Thi s ra dio is d esig ned to o pera te o n no rmal 120 V 60 Hz AC powe r on ly. D o no t
at tem pt to op erate th e rad io on an y o ther pow er so urc e. You c ould cau se damag e
to the radio that is not covered by your warranty.
•
•
•
•
•
PREPARATION FOR USE
Thi s de vice com plie s wi th P art 15 o f th e FC C Ru les. Ope rati on i s su bjec t to the
following two conditions:
(1) This device may not cause harmful interference, and
(2 ) Thi s d evice mu st ac cep t any in terfe ren ce re cei ved, inc ludin g i nterf ere nce
that may cause undesired operation.
Cha nges or modi fica tion s no t ex pres sly appr oved by the part y re spon sibl e fo r
compliance could void the user's authority to operate the equipment.
PREPARATION FOR USE
5 2
1
1
kHz
MHz
AM
2
2
13.) Speaker (Back Cabinet).
14.) ALARM 1 Setting / Button.
15.) ALARM 2 Setting / Button.
16.) WEEK MODE Button. (Weekdays l
Weekends l Everyday Alarm)
17.) SET - / Button.
18.) SET + / Button.
19.) RADIO ON/OFF Button.
20.) SNOOZE / SLEEP / DIMMER
Button.
21.) Back Up Battery Compartment
(Bottom Cabinet).
VOLUME +
VOLUME -
TUNE -
TUNE +
OFF
OPERATING INSTRUCTIONS
Hol d th e TI ME Z ONE butt on a nd t hen pres s ei ther the SET + ( up) or – (do wn)
buttons until your own time zone appears on the display, then release the buttons.
Th e c lock dis play wil l cha nge to t he corre ct time in the t ime zone yo u sel ect ed.
The clock will always return to the correct time in the zone you selected after every
power interruption.
If you move to a different time zone, simply change the default zone display to the
new zone and the SmartSet will remember that setting for you.
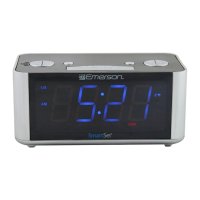
To see the correct date at any time, depress the MONTH/DATE button. The display
Changes from time to Month and Date (MM/DD).
For example, May 21st will appear as “ 5.21” .
When you release the MONTH/DATE button
the display returns to the correct time.
To see the correct year, depress the MONTH/DATE and TIME buttons together.
The display changes from time to year.
When you release the MONTH/DATE and
TIME buttons the display returns to the
correct time.
If t h e radio o r buzz e r is 'O f f ', t o v iew t h e corre c t 'Day o f Week ' , depre s s the
WEEK button. The display will change from Ti m e t o “ D a y o f W e e k ” . W h e n
you release the WEEK button the display returns to the correct Time.
If the radio or buzzer is 'On', to view the correct 'Day of Week', press the
RADIO ON/OFF Button first to stop the radio or buzzer,
then depress the WEEK button, display will change
from Time to 'Day of Week'. When you release the
WEEK button the display returns to the correct Time.
Note: From d1,d2 to d7 stand for from Monday ,Tue sd ay to Su nday separately.
All Daylight Saving and Leap Year adjustments are made automatical l y b y
the SmartSet internal computer as follows:
• Start of Daylight Saving Time:
At "2 : 0 0 A M " o n t h e 2nd S u n d a y i n Mar c h , t h e c l o c k w i l l a u t o m a t i c a l l y
advance to "3:00 AM".
• End of Daylight Saving Time:
At '3:00 AM' o n the 1 s t Sund a y in No v e m ber, t h e cloc k w ill a u t o matic a l l y
reset to "2:00 AM".
• Leap Year:
At " 1 2 : 0 0 M i d n i g h t " o n F e b r u a r y 2 8 t h , t h e c a l e n d a r d i s p l a y w i l l c h a n g e
to "2.29".
Some people like to set their clocks 5 to 10 minutes fast to make sure that they will
always be on time. Even though the SmartSet sets the time by itself, you still have
the option of adjusting the time manually if you wish.
To manually adjust the time display depress and hold the TIME button, and press
ei the r the SE T + o r - b utt ons t o a djust th e tim e d ispla y a head or back as desir ed.
Each press of the SET + or - buttons will change the display by one minute. If you
ho ld the S ET + or - b utton s t he di spl ay wi ll conti nue to c han ge. T he di spl ay wi ll
change slowly at first, one minute at a time. But if you continue holding the SET +or
- buttons the display will change rapidly.
NOTE: If you manually adjust the time, your new setting is entered into the
Smar t S e t m e m o ry. If t h e power i s inte r r u pted, t h e dis p l a y wil l r eturn t o your
new setting, not the original setting, when the power is restored.
Your Sma rtSe t clo c k ra dio has two sepa rate ala rms that can be set and used
in dep enden tly. You may use the alar ms to wa ke two p eop le at di ff ere nt ti mes , or
yo u m ay us e o ne al arm for wee kdays an d the ot her f or weeke nd wake up times .
The pro cedu re f or a djus ting the wak e up tim e is the sam e fo r bo th Ala rm 1 and
Alarm 2.
1.) Depr e s s and h o l d eit h e r the A L A RM 1 o r
ALAR M 2 sett i n g butt o n . The d i splay w i ll
change from the correct tim e to the Alarm 1
or Ala rm 2 wak e up time.
2.) Whi le h oldi ng t he A LARM 1or AL ARM 2 se ttin g bu tton , de pres s ei ther the
SET + or - button to move the display ahead or back to your desired wake up ti me .
3.) Wh en t he d es ir ed w ak e up t im e ap pe ar s on t he d is pl ay, release the SET + or -
buttons.
NOTE: Be sure that you have set the wake up time correctly by observing the AM
indicator. If t he AM indicator is 'On ' the wake up time is "AM". If the AM indicator is
'Off', the wake up time is "PM".
4.) When the desired wake up time (AM or PM) appears on the display, release t he
ALARM 1 or ALARM 2 setting buttons.
Your SmartSet cl ock radio allows you to select from among three different alarm
operation modes for either alarm. The alarm modes are:
• Everyday ― the alarm will turn on all 7 days.
• Weekdays only ― the alarm will only turn on Monday through Friday;
• Weekends only ― the alarm will only turn on Saturday and Sunday.
To check the Alarm Mode setting for Alarm1, depress the ALARM 1 setting button.
The display will show the Alarm 1 wake up time and the DAY OF WEEK indicators
will show you the alarm mode which is selected.
AM
20
11
17
12
18
10
13
9
14
19
15
16
21
7
3
2
1
6
5
Front Panel
Top Panel
1
3
5
7
2
4
6
8
4
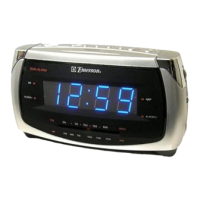
S m a r t S e t Clock R a d i o ,
With Auto-Time Setting System,
Dual Alarms,
PLL AM/FM Radio
(U.S. Patent No. 6,567,344)
Th is i s CL ASS I I a ppa ra tus wit h d oub le i nsul at ion, an d no pro te cti ve e art h pr ovi ded .
The Cautio n Marking lo cated at t he botto m enclosure of th e apparatus.
Visit our web site at www.emersonradio. com
®
®
®
®
Unpa cking And Set Up
Prot ect Your Furnit ure
Powe r Source
This radio should be connected to an AC outlet that
is always 'live'. Do not connect it to an outlet that is
co ntr olled by a wa ll switc h. When the powe r t o the
radio is interrupted, the built in lithium battery takes
over t o main t a i n the t i me an d a larm s e t tings . To
maximize the life of the lithium battery keep the radio
connected to a 'live' AC outlet at all times.
Sett ing The Ti me, The First Time
Date D isplay
Year Di splay
'Day of Week' Di splay
Dayl ight Saving and Lea p Year Adjustments
Manual Time Adjustments
Sele cting The Alar m Week M ode
®
®
®
®
®
®
Adju sting The Wake U p Time s
®
®
Th e li gh tn in g flas h with ar ro w-
hea d s ymbo l, w it hin a n e q ui -
lat era l t rian gle is i nt ende d t o
al ert th e use r t o t he pr es enc e
of uninsulated 'dangerous voltage'
wi thi n t he pr od uct 's en cl osu re
t h a t m a y b e o f s u f f i c i e n t
ma gni tu de to co nst it ut e a ri sk
of e le ctr i c sh oc k to p ers on s.
The e x cl am ati on poi n t wi th in
a n equ il a t e ral t ri a n gle i s i n-
t e nd e d t o a le r t t h e u s e r t o
t h e p r e se n c e o f im p o r ta n t
o p e r a ting a nd m a i ntena nc e
( s er v i c i ng ) in s t r uc t i o n s i n
t h e l i t er a t u re a cc o m p a ny -
i n g th e a p p li a nc e .
WARNING:TO REDUCE THE RISK
OF ELECTRIC SH OOK DO NOT
REMOVE COVER (OR BACK),NO
USER SERVICEABLE PARTS
INSIDE REFER SERVICING TO
QUALIFIED SERVICE PERSONNE L
AVIS : RIS Q UE D E C H OC
ELECTRIQUE-NE PAS OUVRIR