EasyManuals Logo
Home>Epilog Laser>Engraver>Fusion Pro 32

Epilog Laser Fusion Pro 32 Assembly Replacement

Epilog Laser Fusion Pro 32
22 pages
To Next Page IconTo Next Page
To Previous Page IconTo Previous Page
Page #3 background imageLoading...
Page #3 background image
PRO 32 & 48 X-AXIS ASSEMBLY
3
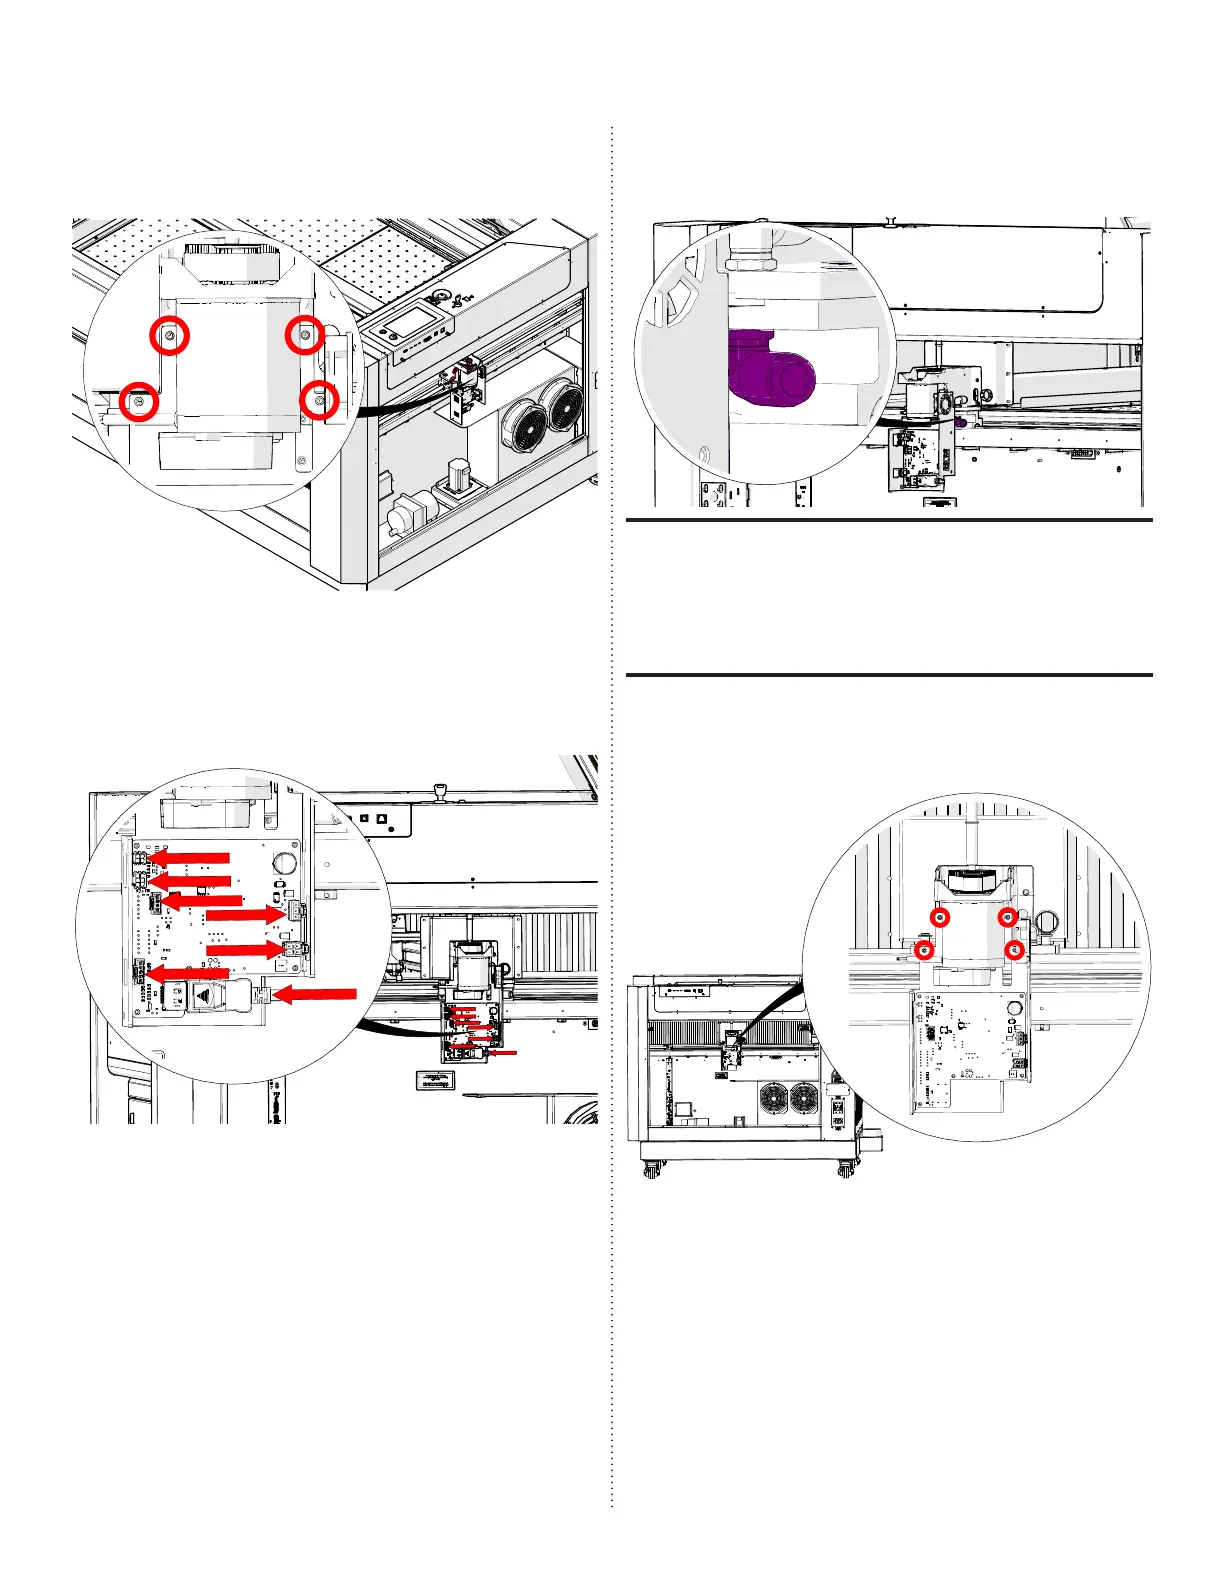
8. Loosen, but do not remove the four (4)
Phillips screws that hold the x-axis drive
board cover:
9. Remove the x-axis drive board cover.
10. Disconnect the seven (7) electrical
connectors from the drive board:
12. Disconnect the air tubing from the
elbow connector at right side of the
x-axis assembly:
The air tubing is held by a retaining fixture.
To remove the tubing, press the tubing into
the fixture. Then, while holding the orange
retaining ring tight to the fixture pull the air
tubing away from it.
13. Loosen and remove the four (4) 7/64” hex
screws that hold the x-axis drive board
housing:

Other manuals for Epilog Laser Fusion Pro 32

Questions and Answers:

Question and Answer IconNeed help?

Do you have a question about the Epilog Laser Fusion Pro 32 and is the answer not in the manual?

Epilog Laser Fusion Pro 32 Specifications

General IconGeneral
BrandEpilog Laser
ModelFusion Pro 32
CategoryEngraver
LanguageEnglish

Related product manuals